
In this tutorial, you will get to know how we can implement both React-Native Firebase Social Auth Twitter login in our app and how to integrate react-native-twitter-signin npm package for twitter login in our cool application, and then test it on Android.
Complete source code of this tutorial is available here — React-Native-twitter-login (android branch)
Twitter Login — What and why?
There are several reasons why you should use a Twitter login in your app
- Ease of use — When a new user uses your app, only two buttons clicks are required to login using Twitter. In other scenario, user will have to type in an email/password and login
- No “forgot password” — When your app uses Twitter login, the user does not have to worry about forgetting password for your app’s login
- No “verify email” — If you use a custom-email authentication of your own, you will have to verify the email if it is a valid one or not. Twitter login will always have a valid email/phone number associated.
- Single solution — Twitter login can allow your users to use single login credentials across multiple devices
- Twitter integration — If your app uses Twitter authentication, you can use Twitter APIs inside your app as well. This can include fetching user tweets etc.
- Trust — Nowadays, people generally trust social logins more over custom email logins. Social logins follows standard privacy protocols and hence are more reliable for information sharing.
Authentication in React Native
React Native has been around us for around 4 years and has been very popular among developers for its ease of usage over Swift / Java. Also, you get to keep single source code for both Android and iOS app. What more can a developer ask for!
React Native 0.60.5 is the latest version (at the time of writing this post), and is much more reliable and robust than previous versions. It also includes breaking changes related to AndroidX, but don’t worry we’ll create an Android test app as well.
There are several ways of Authentication in React Native Apps
- Social logins — Social logins are a popular and easy way of authentication in mobile apps. You must have seen Google, Facebook, Instagram logins in almost all the modern apps. Social logins are easy to use and more reliable for quick integrations.
- Create your own back-end — You can create your own back-end in Node.js, Go, Django or Ruby-on-rails, and connect your app authentication to your own back-end. This method is favored by developers who need full control over the user authentication. But this method is the most time taking one as well.
- Back-end as a Service (BaaS) — You can use pre-built BaaS platforms which allows easy integration of authentication in your apps. Basically, these platforms provide you a ready-made back-end, so you don’t have to make one on your own. Firebase, Parse, Back4App are some BaaS platforms.
Firebase is the most popular among these for mobile apps, which we’ll study in the next section
Firebase
Firebase is a Backend-as-a-Service (BaaS) platform. It started as a YC11 startup and grew up into a next-generation app-development platform on Google Cloud Platform. It is getting popular by the day because of the ease of integration and a variety of functionalities available on it.
A lot of quick integrations are available with Firebase. Some of these are listed below:
- Real-time database
- Email Authentication
- Social logins
- In-app messages
- Push notifications
- Analytics
- Crashlytics
- Remote config
Firebase is quickly growing to become the most popular mobile app back-end platform.
Firebase Authentication Options
Firebase not only provides ready-made email authentication but also provides authentication using variety of social logins. You can see the authentication options available with Firebase

We will use Firebase to store user profile information once the Twitter login is done. This is the preferred method, as it is reliable for both apps and PWA.
Steps for Twitter authentication
We will follow these step-by-step instructions to create our React Native app with Twitter authentication
Step 1: Create a Firebase Project and Add android platform
Step 2: Enable Twitter Sign-In in Firebase project
Step 3: Create a Basic React Native app
Step 4: Install the react-native-twitter-signin package for Twitter Login
Step 5: Implement Twitter auth functions in RN app
Step 6: Test your app on Android
Step 7: Use Firebase to store user info and handle Auth
So let’s jump right in
Step 0: Create a SHA-1 Signature
This is an important step where many developers commit mistake. That’s why Step 0
This is a way for the app and Firebase to recognize the system from which the app was developed. It is generated based on the system and yourkeystorefile.
Generate the key using the following steps : —
Method 1: —
step 1:-- OpenAndroid StudioOpen Your Project
step 2:--
step 3:-- Click on Gradle (From Right Side Panel, you will see Gradle Bar)
step 4:-- Click on Refresh (Click on Refresh from Gradle Bar , you will see List Gradle scripts of your Project)
step 5:-- Click on Your Project (Your Project Name form List)
step 6:-- Click on Tasks/Android
step 7:-- Double Click onsigningReport(You will getSHA1andMD5in Run Bar).
Now you are all done , check your keys in results.
Method 2: —
Generate the key using the following command
$ keytool -exportcert -keystore <<keystore file location>> -list -v
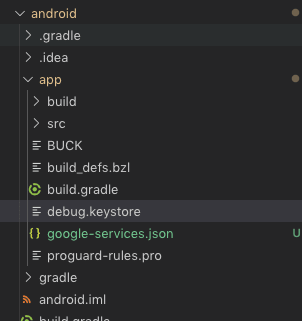
Important: This is where many people commit a mistake. The keystore file in the above command is NOT the default keystore file of your system. React Native automatically generates a debug.keystore for your Android project, which resides in the Android project folder.
Step 1: Create a Firebase Project
For authentication, we need a back-end. For this tutorial, Firebase is our back-end, so we need to configure a few things in Firebase. First of all, we’ll create a new Firebase project and new app inside it.
1.1 If you don’t have an existing Firebase Project
If you already have a Firebase project, skip to step 1.2. Otherwise, create a new Firebase project by going to Firebase Console. Give your project a name and that’s it!

1.2 Create and attach new app to the project
Now that the project is created, create a new Android app in the project dashboard.

Add the SHA1 key you generated in Step 0 and add it in Debug signing certificate SHA-1 field

Just mention the correct package name of your app in the Android package nameinput. For me, it is com.twitterlogin. Give it a nickname to remember.
Next step, download the google-services.json file and put it in the android/appfolder of your project. You can skip the rest of the steps for now. Your app is created now, and you should see it in the dashboard.
Step 2: Enable Twitter Login in Firebase
Now that your app is connected to Firebase project, we need to go into our Firebase console and enable Twitter authentication for our app.
Once you’re inside the app’s dashboard, you’re going to go into
Authentication → Sign-In Method → Twitter
and click the Enable toggle.

Give a name to for your Auth consent screen and save your web client Id as well. This will be used to integrate the React Native app with Firebase.
Step 3: Create a basic React Native app
First, make sure you have all pre-requisites to create a react-native app as per the official documentation.
At the time of this post, I have React-Native version 0.60.5
Create a blank react-native app (Replace myApp with your own name)
$ react-native init RNTwitterLogin
This will create a basic React-native app which you can run in a device or simulator. (let’s run Android)
Let’s run the app in Android using (I’m using a real device)
$ react-native run-android
You’ll see the default start screen
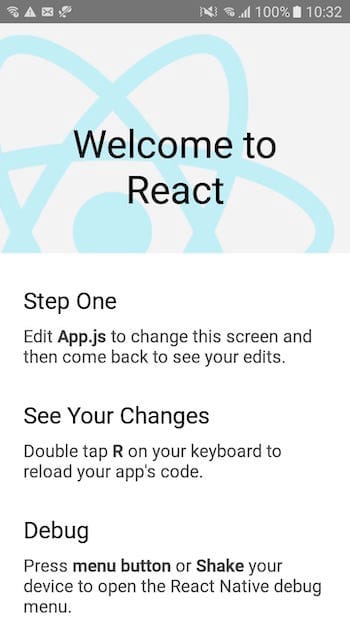
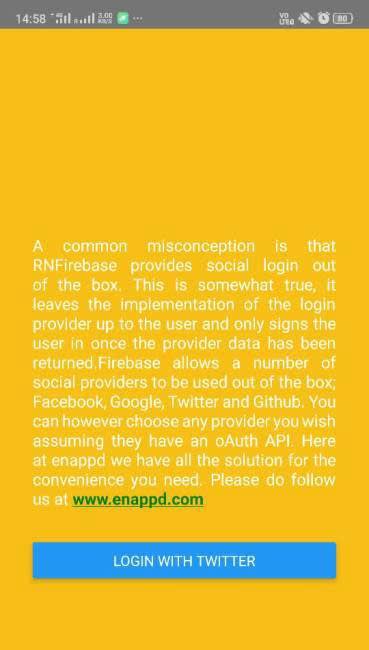
Change the UI of this front page by changing App.js and the page will look like this.
Code View: —
Result: —
Step 4: Install the package for Twitter Login using react-native-twitter-signin package
To enable Twitter Login, we’ll install a package named react-native-twitter-signin. This is a widely used package for Twitter Login, and also very reliable.
4.1 Install package
Install the package using
$ yarn add react-native-twitter-signin
Linking the package is not required above react-native version 0.60.
4.2 Make sure you have latest SDK and other android packages
You should always try to stay updated with latest Android SDK and other packages. At the time of this post, my Android SDK is 9.0 (Pie) and here’s a list of my other packages

4.3 Add google-services.json file to project
If you haven’t done it yet, download the google-services.json file from your Firebase project and put it in the android/appfolder of your RN project.
Now let's see some tricky parts for this package —
There is an unknown error which has very less solution on any platform like StackOverflow or others but I found that solution after too many hecks,
First of all, you need to install the below package to get it in work
npm install --save GoldenOwlAsia/react-native-twitter-signin#master
instead ofyarn add react-native-twitter-signin
Now you are all set to install packages
4.3.1: —
Go to Twitter Apps to create your app so that you can obtain API key and secret, note:
- Remember to set a Callback Url, whatever will work
- By default, Twitter won’t allow you to grab user’s email, so you have to apply for permission for your app to retrieve user’s email
- Here is how callbacks would look like:

It may take up to 72 hrs to verify your developer's account, so stay calm and code rest!
4.4 Update Android configuration files
- Update
android/build.gradlewith latest versions. My configuration is
buildscript {
ext {
buildToolsVersion = "28.0.3"
minSdkVersion = 16
compileSdkVersion = 28
targetSdkVersion = 28
supportLibVersion = "28.0.0"
}
...
dependencies {
classpath 'com.android.tools.build:gradle:3.4.1' // <--- use this version or newer
classpath 'com.google.gms:google-services:4.3.0' // <--- use this version or newer
}
...
allprojects {
repositories {
mavenLocal()
google() // <--- make sure this is included
jcenter()
maven {
// All of React Native (JS, Obj-C sources, Android binaries) is installed from npm
url "$rootDir/../node_modules/react-native/android"
}
}
}
- Update
android/app/build.gradledependencies. My configuration looks like this
...
dependencies {
implementation fileTree(dir: "libs", include: ["*.jar"])
implementation "com.android.support:appcompat-v7:23.0.1"
implementation "com.facebook.react:react-native:+"
implementation project(':react-native-twitter-signin')/ <--- add this line
}
apply plugin: 'com.google.gms.google-services' // <--- this should be the last line
Now let’s setup react-native-firebase authentication in your application —
Connect Firebase to your React Native app using react-native-firebase
react-native-firebase is a popular package to connect React Native apps to Firebase various functionalities.
React-native-firebase also recommends using react-native-twitter-signinfor Twitter authentication, which we just used above. The react-native-twitter-signin the library allows us to login (using twitter) which returns an optional accessToken and authToken. Once we have the two tokens we need to create a credential using TwitterAuthProvider#credential and then sign in with that credential using auth#signInWithCredential
- Install
react-native-firebasepackage using
$ yarn add react-native-firebase
This installs the package, but it still needs to be connected to your android app properly
Modify Android config files
If you have done the previous steps (in Step 4.4) correctly, then you only need to add these things further
- Add following Firebase modules in dependencies in
android/app/build.gradle
dependencies {
.....
implementation project(':react-native-firebase')
implementation "com.google.android.gms:play-services-base:17.1.0"
implementation "com.google.firebase:firebase-core:17.0.9"
implementation 'com.google.firebase:firebase-auth:19.0.0'
....
}
Troubleshooting — If you face issues in the above settings, visit the documentation of react-native-firebase to get detailed steps for your RN versions.
- For older versions of React Native, in
MainApplication.javayou should have the following code. For my version 0.60.5, there is a need to editMainApplication.java
import com.goldenowl.twittersignin.TwitterSigninPackage; // <---public class MainApplication extends Application implements ReactApplication {
......
@Override
protected List<ReactPackage> getPackages() {
return Arrays.<ReactPackage>asList(
packages.add(new RNFirebaseAuthPackage());// <-- this needs to be in the list
)
);
}
......}
Wow, you have done well. Now, you are all set to take the taste of your own cooked food!
Code for Twitter Signin : —
Note, firebase.auth().signInWithCredential is the method used to store user credentials in the back-end.
Here,
TwitterKeys.TWITTER_CONSUMER_KEY = api key of the application TdewitterKeys.TWITTER_CONSUMER_SECRET = secret key of the app
You can get both keys after creating the twitter developer’s account and registering the app on that. To create a developers account go here.
When you will click on the SignIn button then you will be redirected to some pages for authentication or you may say confirmation of your valid account as follow:
Step 1 Clicked: —
Step 2 Enter credentials : —

Step 3 Authorize app : —

Now you are in…

Now, run the app again using CLI or Android Studio, log in as usual and you’ll see that a user pops up in Firebase Users list

In the whole setup, you may encounter a problem related to access token from react-native firebase so for that solution you would need to write twittersdk:// as callback URL in the in your attached twitter app.
Complete source code of this tutorial is available here — React-Native-twitter-login (android branch)
You have successfully
- Logged in a user using Twitter Login in React Native
- Attached the authentication to Firebase to store user credentials
🎉 🎉 🎉 🎉 🎉 🎉 🎉
Firebase, further
You can now go ahead and attach more Firebase functions like logout, silent login, user info, etc. since you have user credentials in Firebase.
Note, not all userInfo that we receive after Twitter Login gets stored in Firebase by default. If you want all the information to be stored, then you should use the FireStore database to store it, and retrieve it when required.
For more details on functions like
- CRUD operations in Firestore
- Image Upload
- Phone authentication
check out this blog.

Conclusion
In this blog, you learned how to implement Twitter Login in React Native apps for Android. You also learned how to attach this authentication to Firebase for better handling using back-end. We also built the app in Android and ran on a device.
Complete source code of this tutorial is available here — React-Native-twitter-login (android branch)
Next Steps
Now that you have learned about setting up React-Native Firebase social auth Twitter Login in React Native apps, here are some other topics you can look into
- Firebase — Integrate Firebase | Analytics | Push notifications | Firebase CRUD
- How To in React Native — Geolocation | Life cycle hooks | Image Picker | Redux implementation | Make API calls | Navigation | Translation | Barcode & QR code scan | Send & Read SMS | Google Vision
- Payments — Apple Pay | Stripe payments
- Authentication — Google Login| Facebook login | Phone Auth | Twitter login | Anonymous Login
- Create Instagram / Whatsapp Story Feature in React Native
- React Native life cycle hooks | Implement Redux | Async actions with Redux
- Create Awesome Apps in React Native using Full App
If you need a base to start your next React Native app, you can make your next awesome app using React Native Full App


Top comments (0)