
Geolocation, GPS are not fancy words for anyone today. Every smart phone user knows they can use GPS to know their location in the world (in Google/Apple Map). Famous apps like Uber, Lyft make use of location data to book rides, etc. Apps for food delivery use GPS data for live tracking the delivery person.
There are several interesting features and plugins available in Ionic 4 to get the best out of a user’s location. These include near-field as well as GPS based location features. In this blog, we explore these features in depth, and how to use them in our own Ionic app. Let’s dive right in

1. Geolocation
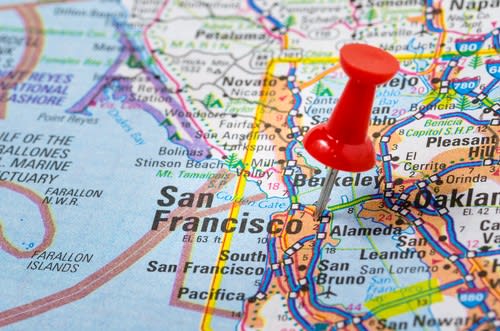
The most famous and familiar location feature — Geolocation is the ability to track a device’s whereabouts using GPS, cell phone towers, WiFi access points or a combination of these. Since devices are used by individuals, geolocation uses positioning systems to track an individual’s whereabouts down to latitude and longitude coordinates, or more practically, a physical address. Both mobile and desktop devices can use geolocation.
Geolocation can be used to determine time zone and exact positioning coordinates, such as for tracking wildlife or cargo shipments.
Some famous apps using Geolocation are
- Uber / Lyft — Cab booking
- Google Maps (of course) — Map services
- Swiggy / Zomato — Food delivery
- Fitbit — Fitness app
- Instagram / Facebook — For tagging photos
Let’s see briefly how we can use Geolocation in our Ionic 4 app. To install the plugin use
ionic cordova plugin add cordova-plugin-geolocation
npm install @ionic-native/geolocation
For all plugins, the step to import the plugin in a component will remain common (just change the plugin name)
import { Geolocation } from '@ionic-native/geolocation/ngx';

constructor(private geolocation: Geolocation) {}
Once the plugin is imported, (and make sure the deviceReady has fired), you can find current location using
this.geolocation.getCurrentPosition().then((resp) => {
 // resp.coords.latitude
 // resp.coords.longitude
}).catch((error) => {
  console.log('Error getting location', error);
});
If you want a continuous tracking of your location, use this instead
let watch = this.geolocation.watchPosition();
watch.subscribe((data) => {
 // data can be a set of coordinates, or an error (if an error occurred).
 // data.coords.latitude
 // data.coords.longitude
});
These are the very basics of Geolocation, but you can do a lot more using basic free and open-source APIs. Once you have your location, you can
- Find out the weather in your location using open weather API from http://openweathermap.org/
- Locate yourself on map by using Google Map in your app, and setting a marker on your location
- Find nearby restaurants by using Google Map API
- See pictures of things around you using
FlickrAPI
https://api.flickr.com/services/rest/?method=flickr.photos.search&api_key=Your_API_Key&lat="
    + latitude + "&lon=" + longitude + "&format=json&jsoncallback=?
For more information on the plugin, you can visit https://github.com/apache/cordova-plugin-geolocation
2. Geo-fence

A geo-fence is a virtual perimeter for a real-world geographic area. Geofencing combines awareness of the user’s current location with awareness of the user’s proximity to locations that may be of interest. Imagine an area drawn on the map, and you are supposed to stay inside (or outside) this area. This is a perfect use case for Geofencing.
To mark a location of interest, you specify its latitude and longitude. To adjust the proximity for the location, you add a radius. The latitude, longitude, and radius define a geofence, creating a circular area, or fence, around the location of interest.
Some good use cases for geofencing are
- Child location services, can notify parents if a child leaves a designated area.
- Prison areas or highly sensitive government buildings can be Geofenced and every person entering / working in the area can be tracked
- A quarantined area can be marked as hazard on map, and an app can alert you if you are about to enter that area
So let’s see briefly how we can use Geofencing in our Ionic 4 app. To install the plugin use
ionic cordova plugin add cordova-plugin-geofence
npm install @ionic-native/geofence
For all plugins, the step to import the plugin in a component will remain common (just change the plugin name)
import { Geofence } from '@ionic-native/geofence/ngx';


constructor(private geofence: Geofence) {
  // initialize the plugin
  geofence.initialize().then(
    // resolved promise does not return a value
    () => console.log('Geofence Plugin Ready'),
    (err) => console.log(err)
  )
}
Once the plugin is imported and initialized, you can add a Geofence using
private addGeofence() {
  //options describing geofence
  let fence = {
    id: '69ca1b88-6fbe-4e80-a4d4-ff4d3748acdb', //any unique ID
    latitude:       37.285951, //center of geofence radius
    longitude:      -121.936650,
    radius:         100, //radius to edge of geofence in meters
    transitionType: 3, //see 'Transition Types' below
    notification: { //notification settings
        id:             1, //any unique ID
        title:          'You crossed a fence', //notification title
        text:           'You just arrived to Bangalore city center.', //notification body
        openAppOnClick: true //open app when notification is tapped
    }
  }

  this.geofence.addOrUpdate(fence).then(
     () => console.log('Geofence added'),
     (err) => console.log('Geofence failed to add')
   );
}
transitionType is used to define which transition of user should trigger an alert. It supports three values
- 1: Enter
- 2: Leave
- 3: Both
You can override default transition behavior by overriding this.geofence.onTransitionReceived() function.
this.geofence.remove() will remove a geofence with specific Id, and hence stops tracking as well.
Javascript background execution
This is a known limitation. When in background, your app may/will be suspended to not use system resources. Therefore, any javascript code won’t run, only background services can run in the background. Local notification when user crosses a geofence region will still work, but any custom javascript code won’t. If you want to perform a custom action on geofence crossing, try to write it in native code.
3. Estimote Beacons
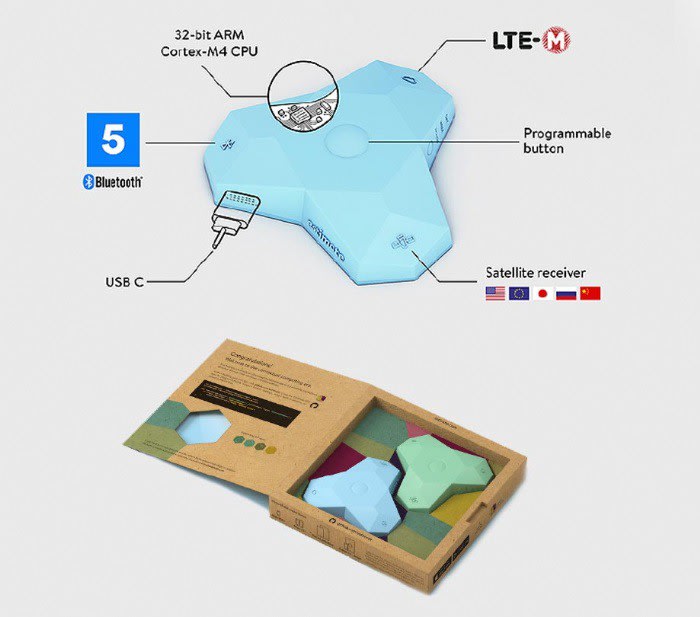
Things get a little nerdy here. Estimote beacons are near field sensors which sense nearby devices. These wireless sensors (beacons) communicate with apps on a mobile device to trigger contextually relevant actions, from personalized notifications and frictionless payments to indoor navigation and automations.
Imagine walking around in a shopping mall. You might not want to go inside every shop and explore the things on display, or what offers are available etc. A beacon from each shop, or from a central location can send notifications to your app and tell you what offers are available so you can pick the right one.
Let’s quickly see how we can use Estimote Beacons in our Ionic 4 app. First of all, to use this feature, you need the beacons. These are available on Estimote website. To install the plugin use
ionic cordova plugin add cordova-plugin-estimote
npm install @ionic-native/estimote-beacons
Import the plugin in a component with
import { EstimoteBeacons } from '@ionic-native/estimote-beacons/ngx';

constructor(private eb: EstimoteBeacons) { }
// Request permission to use location on iOS
this.eb.requestAlwaysAuthorization();Apps detect and interact with beacons in two ways:
- Monitoring: actions triggered on entering/exiting region’s range; works no matter whether the app is running, suspended, or killed (if the app’s not running when an enter/exit even comes, iOS will launch it into the background for a few seconds to handle the event)

Once the plugin is imported and initialized, you can use monitoring functions
// Start ranging
this.eb.startMonitoringForRegion(region)
  .then(
    () => console.log('received the request to monitoring'),
    error => console.error('failed to begin monitoring: ', error)
  );
// Stop ranging
this.eb.stopMonitoringForRegion()
- Ranging: actions triggered based on proximity to a beacon; works only when the app is running(e.g., it’s displayed on screen, or running in the background in response to a monitoring event, etc.)

Once the plugin is imported and initialized, you can use ranging functions
// Start ranging
this.eb.startRangingBeaconsInRegion(region)
  .then(
    () => console.log('received the request to monitoring'),
    error => console.error('failed to begin monitoring: ', error)
  );
// Stop ranging
this.eb.stopRangingBeaconsInRegion()
It’s important to remember that Monitoring allows you to scan for beacon regions, while Ranging is for interacting with individual beacons.
There is a lot of trial and error with this plugin. In absence of a real beacon, you can use a beacon emulator app, which acts like a demo beacon.
4. iBeacon

This is very much similar to Estimote beacon technology. iBeacon is the name for Apple’s technology standard, which allows Mobile Apps (running on both iOS and Android devices) to listen for signals from beacons in the physical world and react accordingly. In essence, iBeacon technology allows Mobile Apps to understand their position on a micro-local scale, and deliver hyper-contextual content to users based on location. The underlying communication technology is Bluetooth Low Energy (BLE).
BLE communication consists primarily of “Advertisements”, or small packets of data, broadcast at a regular interval by Beacons or other BLE enabled devices via radio waves. These packets are meant to be collected by devices like smartphones, where they can be used for a variety of smartphone applications to trigger things like push messages, app actions, and prompts.
Standard BLE has a broadcast range of up to 100 meters, which make Beacons ideal for indoor location tracking and awareness.
To install the plugin use
ionic cordova plugin add cordova-plugin-ibeacon
npm install @ionic-native/ibeacon
Import the plugin in a component with and start using
import { IBeacon } from '@ionic-native/ibeacon/ngx';

constructor(private ibeacon: IBeacon) { }
// Request permission to use location on iOS
this.ibeacon.requestAlwaysAuthorization();// create a new delegate and register it with the native layer
let delegate = this.ibeacon.Delegate();
// Subscribe to some of the delegate's event handlers
delegate.didRangeBeaconsInRegion()
.subscribe(
data => console.log('didRangeBeaconsInRegion: ', data),
error => console.error()
);
delegate.didStartMonitoringForRegion()
.subscribe(
data => console.log('didStartMonitoringForRegion: ', data),
error => console.error()
);
delegate.didEnterRegion()
.subscribe(
data => {
console.log('didEnterRegion: ', data);
}
);You can create a beacon region with a name and UUID
let beaconRegion = this.ibeacon.BeaconRegion('deskBeacon','F7826DA6-ASDF-ASDF-8024-BC5B71E0893E');

this.ibeacon.startMonitoringForRegion(beaconRegion)
  .then(
    () => console.log('Native layer received the request to monitoring'),
    error => console.error('Native layer failed to begin monitoring: ', error)
  );
You can check more details of the plugin here — https://github.com/petermetz/cordova-plugin-ibeacon
5. NFC

Near-field communication (NFC) is a set of communication protocols that enable two electronic devices, one of which is usually a portable device such as a smartphone, to establish communication by bringing them within 4 cm (1.6 in) of each other.
NFC devices are used in contactless payment systems, similar to those used in credit cards and electronic ticket smartcards and allow mobile payment to replace or supplement these systems.
NFC can also be used for social networking, for sharing contacts, photos, videos or files. NFC-enabled devices can act as electronic identity documents and keycards. NFC transfers are usually faster and easier to perform than most other transfer methods.
To install the plugin use
ionic cordova plugin add phonegap-nfc
npm install @ionic-native/nfc
Import the plugin in a component with
import { NFC, Ndef } from '@ionic-native/nfc/ngx';

constructor(private nfc: NFC, private ndef: Ndef) { }
Then start using the NFC plugin with a listener
this.nfc.addNdefListener(() => {
  console.log('successfully attached ndef listener');
}, (err) => {
  console.log('error attaching ndef listener', err);
}).subscribe((event) => {
  console.log('received ndef message. the tag contains: ', event.tag);
  console.log('decoded tag id', this.nfc.bytesToHexString(event.tag.id));

  let message = this.ndef.textRecord('Hello world');
  this.nfc.share([message]).then(onSuccess).catch(onError);
});
removeNdefListener removes the previously started listener.
addTagDiscoveredListener registers an event listener for tags matching any tag type.
removeTagDiscoveredListener removes the previously registered event listener added via nfc.addTagDiscoveredListener.
For details on the functions and issues, you can visit https://github.com/chariotsolutions/phonegap-nfc#nfcaddndeflistener
6. Native Geocoder

Geocoding is the process of transforming a street address or other description of a location into a (latitude, longitude) coordinate.
Reverse geocoding is the process of transforming a (latitude, longitude) coordinate into a (partial) address. The amount of detail in a reverse geocoded location description may vary, for example one might contain the full street address of the closest building, while another might contain only a city name and postal code.
To install the plugin use
ionic cordova plugin add cordova-plugin-nativegeocoder
npm install @ionic-native/native-geocoder
Import the plugin in a component with
import { NativeGeocoder, NativeGeocoderReverseResult, NativeGeocoderForwardResult, NativeGeocoderOptions } from '@ionic-native/native-geocoder/ngx';

constructor(private nativeGeocoder: NativeGeocoder) { }
Then start using the geocoding plugin with
let options: NativeGeocoderOptions = {
    useLocale: true,
    maxResults: 5
};

this.nativeGeocoder.reverseGeocode(52.5072095, 13.1452818, options)
  .then((result: NativeGeocoderReverseResult[]) => console.log(JSON.stringify(result[0])))
  .catch((error: any) => console.log(error));

this.nativeGeocoder.forwardGeocode('Berlin', options)
  .then((coordinates: NativeGeocoderForwardResult[]) => console.log('The coordinates are latitude=' + coordinates[0].latitude + ' and longitude=' + coordinates[0].longitude))
  .catch((error: any) => console.log(error));
7. Location Accuracy
This plugin allows an app to request a specific accuracy for Location Services. If the requested accuracy is higher than the current Location Mode setting of the device, the user is asked to confirm the change with a Yes/No dialog.
For example, if a navigation app that requires GPS, the plugin is able to switch on Location Services or change the Location Mode from low accuracy to high accuracy, without the user needing to leave the app to do this manually on the Location Settings page.
More accuracy, less errors. No more turning on wrong turns

IMPORTANT: This plugin depends on the Google Play Services library, so you must install the “Google Repository” package under the “Extras” section in Android SDK Manager. Otherwise the build will fail.
To install the plugin use
ionic cordova plugin add cordova-plugin-request-location-accuracy
npm install @ionic-native/location-accuracy
Import the plugin in a component with
import { LocationAccuracy } from '@ionic-native/location-accuracy/ngx';

constructor(private locationAccuracy: LocationAccuracy) { }
Then start using the plugin
this.locationAccuracy.canRequest().then((canRequest: boolean) => {

  if(canRequest) {
    // the accuracy option will be ignored by iOS
    this.locationAccuracy.request(this.locationAccuracy.REQUEST_PRIORITY_HIGH_ACCURACY).then(
      () => console.log('Request successful'),
      error => console.log('Error requesting location permissions', error)
    );
  }

});
Conclusion
In this post, we learnt about several different plugins that can be used for location related features in our apps. Some of these are far-field (GPS), while some are near-field sensor plugins. You can use these plugins for a variety of purposes from tracking your location, to sending relevant data to nearby customers and requesting accurate location.
Stay tuned for more Ionic 4 blogs !
FOUND THIS POST INTERESTING ?
Also check out our other blog posts related to Firebase in Ionic 4, Geolocation in Ionic 4, QR Code and scanners in Ionic 4 and Payment gateways in Ionic 4
Also check out this interesting post on How to create games in Ionic 4 with Phaser
NEED FREE IONIC 4 STARTERS?
You can also find free Ionic 4 starters on our website enappd.com
You can also make your next awesome app using Ionic 4 Full App
References
This blog was originally published on Enappd.


Top comments (0)