
Razorpay is a payments company that provides payment solutions to online merchants in India. Razorpay was founded in 2014 in our own city of Jaipur 😃. They were part of the winter batch of Y Combinator’s startup program in 2015. Razorpay allows online businesses to accept, process and disburse digital payments through several payment modes like debit cards, credit cards, net banking, UPI and prepaid digital wallets. Razorpay payment solutions can be integrated by both web and mobile applications.
Razorpay currently works only for businesses in India, but that doesn’t make it small. Functionality and developer friendliness-wise Razorpay can be called Stripe of India.
Do not confusion India-only business with single currency payments. Razorpay accepts payments in almost all currencies.
What is Ionic 4?
You probably already know about Ionic, but I’m putting it here just for the sake of beginners. Ionic is a complete open-source SDK for hybrid mobile app development created by Max Lynch, Ben Sperry and Adam Bradley of Drifty Co. in 2013. Ionic provides tools and services for developing hybrid mobile apps using Web technologies like CSS, HTML5, and Sass. Apps can be built with these Web technologies and then distributed through native app stores to be installed on devices by leveraging Cordova.
So, in other words — If you create Native apps in Android, you code in Java. If you create Native apps in iOS, you code in Obj-C or Swift. Both of these are powerful but complex languages. With Cordova (and Ionic) you can write a single piece of code for your app that can run on both iOS and Android (and windows!), that too with the simplicity of HTML, CSS, and JS.
Ionic 4 and Payment Gateways
Ionic 4 can create a wide variety of apps, and hence a wide variety of payment gateways can be implemented in Ionic 4 apps. The popular ones are PayPal, Stripe, Razorpay, Braintree, in-app purchase etc. For more details on payment gateways, you can read my overview blog on Payment Gateway Solutions in Ionic 4 or detailed blogs on PayPal and Stripe.
Razorpay can be integrated in websites as well as mobile apps. In this blog we’ll learn how to integrate Razorpay payment gateway in Ionic 4 apps and Ionic 4 PWA.

Razorpay Integration Methods
Razorpay follows a standard payment flow, similar to Stripe

Before you start integrating with our products, you might want to consider the available integration paths:
Most popular method in websites. This is similar to PayPal Payment button which pops up an auto-generated form and takes care of validations etc itself.

2. Integrate with mobile apps — Using standard SDKs
3. Integrate with Razorpay APIs
This needs to be enabled in your Razorpay account specifically. This is essentially server-to-server payment communication.
4. Integrate with the Plugins — Various plugins are available for Woocommerce, Magento, Wix etc.
Integrating Razorpay in Ionic 4 apps is very simple and straightforward. It makes use of razorpay-cordova-plugin, and it works in both Apps and PWA.
Let’s start step-by-step
Complete source code of this tutorial is available in the Ionic4-razorpay Github repository.
Prerequisites
- Create an Ionic 4 app for Razorpay integration
- Razorpay Developer account for API keys
Create a basic Ionic 4 app
Creating a basic Ionic 4 app is very easy. Assuming you have all basic requirements installed in your system, run
$ ionic start MyApp sidemenu
This creates your app with titleMyApp and sidemenu template.
For more details on how to create a basic Ionic 4 app, refer to my blog How to create an Ionic 4 app
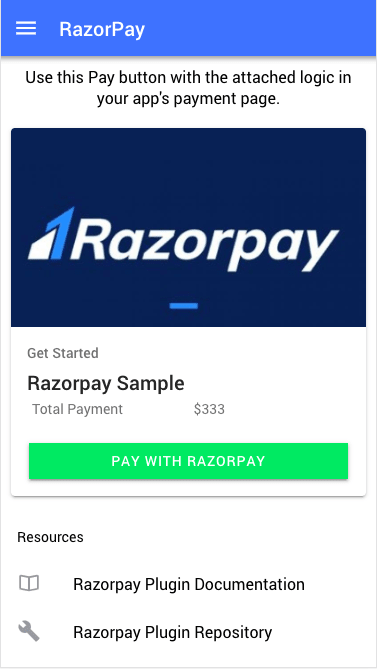
With minor modifications, my homepage looks like this.
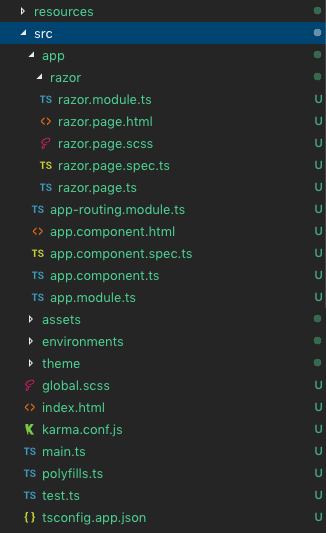
The file structure looks something like this, just for an idea
The main functional part of this HTML is nothing but the payment button you see above, which invokes payWithRazor() function in the razor.page.ts file. The HTML looks as following
Razorpay Developer Account
Visit razorpay.com and create an account. Razorpay payment services are currently available only for business in India.
Once you are inside Razorpay Dashboard, look for the Settings Tab -> API keys.
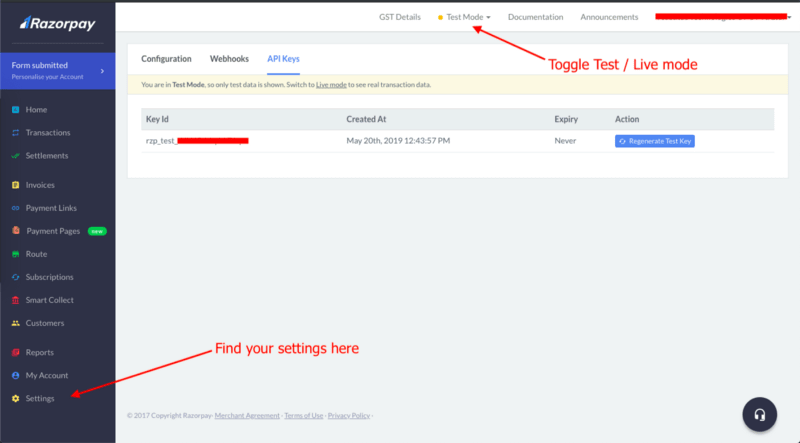
Key Id is what you use for connecting the Razorpay SDK in front-end. Key Secret is used in the back-end, and is only shown once to you when generated. You should save these values in a safe place, or you can always generate again.
That’s all you need from Razorpay account, for now. You can toggle the Live keys and use them instead, once you have tested the process.
Let’s look into the Ionic 4 integration of Razorpay now.
Integrate Razorpay plugin in Ionic 4 PWA
To include Razorpay functionality in your Ionic 4 app, you need to install Razorpay plugin. Install the plugin with following commands
$ cordova plugin add com.razorpay.cordova --save
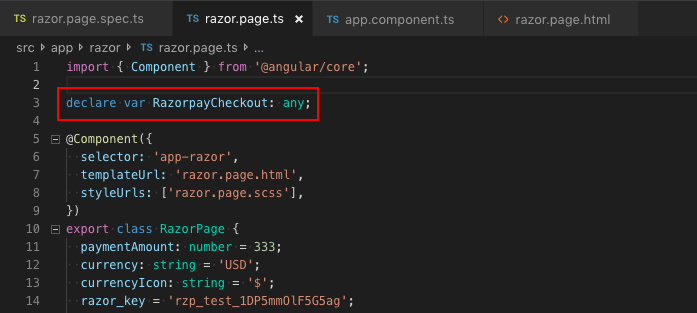
After installation completes, import Razorpay variable in your razor.page.ts
Now, using the Razorpay payments is really easy. The payment function looks like the following
RazorpayCheckout.open connects Razorpay SDK using your Key Id.
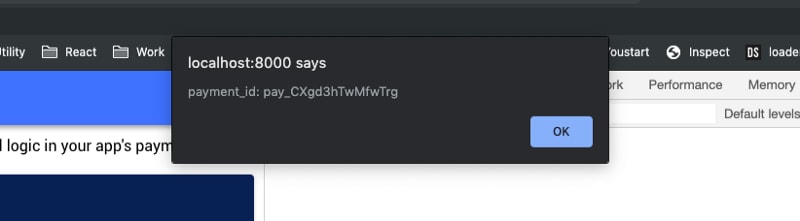
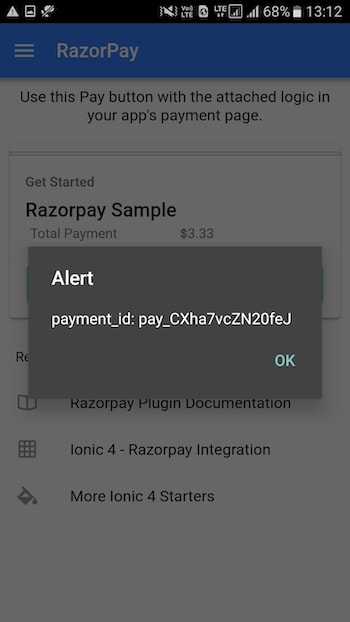
successCallback and cancelCallback are called on successful and failed payment respectively.
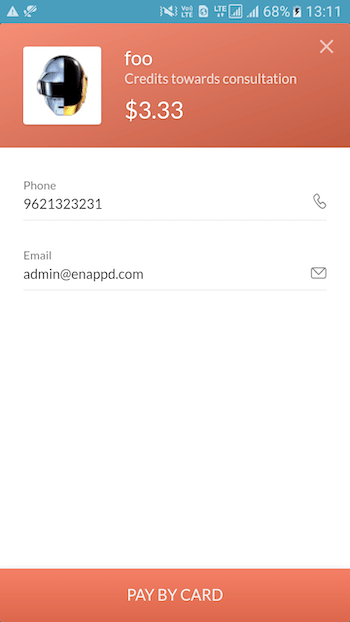
Note that the prefill details are optional, and can be provided at the checkout modal as well. This is a way to provide better UX to user if you have obtained the email / phone earlier in the app somewhere.
Since Razorpay plugin works for both mobile app and PWA, we can create a browser platform for the app to test the functionality
$ ionic cordova platform add browser
Once the platform is added, run
$ ionic cordova run browser
and you can test the implementation of Razorpay plugin in PWA.
On calling the RazorpayCheckout.open function, Razorpay’s auto-payment modal pops up and takes over the flow
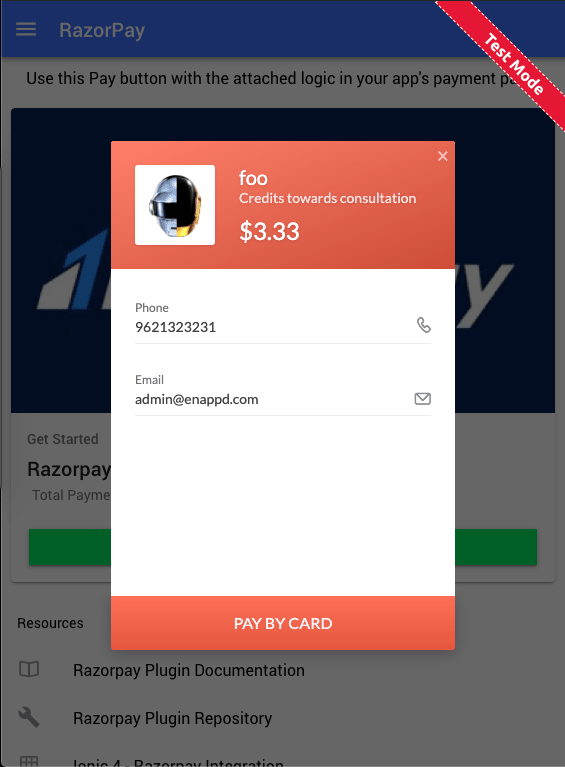
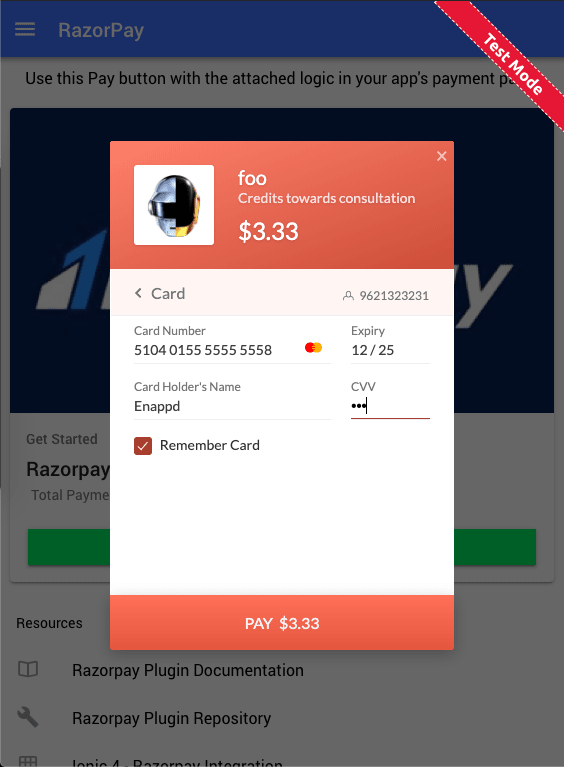
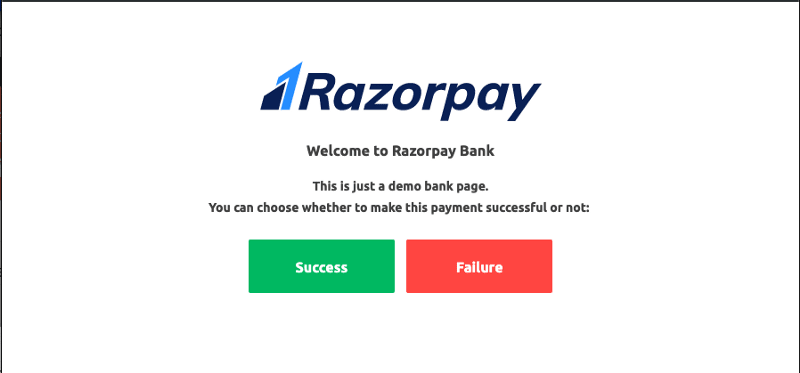
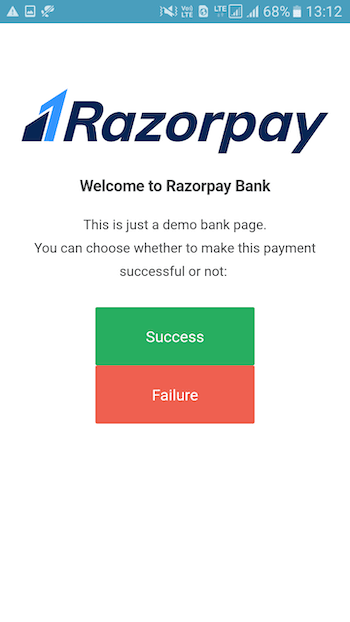
Here, we have used a test card for Razorpay. 🤓 As you proceed, you get a Razorpay modal that allows you to create a successful payment or a failed payment, to test both. Note that this popup will not come in LIVE flow
Razorpay integration in Ionic 4 mobile app
The integration of Razorpay plugin in Ionic4 mobile app is exactly similar to the one done above. Instead of creating a browser platform, you can create an android platform, for example
$ ionic cordova platform add android
And then run the app on a device or emulator
$ ionic cordova run android
The payment flow goes similar to PWA, as shown in following screenshots from an Android device

For iOS, please note the following
- The plugin no longer supports Swift 3 , moving forward only the latest version of our swift is supported.
- Current release is meant for Xcode 10 and above as it uses a framework compiled in Swift 4.2. Also make sure that you set Always Embed Swift Standard Libraries of your main target to Yes.
- The iOS framework is shipped with simulator architectures , you have to remove them before you archive, just google stripping simulator architectures and follow the steps. Also remember to Enable bitcode on both your iOS project as well as the RazorpayCheckout project.
- Please add this line to the top of your Main.m file
# import <Razorpay/Razorpay-Swift.h>Conclusion
Razorpay is a relatively simpler Payment gateway to implement in Ionic 4 apps. A simple plugin integration allows you to create payments from the front-end itself. However, you can always go for a more sophisticated payment flow implementation using Orders API .
Complete source code of this tutorial is available in the Ionic4-razorpay Github repository.
Stay tuned for more Ionic 4 blogs !
FOUND THIS POST INTERESTING ?
Check out my other post on
- Ionic 4 PayPal payment integration — for Apps and PWA
- Ionic 4 Stripe payment integration — for Apps and PWA
- Ionic 4 Apple Pay integration
Also check out our other blog posts related to
- Firebase in Ionic 4,
- Geolocation in Ionic 4,
- QR Code and scanners in Ionic 4 and
- Translations in Ionic 4
NEED FREE IONIC 4 STARTERS?
You can also find free Ionic 4 starters on our website enappd.com
You can also make your next awesome app using Ionic 4 Full App


Top comments (0)