
There is a lot of stuff in AR I would like to talk about, but let's not waste your time (or mine) and get right to it!

This year at WWDC(2018), Grant Paul from the Human Interface team at Apple was talking about creating great AR experiences.
One thing that he really stressed out is the usage of Screen Space instead of Perspective for rendering text in our AR apps.
If you missed the lecture, I highly recommend giving it a whirl. It stresses out some key points that are really important, and ARKit being a new kid on the block, needs us as developers to get him through the hazing process.
Check it out here.
What is ScreenSpace?
Short answer --> Barrels in the original DOOM. I am not even kidding.
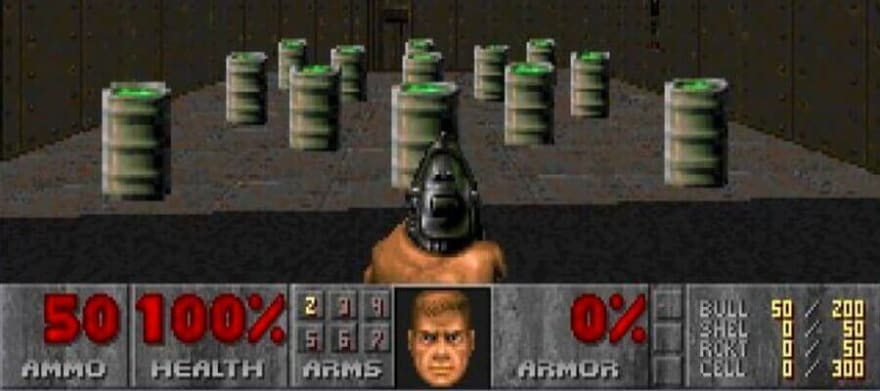
Basically, it's placing a 2D object in a 3D space. It really does have a 3D placement, but the object itself is a 2D sprite. We have loads of reasons to do this in iOS, but the main one is of course readability.
Take a look at this example used in the lecture. We see that the text that is placed with perspective, or SCNText, doesn’t work that well at all.

On the other hand, text placed in Screen Space is always the same size and facing towards the camera, making it perfect for placement of informational data.
I know I know, barrels in Doom do change the size at least, but still, way too good of a reference to be missing out on.
So, HOW do we get there?
Below is a quick tutorial on how to utilise screen space in your projects. This is just a basic template project with no real usage but you should be able to get the basics of screen space and how it works.
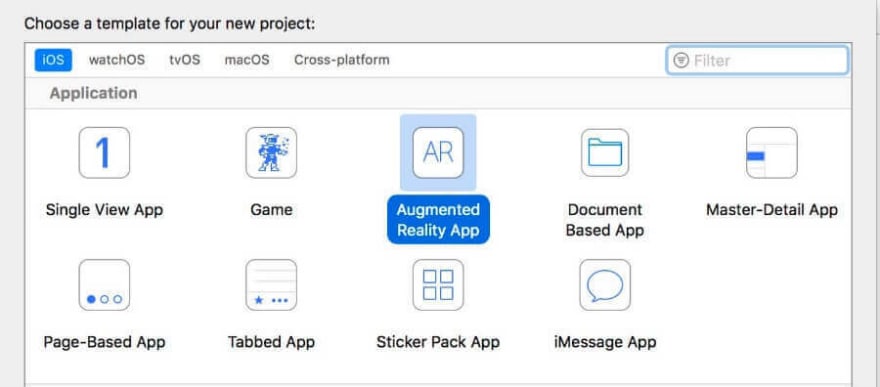
1. Project Creation and Setup
Start a new project and select an AR App template.
Whenever I start working with AR template, one thing that bothers me is not being able to add labels and views via storyboards.
So, to solve that:
- Remove the default ViewController
- Add a new ViewController from the Object library
- Add a UIView inside the new VC
- And finally add an ARSCNView to the VC
Now you have a UIView that can hold all labels, texts, images, and anything your heart desires, but under all of that, you have a ARSCNView for your AR shenanigans.
If you have a better solution for this setup I would love to hear it. So far this works great for me and it’s easy-peasy.
Note: The setup above is not a MUST for this tutorial, just thought to share it with you for future AR-related stuff.
Don’t forget to remove the old outlet and create a new one for the ARSCNView you just placed!
2. Create a UIView and a Label
Next, in a separate swift file, define a class that conforms to the UIView and define a label inside that UIView.
Once we initialize the view later on, it will take a SCNNode as a required parameter so we need to define that as well.
import UIKit
import SceneKit

class SSLabelView: UIView {

  weak var labelNode: SSLabelNode!
  var label = UILabel()

  // Initializing view with a node
  init(labelNode: SSLabelNode) {

    self.labelNode = labelNode
    // creating a frame/size for the view
    super.init(frame: CGRect(origin: CGPoint.zero, size: CGSize(width: 100, height: 100)))

    // Adding a label to the view
    self.addSubview(label)

    // Adding constraints to the label
    label.translatesAutoresizingMaskIntoConstraints = false
    label.topAnchor.constraint(equalTo: self.topAnchor, constant: 10).isActive = true
    label.leadingAnchor.constraint(equalTo: self.leadingAnchor, constant: 10).isActive = true
    label.trailingAnchor.constraint(equalTo: self.trailingAnchor, constant: 10).isActive = true
    label.bottomAnchor.constraint(equalTo: self.bottomAnchor, constant: 10).isActive = true
    label.textColor = UIColor.white

    // Hardcodded text value
    label.text = "TEST"
  }

  required init?(coder aDecoder: NSCoder) {
    fatalError("Init Coder has not been initialized")
  }
}

class SSLabelNode: SCNNode {
}
3. Main VC need some love too!
In the main ViewController (i hope you connected it with the storyboard you messed up at the beginning 😅….sry, I know that one is on me 🤦♂️), declare an array of views.
Here, we will append all the views we create when we tap the screen. I know, sounds like magic, only less lame.
class ARViewController: UIViewController, ARSCNViewDelegate {

@IBOutlet weak var sceneView: ARSCNView!

var ssViews: [SSLabelView] = []
.
.
.
viewDidLoad needs to be updated from the template since we are not using that sweet plane provided by Apple, so here is the code for that.
override func viewDidLoad() {
    super.viewDidLoad()

    // Set the view's delegate
    sceneView.delegate = self

    // Show statistics such as fps and timing information
    sceneView.showsStatistics = true

    // Set the scene to the view
    sceneView.scene = SCNScene()

  // Set the Session delegate
  sceneView.session.delegate = self
}
Note, that at the very bottom I added a session delegate. This is crucial to make the app work, but if you write it NOW, you will get errors for sure. So if you decide to do so, just ignore the errors for bit and all shall be revealed!
4. Touchy touchy
Next, we need to see how touches are handled. We just use a simple hitTest to get the latest touch location, and forward that info to a function that we will create in the next step.
override func touchesBegan(_ touches: Set<UITouch>, with event: UIEvent?) {
  if let touch = touches.first {

    let touchLocation = touch.location(in: sceneView)
    let results = sceneView.hitTest(touchLocation, types: .featurePoint)

    if let hitResult = results.first {
      addLabel(at: hitResult)
    }
  }
}
5. Adding that label like a baws
Once we have the information of where the user tapped, we give that location to the SCNNode we defined at the start, add it as a subview and append it to the array we defined that will hold all the views that we place.
func addLabel(at tapLocation: ARHitTestResult) {

  let labelPosition = SCNVector3(tapLocation.worldTransform.columns.3.x,
                                 tapLocation.worldTransform.columns.3.y,
                                 tapLocation.worldTransform.columns.3.z)

  let ssLabelPosition = SSLabelNode()
  ssLabelPosition.worldPosition = labelPosition
  self.sceneView.scene.rootNode.addChildNode(ssLabelPosition)

  let ssLabelPlacedView = SSLabelView(labelNode: ssLabelPosition)
  self.view.addSubview(ssLabelPlacedView)
  self.ssViews.append(ssLabelPlacedView)
}
I tried to keep the naming as clear as possible so it makes sense, but it is much easier once you rewrite it and use naming convention that works for you 👍 My naming convention is equal to the thought a drunk gives when ordering a new drink. Whatever works.
6. Almost there!
Now we are ready to finally place the views in our ARSCNView. We have defined nodes all over the place and everything is there, but not really there.
So, in a new swift file we create an extension to the ViewController that conforms to the ARSessionDelegate. We do that, so our view would be updated every frame -> 60 frames per second. Smoooooth.
We go inside every view from our array defined in the main VC, and give it a position smack middle of the feature point.
There is also a small fixer function, thanks to Greg Chiste on YouTube , who has a video tutorial for screen space that helped me a lot getting the gist of it. That function makes sure that placed lables don’t appear behind us as well (prison bad UX right there if you know what I mean).
import ARKit

extension ARViewController: ARSessionDelegate {

  func session(_ session: ARSession, didUpdate frame: ARFrame) {

    for view in ssViews {
      let projectedPosition = self.sceneView.projectPoint(view.labelNode.worldPosition)
      onlyShowViewsInFront(projectedPosition: projectedPosition, view: view)
      let size = view.frame.size
      let x = CGFloat(projectedPosition.x) - size.width/2
      let y = CGFloat(projectedPosition.y) - size.height/2

      view.frame.origin = CGPoint(x: x, y: y)
    }
  }

  fileprivate func onlyShowViewsInFront(projectedPosition: SCNVector3, view: UIView) {
    if projectedPosition.z > 1 {
      view.isHidden = true
    } else {
      view.isHidden = false
    }
  }
}
You in AR now son.
If you run the app, move the phone a bit to pick up the feature points, and then smack that screen!
Text “TEST” will be placed in your 3D space and when you move around, you should see that it stays the same size no matter the distance. Pretty neat ha? 😀
Thank you for reading! Feel free to get in touch on Twitter
Consider subscribing to the newsletter below if you loved the content.
I am so lazy I probably won't bore you more than once a week.
Cheers! 🍻

Top comments (0)