
I came across Fly.io. when I was looking for another platform to deploy my applications other than the ones I already knew.
Fly.io is a platform that help's you deploy your application just like Netlify, Vercel, etc. It doesn't matter what framework you are using, Fly.io got you covered 😉.
Steps to Deploy on Fly.io with GitHub
Step 1
Sign up on Fly.io
Go to Fly.io and click on the Sign Up button

Step 2
Sign up using your GitHub account or Email
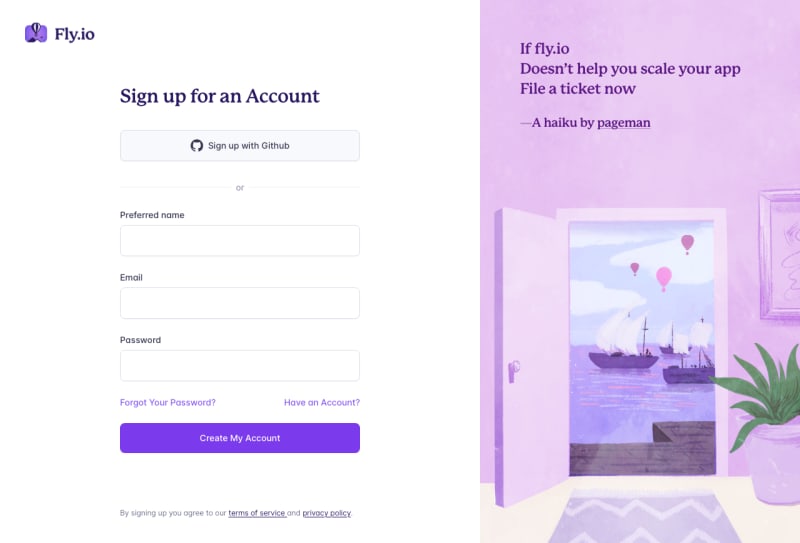
I will sign up and sign in using my GitHub account.
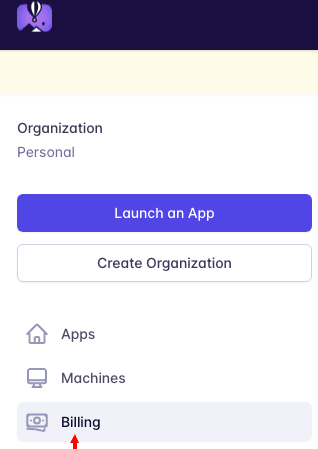
Step 3
You will be routed to your dashboard. Click on Billing to add a credit card. All plans on Fly.io need a credit card.
According to Fly.io
We don't offer a "free tier." Instead, we offer some free resource allowances that apply to all plans, including the Hobby plan, and includes enough usage per month to run a small full-stack app, full-time, for free.
Step 4
Install flyctl
flyctl is a command line utility that helps you work with Fly.io in your terminal.
Install based on your operating system. I will install flyctl using brew
MacOS
brew install flyctl
Linux
curl -L https://fly.io/install.sh | sh
Windows
pwsh -Command "iwr https://fly.io/install.ps1 -useb | iex"
Step 5
Since you have installed flyctl on your terminal, you will have access to fly.io commands. Run the following command in the root directory of your app
fly launch
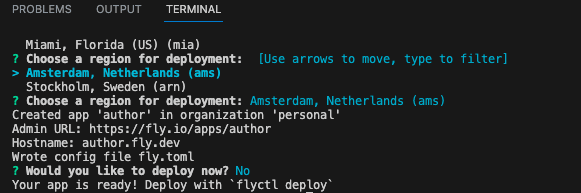
When you run the command above, you will be asked a series of questions such as;
Choose an app name (leave blank to generate one): You can give your app a name or leave it blank so Fly.io will generate one for you.
Choose a region for deployment: some regions are not free. You can check out more about regions on the Fly.io Docs
Would you like to deploy now? : You will select No because we want to sync our app with GitHub
Step 6
Get a Fly.io token by running the command below. Copy the output and paste it somewhere because you will need it later.
fly tokens create deploy -x 999999h
Step 7
Go to the GitHub Repository of the app you want to deploy and Click on Settings

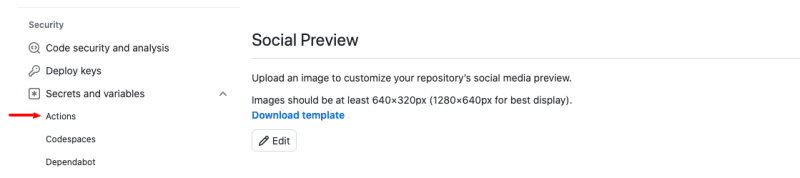
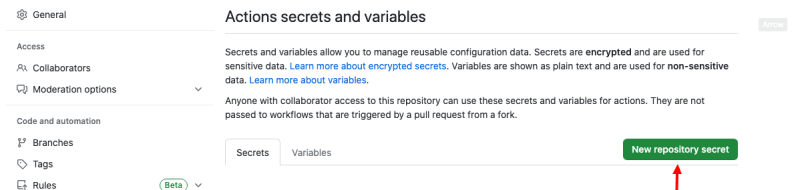
Step 8
You will be routed to the settings page, scroll down to the Security section and click on Secrets and variables and select Actions
Step 9
You will be routed to the secrets page click on the New repository secret button
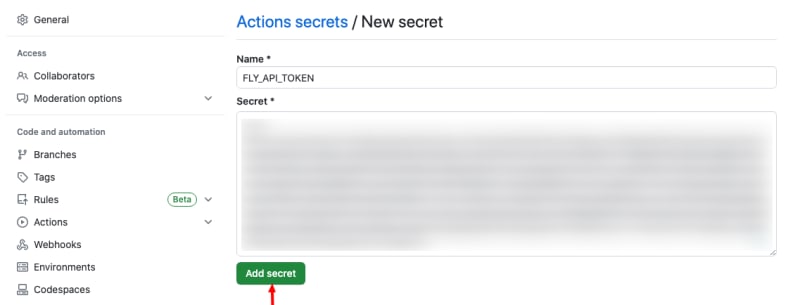
Step 10
Give your action secret a name. I will name mine FLY_API_TOKEN. In the secret field, paste the token you got in Step 5 and click on the Add secret button.
Step 11
Go back to your IDE(Integrated Development Environment) and do the following ;
In the root of your app directory create a folder and name it. github If you don't have one like me.
Inside the .github folder create another folder and name it workflows
In the workflows folder create a file and name it fly.yml
Paste the code below inside the fly.yml
name: Fly Deploy
on:
  push:
    branches:
      - main
jobs:
  deploy:
    name: Deploy app
    runs-on: ubuntu-latest
    steps:
      - uses: actions/checkout@v3
      - uses: superfly/flyctl-actions/setup-flyctl@master
      - run: flyctl deploy --remote-only
        env:
          FLY_API_TOKEN: ${{ secrets.FLY_API_TOKEN }}
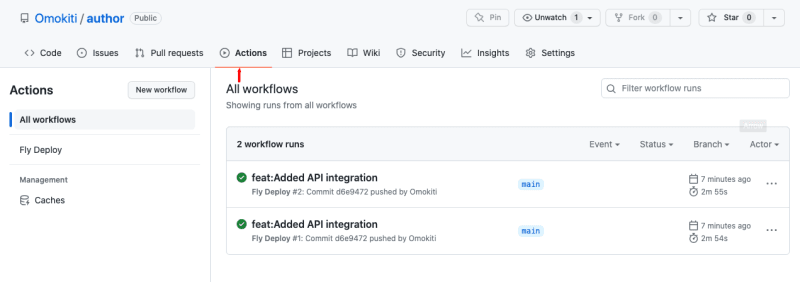
Step 12
Commit your changes and push them to GitHub. Click on the Actions tab of your repository to see the deployment in progress.
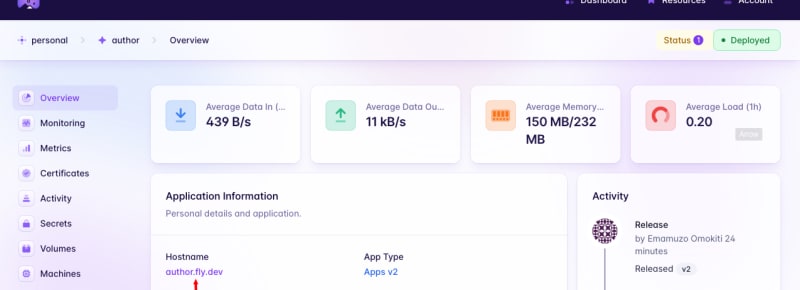
Step 13
If you go to your Fly.io dashboard you will see your deployed app

Click on your app name to see details of your app
Step 14
Click on the Hostname you would be able to access your app.
Conclusion
From Step 5 you can deploy your app when asked Would you like to deploy now? If you had selected yes, your app would have been deployed but when you make changes to your application, you will have to repeat the fly launch process.
You went through this route so that when you make changes to your app and push it to GitHub, It would automatically be deployed and you don't have to repeat the fly launch process when you make changes to your app.
Let me know what you think about Fly.io.
Happy Coding!!!


Top comments (0)