
Cross posted to Ed's personal blog
This self-contained blog post shows how you to quickly and easily deploy a cloud native Java microservice on Azure Kubernetes Service (AKS) directly from the Azure Portal. The app uses a tightly-focused selection of technologies from Jakarta EE 10 and MicroProfile 6 By using a tightly-focused selection of technologies from open standards, developers minimize maintenance cost and time to MVP and maximize skill portability and fun. For more of the benefits, see What are microservices.
For a more full-featured treatment, see this video from my colleague Brian Benz. YouTube link.
Deploy the app
The steps in this section show how to deploy the app from the Azure portal.
- Visit https://aka.ms/publicportal and sign in with a sufficiently empowered Azure subscription. If your identity doesn't have these powers, appeal to your IT department to be granted these powers or use a subscription where you do have those powers.
- The Azure identity deploying this offer must have one of the following two sets of Azure role-based access control roles:
- Contributor and User Access Administrator of the current subscription.
- Owner of the current subscription.
- The Azure identity deploying this offer must have one of the following two sets of Azure role-based access control roles:
- In the search box, enter "websphere liberty" without the quotes.
- In the Marketplace section of the search results, select "IBM WebSphere Liberty and Open Liberty on Azure Kubernete...".
- Select Create.
- By the Resource group box, select Create new and enter the name of a new resource group. This must be unique in your subscription. I suggest disambiguating by prefixing a string with your initials and some form of date to the text
01aks. For example,ejb052601aks. - Select Next: AKS.
- Leave the defaults and select Next: Load balancing.
- Select Yes under Connect to Azure Application Gateway. Leave the remaining values at their defaults.
- Select Next: Operator and application.
- Explore the info box next to the text IBM supported. This offer can be covered by full support from IBM and Microsoft. Purchase a support contract from IBM This plus your existing Microsoft support as an Azure customer gives you full coverage.
- After thinking carefully about the value of buying support, make a note to yourself to ask your IT deparmment about it and select No.
- Next to Deploy an application?, select Yes.
- Next to Deploy your own application or a sample application? select The Open Liberty sample image.
- Select Next: Review + create.
- When you see Validation passed, select Create.
Explore the deployed app
The steps in this section show you how to explore the deployed app
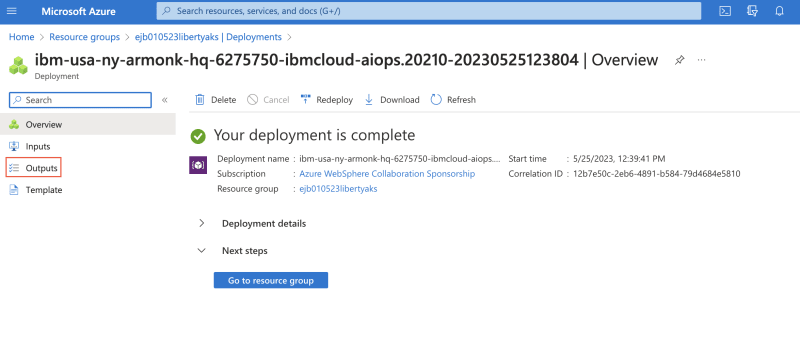
- Depending on cloud weather, you will see this screen in about fifteen minutes. Select Outputs as shown here.
- Locate the output named
appHttpsEndpointand select the "copy" icon beside it. - Paste that link in a new browser tab and go to the link. Accept the warning about the self-signed certificate. The offer created this certificate on your behalf. Do not use self-signed certificaties in production.
- View the app and play around.
Verify the app supports Jakarta EE 10 and MicroProfile 6
The steps in this section show you how to verify the app supports Jakarta EE 10 and MicroProfile 6.
If you followed the EE 10 and MicroProfile 6 links in the first paragraph, you'll see a list of technologies included in those two open standards. Because this app is a microservice, and because Liberty is a fully modular microservice platform, the sample app includes only a subset of those two standards.
- In the Azure portal, return to the page with the Outputs from the previous section.
- Locate the output named
cmdToConnectToClusterand select the "copy" icon beside it. - Still in the Azure portal, open an Azure Cloud Shell.
- Select the icon with
>_in the tool bar at the top of the Azure portal, as shown here. The Azure Cloud Shell is incredibly powerful and worthy of your time investment to master it. For complete documentation see Overview of Azure Cloud Shell..
- Select the icon with
- You may be asked to create storage. If so, say Yes.
- In the cloudshell prompt, paste the value for
cmdToConnectToClusteryou just now copied and pressEnter. You should see text similar toMerged "cluster26234e-admin" as current context in /home/edward/.kube/config. - Enter
alias k=kubectl. This may be useful later. - Enter
k get pods. Copy either of the two values in theNAMEcolumn. - Enter
k logs <paste value from preceding step> | grep mpHealth | jq .The output should look like the following.
   {
  "type": "liberty_message",
  "host": "app26234e-7bb7bc94f8-7bt7z",
  "ibm_userDir": "/opt/ol/wlp/usr/",
  "ibm_serverName": "defaultServer",
  "message": "CWWKF0012I: The server installed the following features: [cdi-4.0, distributedMap-1.0, jndi-1.0, json-1.0, jsonb-3.0, jsonp-2.1, monitor-1.0, mpConfig-3.0, mpHealth-4.0, mpMetrics-5.0, restfulWS-3.1, restfulWSClient-3.1, ssl-1.0, transportSecurity-1.0].",
  "ibm_threadId": "0000002a",
  "ibm_datetime": "2023-05-25T17:05:50.340+0000",
  "ibm_messageId": "CWWKF0012I",
  "module": "com.ibm.ws.kernel.feature.internal.FeatureManager",
  "loglevel": "AUDIT",
  "ibm_sequence": "1685034350340_0000000000033",
  "ext_thread": "Default Executor-thread-1"
   }
The value of the message property is your proof that a subset of technologies from both Jakarta EE 10 and MicroProfile 6 are running in the application.
Call to action: To learn more visit https://aka.ms/websphere-on-azure-contactme . If you want us to contact you directly, select the Contact Me button and I'll get in touch directly.


Top comments (0)