
Intro
When making changes to an app, automated tests help to ensure that your new code hasn't broken any previously developed features. Tests help to save you time, as you won't have to always manually test everything out when adding new features or making changes to a codebase. This is especially important as your application grows larger.
In this article, I'm going to show you how to write some basic feature tests for a HarperDB custom functions (applications) project to ensure that the api routes are working as planned. We will also write a unit test to ensure that one of our individual functions is working correctly.
In case you're not familiar, HarperDB is a database, streaming broker, and application development platform. It has a flexible, component-based architecture, simple HTTP/S interface, and a high-performance single-model data store that accommodates any data structure.
Github repo
The complete code repository for this project: https://github.com/DoableDanny/HarperDB-Testing-Tutorial
(Don't forget to give it a star ⭐)
Installing HarperDB locally
I'm on Mac, so to install HarperDB I opened a terminal and entered:
npm install -g harperdb
This installed HarperDB instance on my Mac is located at the destination: /Users/danadams/hdb Server with:
- Listening port: 9925
- Username for HDB_ADMIN: HDB_ADMIN
- Password: whatever_you_set_this_to_during_installation
We can now start HarperDB with the command:
harperdb
Now we can use HarperDB locally!
Creating a HarperDB custom functions project
Now we have HarperDB installed locally, we can create a new HarperDB custom functions project. Custom functions (also known as applications) are simply Fastify API routes that can very quickly access data from the HarperDB database. To create a new custom functions project, open up a new terminal and cd ("change directory") into the custom functions directory of your local HarperDB instance:
cd hdbcd custom_functions
You can check that you're in the correct directory by entering pwd ("print working directory"). Currently, I'm here: /Users/danadams/hdb/custom_functions.
Now that we're in the right place, we need to actually create a new custom functions project. We could do all of this from scratch, or we can just clone HarperDB's custom functions starter template to get us going quickly: https://github.com/HarperDB/harperdb-custom-functions-template. So, let's clone this into our custom_functions folder:
git clone https://github.com/HarperDB/harperdb-custom-functions-template
If you now enter ls ("list files and directories"), you should see harperdb-custom-functions-template listed.
Let's rename this folder to testing-project-tutorial:
mv harperdb-custom-functions-template testing-project-tutorial
Alright, let's open up this project in VS Code:
code testing-project-tutorial
Setting up HarperDB Studio
Let's now set up HarperDB studio so we can easily view our database with a nice UI in the browser.
First, create an account with HarperDB.
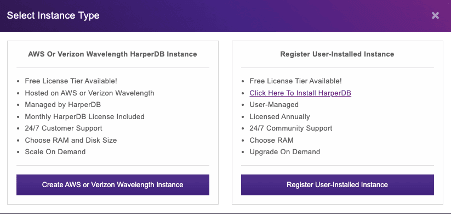
Then we need to connect up our locally installed HarperDB instance by registering a user-installed instance:
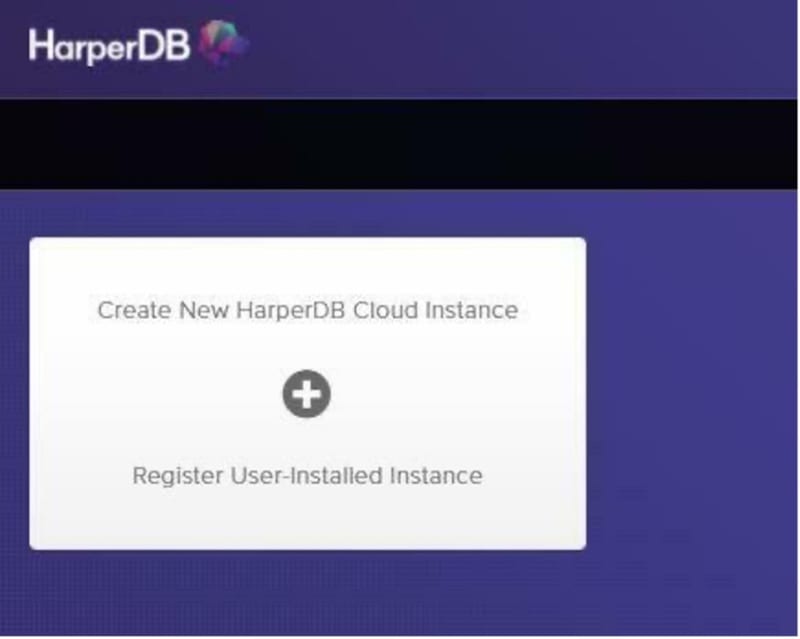
Select "Register User-Installed Instance":
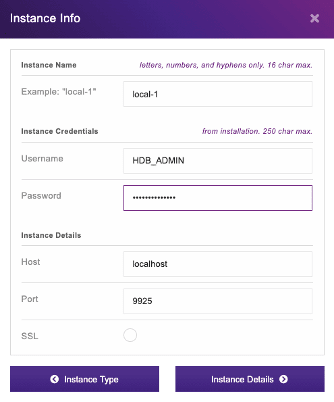
Then connect up the local HarperDB instance that you installed in the previous step:
Creating our Schema and Table in HarperDB Studio
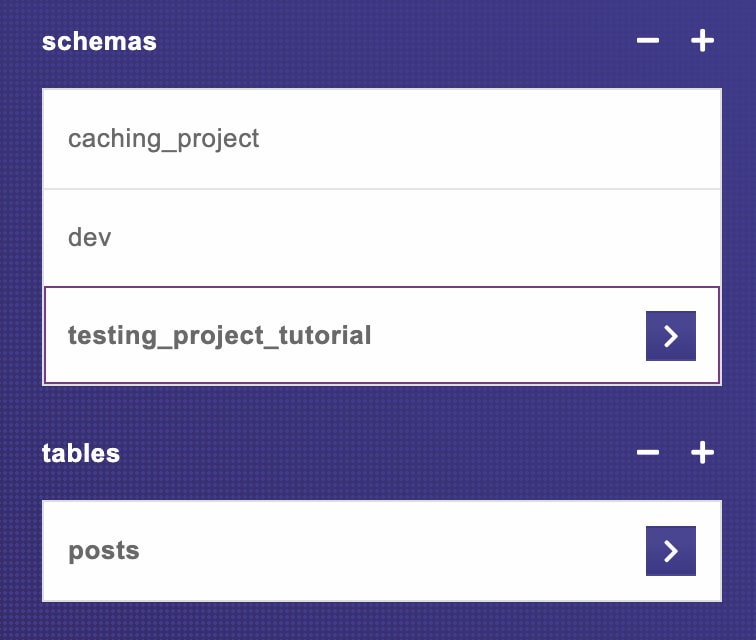
In HarperDB studio, click on "Browse" in the nav bar, then create a new schema called testing_project_tutorial. Inside this schema, create a new table called posts with hash_attr of id (hash_attr are like HarperDB's version of primary keys).
Defining some useful constants for our project
Create the file config/constants.js in the project root. Add the following project constants:
export const HDB_URL = 'http://localhost:9926/testing-project-tutorial';

export const SCHEMA = 'testing_project_tutorial';
Creating our HarperDB Custom Function API routes
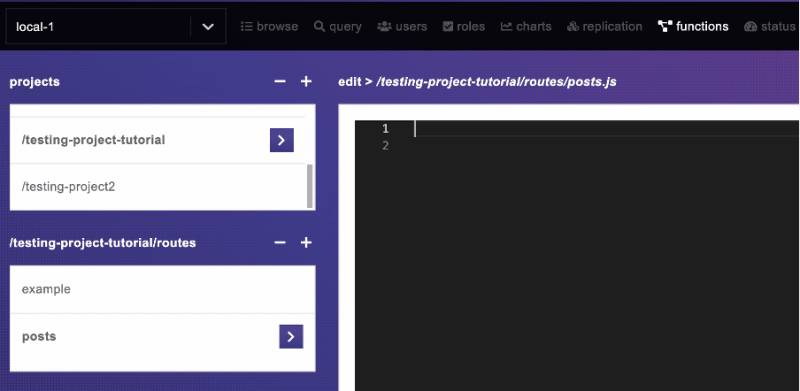
First, let's create a route where we can get a list of blog posts. In your HarperDB studio, go to the functions tab and go to your testing-project-tutorial project. Under the routes folder, create a file called posts:
Create a route that accepts a GET request, then fetches all the posts from the posts table:
// routes/posts.js

import { SCHEMA } from '../config/constants.js';

const POSTS_TABLE = 'posts';

export default async (server, { hdbCore, logger }) => {
    // GET: get list of posts
    server.route({
        url: '/posts',
        method: 'GET',
        handler: (request, reply) => {
            request.body = {
                operation: 'sql',
                sql: `SELECT * FROM ${SCHEMA}.${POSTS_TABLE}`,
            };
            return hdbCore.requestWithoutAuthentication(request);
        },
    });
};
Click the save button in HarperDB studio, then navigate to this new route:
http://localhost:9926/testing-project-tutorial/posts
We get back an empty array, as we currently have no posts:

So, let's create a route that accepts a POST request and some data related to a post. The posted data should be a JSON object with the fields username, title, and content.
// routes/posts.js

// POST: create a new post
  server.route({
    url: '/posts',
    method: 'POST',
    handler: (request, reply) => {
      const data = request.body;
      let validatedData;
      try {
        // validate the posted data using our custom validateCreateProductInput function.
        validatedData = validateCreatePostInput(data);
      } catch (error) {
        // posted data is invalid, so return the error message
        return reply.status(400).send({ message: error.message });
      }
      // data is all good, so insert it into the posts table
      request.body = {
        operation: 'insert',
        schema: SCHEMA,
        table: POSTS_TABLE,
        records: [
          {
            ...validatedData,
          },
        ],
      };


      return hdbCore.requestWithoutAuthentication(request);
    },
  });
But the above route won't work just yet, as we need to create the validateCreateProductInput() function. Above, we're wrapping this in a try/catch block as we want this validation function to throw errors if the posted data is not valid.
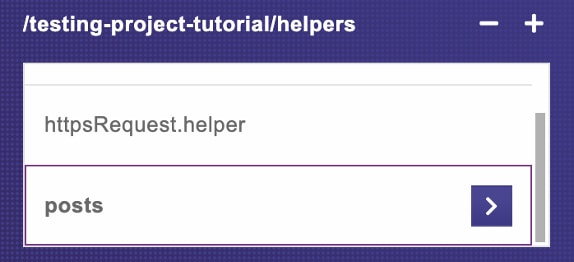
From HarperDB studio, create a new helper file called posts:
Then create the validation function:
// helpers/posts.js

export function validateCreateProductInput(input) {
    const { username, title, content } = input;
    if (!username || !title || !content) {
        throw Error('username, title and content are required');
    }
    if (username.length > 12) {
        throw Error('username must be less than 12 characters');
    }
    return {
        username: username.toLowerCase(),
        title,
        content,
    };
}
And, of course, let's import this function at the top of our routs/posts file:
// routes/posts.js

import { validateCreateProductInput } from '../helpers/posts.js';
Let's now use Postman to test out our routes. I've exported a Postman JSON collection file that you can simply import into Postman to quickly get you going: https://github.com/DoableDanny/HarperDB-Testing-Tutorial/blob/main/HarperDB%20Testing%20Tutorial.postman_collection.json
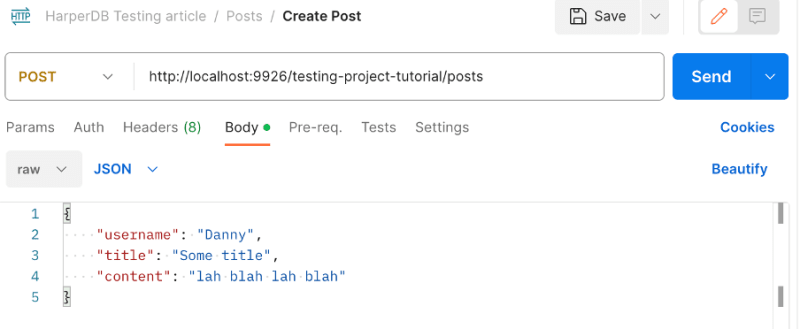
For the create post route, we can send our post data in a raw JSON body:
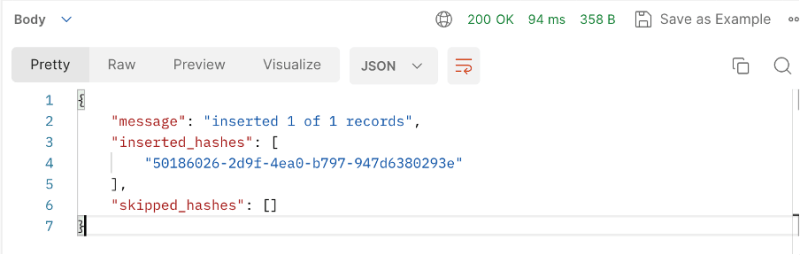
And the post was created successfully:
Let's check the posts table:

Perfect!
Now to check that our get posts route returns this new post:
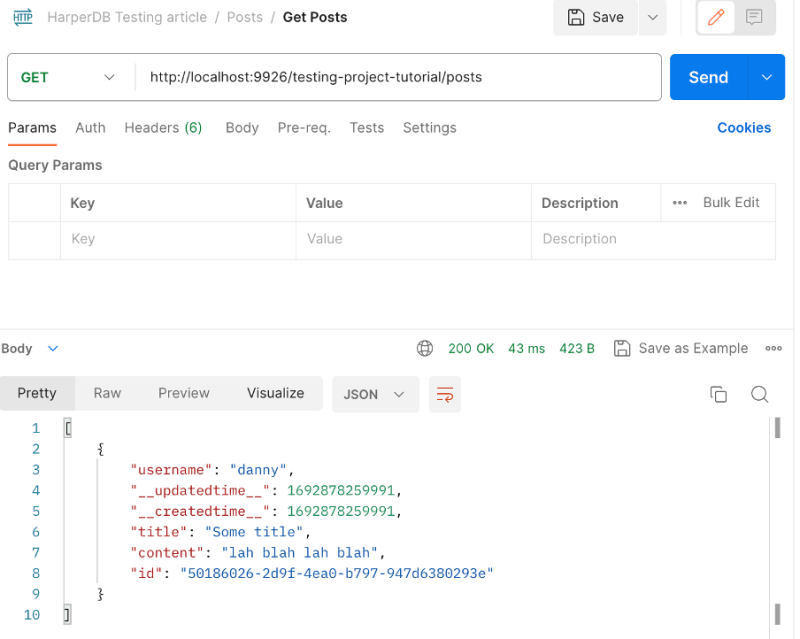
Awesome!
Let's now write some tests to ensure our routes are working as planned!
Setting up our project for testing
For this part of the project, I'm going to begin working in VS Code, rather than coding directly into HarperDB studio, to make it easy to install some npm packages. First, let's install the testing framework node tap as a dev dependency:
npm i tap -D
Let's also create a script in package.json to run our tests:
// package.json

{
  "name": "testing-project-tutorial",
  "version": "2.0.0",
  "description": "An example HarperDB Custom Function",
  "type": "module",
  "author": "Danny Adams",
  "scripts": {
    "test": "tap"
  },
  "devDependencies": {
    "tap": "^16.3.8"
  }
}
All of our tests can now be ran with:
npm run test
Testing creating a post
Unit tests
First, we will write unit tests to check that our validateCreatePostInput() function is working correctly with different inputs.
When writing tests, it's important to not forget about testing the sad paths: what if some form input is invalid, or a url param is invalid. Do we get the correct status code, error message, redirect, view, etc.
It's often a good approach to start writing the sad tests first, as it gets you brainstorming about what can go wrong and how it should be handled. So, let's start by writing a unit test to check that our validateCreatePostInput() function throws an error with the correct message if we pass it invalid data.
In the project root, create the file tests/posts/createPost.test.js, and add the following code:
// tests/posts/createPost.test.js

import { test } from 'tap';
import { validateCreatePostInput } from '../../helpers/posts.js';


test('POST `/posts`', async (t) => {
  // Unit test -- sad path
  test('Test if error is thrown from validate post data function call', async (t) => {
    t.throws(
      () => {
        const input = {
          username: 'Danny Adams',
          title: 'This is the Title',
          // content: "This is the contents of the post. Blah blah etc.", // no content provided should throw error
        };
        validateCreatePostInput(input);
      },
      {
        message: 'username, title and content are required', // error message we expect
        // name: "ExpectedErrorName", // Optional: check error name if needed
      }
    );
  });
});
The test above is a "unit test", as we are only testing one piece of code – our validation function. Above, we're using node tap to test that the function throws an error with the correct message if we don't pass a content field.
After running the test with npm run test:
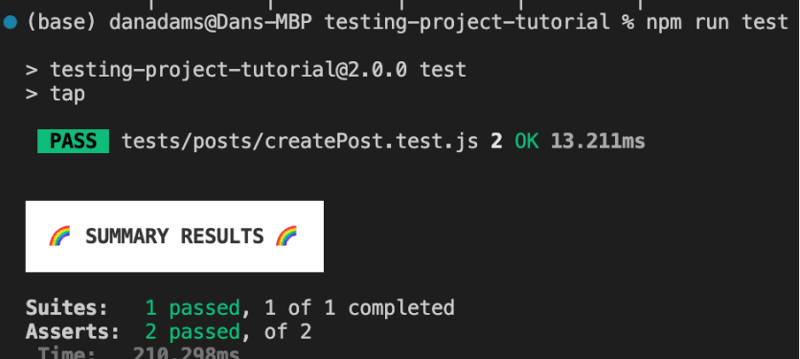
Our test passes!
How does Node Tap know which of our files to run as tests? It simply looks for files that end in .test.js.
Challenge: see if you can write a unit test to check what happens if we post a username that is too long.
Next, let's write the "happy path", where the input data is correct:
  // Unit test -- happy path
  test('Check post data is validated correctly', async (t) => {
    const input = {
      username: 'Danny Adams',
      title: 'This is the Title',
      content: 'This is the contents of the post. Blah blah etc.',
      naughtyKey: "This key shouldn't be here",
    };
    const validData = validateCreatePostInput(input);
    t.equal(validData.title, input.title);
    t.equal(validData.content, input.content);
    t.equal(validData.username, input.username.toLowerCase()); // username should be lowercased
    t.equal(validData.hasOwnProperty('naughtyKey'), false); // naughtyKey should not be returned from validateCreateProductInput()
  });
Above, we are simply checking that our validation function returns the validated data that we expect. Now that we have these tests, if we needed to modify our validation function in the future, these tests would tell us if the function is no longer behaving as it should.
Feature tests
Most of your tests should be feature tests, as they help to ensure that the application as a whole is working as expected. Let's test that our api route to create a new post is working correctly. We'll first write the unhappy paths to get us thinking about what could go wrong, then we'll write the happy path.
Unsuccessful post creation
First, create a helper function at the bottom of the createPost.test.js file that we can reuse to send a POST request to our api:
// tests/createPost.test.js

async function postThePost(input) {
  const response = await fetch(HDB_URL + "/posts", {
    method: "POST",
    headers: {
      "Content-Type": "application/json",
    },
    body: JSON.stringify(input),
  });
  const json = await response.json();
  return { response, json };
}
Now let's create two feature tests to check that our api returns the expected status codes and error message when we send invalid data:
// tests/createPost.test.js

test("POST `/posts`", async (t) => {

// …

  // Feature test: sad path
  test('Trying to create a post with username that is too long', async (t) => {
    const username = 'This username is just way to long...';
    const title = 'This is the Title';
    const content = 'This is the contents of the post. Blah blah etc.';


    const { response, json } = await postThePost({ username, title, content });


    t.equal(response.status, 400);
    t.equal(json.message, 'username must be less than 12 characters');
  });


  // Feature test: sad path
  test('Trying to create a post with no title', async (t) => {
    const username = 'Test User';
    const title = '';
    const content = 'This is the contents of the post. Blah blah etc.';


    const { response, json } = await postThePost({ username, title, content });


    t.equal(response.status, 400);
    t.equal(json.message, 'username, title and content are required');
  });

// …
Above, we're asserting that we get the correct error status codes (400 for "bad request") and that the error messages returned are as expected.
Create a post successfully
Now let's test what creating a post successfully should look like – the happy path!
First, at the bottom of the test file, create a deletePosts() helper function. We will use this to delete the test post that we create.
// tests/posts/createPost.js


async function deletePosts(postIdsArray) {
  const { response: deleteResponse, json: deleteJson } = await harperDbClient({
    operation: 'delete',
    schema: 'testing_project',
    table: 'posts',
    hash_values: postIdsArray,
  });
  console.log('Delete response:');
  console.log(deleteResponse, deleteJson);
  return { deleteResponse, deleteJson };
}
Let's also create a harperDbClient() function that we can reuse to interact with our HarperDB data:
// helpers/harperdb.js

export async function harperDbClient(body) {
  var myHeaders = new Headers();
  myHeaders.append('Content-Type', 'application/json');
  myHeaders.append('Authorization', process.env.HARPERDB_SECRET);

  var raw = JSON.stringify(body);

  var requestOptions = {
    method: 'POST',
    headers: myHeaders,
    body: raw,
    redirect: 'follow',
  };

  try {
    const response = await fetch('http://localhost:9925', requestOptions);
    const json = await response.json();
    return { response, json };
  } catch (error) {
    console.log(error);
  }
}
We also need to install the dotenv package to load in our environment variables:
npm i dotenv
Add your HarperDB secret into a .env file at your project root (your .env file should look like this), then load the variables at the top of the test file:
// tests/posts/createPost.js

import 'dotenv/config';
Here's how our successful post creation test will work:
- Create a post by hitting our POST api endpoint with some valid data.
- From the api's json response, get the "inserted_hashes". This is an array of the post ids that were just created. HarperDB automatically creates these ids when inserting a record.
- Pass a callback to node tap's
teardown()function to delete these test posts once the test is complete. The teardown function will run automatically when node tap detects that this test is complete. - Fetch the new post from the posts table so we can check that it was inserted correctly by comparing it to the original input data.
- Run our assertions (e.g.
t.equal()) to check status codes, messages, and data are all as expected.
Putting this into code:
tests/posts/createPost.js


import { HDB_URL, SCHEMA } from '../../config/constants.js';
import { harperDbClient } from '../../helpers/harperdb.js';


// …


// Feature test: happy path
  test('Create a post successfully', async (t) => {
    // create some post data
    const username = 'Test User';
    const title = 'This is the Title';
    const content = 'This is the contents of the post. Blah blah etc.';


    // Hit our custom function api endpoint to create new post
    const { response, json } = await postThePost({ username, title, content });
    console.log('JSON R');
    console.log(json.inserted_hashes);
    const postIds = json.inserted_hashes;


    // Teardown => run callback once test is complete
    t.teardown(async () => {
      // Clean up: delete the test post from db
      const { deleteResponse } = await deletePosts(postIds);
      console.log('Deleted posts with status ', deleteResponse.status);
    });


    // Fetch this new post from the db
    const { response: dbResponse, json: dbJson } = await harperDbClient({
      operation: 'search_by_hash',
      schema: SCHEMA,
      table: 'posts',
      hash_values: postIds,
      get_attributes: ['id', 'username', 'title', 'content'],
    });
    const dbNewPost = dbJson[0];


    console.log('DB RESULT:');
    console.log(dbResponse, dbJson, dbNewPost);


    // Check status and response is correct from api
    t.equal(response.status, 200);
    t.equal(json.message, 'inserted 1 of 1 records');


    // Check the post was inserted correctly into the db
    t.equal(dbResponse.status, 200);
    t.equal(dbNewPost.username, username.toLowerCase()); // username should be lowercased
    t.equal(dbNewPost.title, title);
    t.equal(dbNewPost.content, content);
  });
});
Testing getting posts
To test our api endpoint to get all posts, we'll do the following:
- Insert 3 test posts into the posts table
- Use node tap's teardown function to delete these new posts once the test is complete
- Fetch all posts by making a GET request to our /posts route
- Check that one of the posts we got back is one of the new posts that we created and that it contains the correct data
// tests/posts/createPost.js

import { HDB_URL, SCHEMA } from '../../config/constants.js';
import { harperDbClient } from '../../helpers/harperdb.js';

// …

// Feature test: happy path
  test('Create a post successfully', async (t) => {
    // create some post data
    const username = 'Test User';
    const title = 'This is the Title';
    const content = 'This is the contents of the post. Blah blah etc.';

    // Hit our custom function api endpoint to create new post
    const { response, json } = await postThePost({ username, title, content });
    console.log('JSON R');
    console.log(json.inserted_hashes);
    const postIds = json.inserted_hashes;

    // Teardown => run callback once test is complete
    t.teardown(async () => {
      // Clean up: delete the test post from db
      const { deleteResponse } = await deletePosts(postIds);
      console.log('Deleted posts with status ', deleteResponse.status);
    });

    // Fetch this new post from the db
    const { response: dbResponse, json: dbJson } = await harperDbClient({
      operation: 'search_by_hash',
      schema: SCHEMA,
      table: 'posts',
      hash_values: postIds,
      get_attributes: ['id', 'username', 'title', 'content'],
    });
    const dbNewPost = dbJson[0];

    console.log('DB RESULT:');
    console.log(dbResponse, dbJson, dbNewPost);

    // Check status and response is correct from api
    t.equal(response.status, 200);
    t.equal(json.message, 'inserted 1 of 1 records');

    // Check the post was inserted correctly into the db
    t.equal(dbResponse.status, 200);
    t.equal(dbNewPost.username, username.toLowerCase()); // username should be lowercased
    t.equal(dbNewPost.title, title);
    t.equal(dbNewPost.content, content);
  });
});
Things we could improve on in this project
There we have it; you now know how to run some unit and feature tests in a custom functions project. However, if this was a serious project, we'd definitely want to improve on a few things:
- Currently, our tests are working with our main database. This is generally considered bad practice as it can result in our tests messing up our development data and get us in a mess. It would probably be better to work with a test schema with the same tables as the real schema.
- It's usually a good idea to clear out all test data in each table after running each test, so that tests don't interfere with each other and cause unexpected issues. We would then have complete control over what is in each table at the beginning of each test, and so can test exactly what we expect to be in each table.
- It could also be a good idea to create a separate environment for testing, e.g. .env.testing, then when running our tests we could specify the environment we want to use in the npm script. E.g.
// package.json

"scripts": {

"test": "NODE_ENV=test dotenv -e .env.test tap"

},
Thanks for reading!
If you enjoyed this article, it'd be awesome if you could give me a sub on YouTube. You could also follow me on Twitter.
Cheers!

Top comments (2)
Great article Danny!
Thanks Margo!