
This introductory article on geolocation testing is intended for quality assurance (QA) and test engineers working with web applications, and cross-platform (React Native) and native (iOS, Android) mobile applications. It offers step-by-step instructions on how to start geolocation testing on your project, and also describes the pros and cons of several possible approaches. Here you will also learn such key concepts as back-end representation, data generation, data validation, emulation, and testing levels using REST API.
What geolocation is and why you need geolocation testing
It’s no longer just GPS navigation apps that use geolocation. Locations, route directions, and estimated time of arrival are features being implemented in transportation, food delivery, e-commerce, games, social media – in fact, the list of application categories not using geolocation is shrinking every day.
For an app-based company, business logic often depends on action triggers based on the location of people and objects. This makes a solid understanding of how to perform geolocation testing a must-have ingredient in making such projects a success.
Before diving in, a refresher on the definitions:
- Geolocation. The identification or estimation of the real-world geographic location of a mobile phone or computer. Because we are dealing with devices and networks, it is important to be aware of the issues we may encounter (uptime, connection speed, accuracy) and, therefore, of the nature of the estimation part of the definition.
- Geolocation testing. The technique of identifying the geographical location of a device via the internet. In other words, this kind of testing includes everything related to the position of an object in space, actions based on the object’s position regarding other objects, and the effect on different processes and areas.
How geolocation is represented on the application backend
Geolocation requests and responses are represented as JSON (GeoJSON), and the content type that stores geodata is application/json.
What is GeoJSON?
GeoJSON is an open-standard format designed to represent simple geometry objects, along with their non-spatial attributes. It is based on JSON, the JavaScript Object Notation.
What is Geodata?
Of the many Geodata geometry objects, the key ones are point, path, polygon, track, and feature.
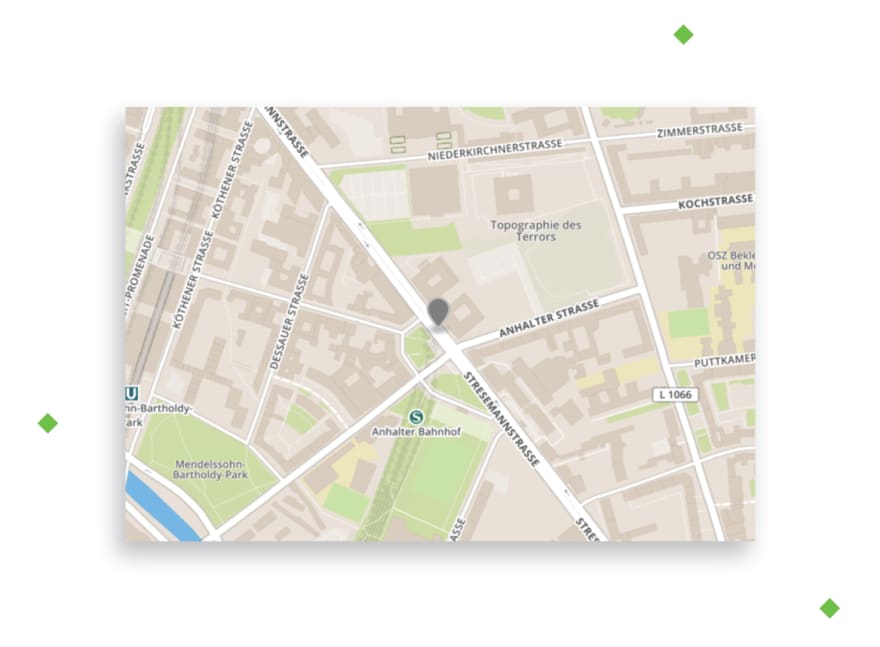
Point
A Point is the combination of os latitude, longitude, and elevation coordinates. We can imagine a Point in a three-dimensional vector space represented by coordinates on the x-, y- and z-axis. The main Point parameters are latitude and longitude, since elevation coordinates are used more rarely and only in specific cases, like atmospheric pressure calculation.
There are two important things to remember about the Point:
- The standard is that the latitude must always be listed first, followed by the longitude (not everyone seems to know this);
- The fifth and later decimals in latitude or longitude have little significance, with the 5th decimal representing a little over 10 feet, or less than 5 meters.
In a food delivery app example, the Point represents the pick-up location of the order, the drop-off location for the customer, and the delivery person’s location, typically with only their latitude and longitude coordinates.
Point code representation
{
    "geometry": {
        "type": "Point",
        "coordinates": [
            13.381969928741455,
            52.50479381812203
        ]
    }
}
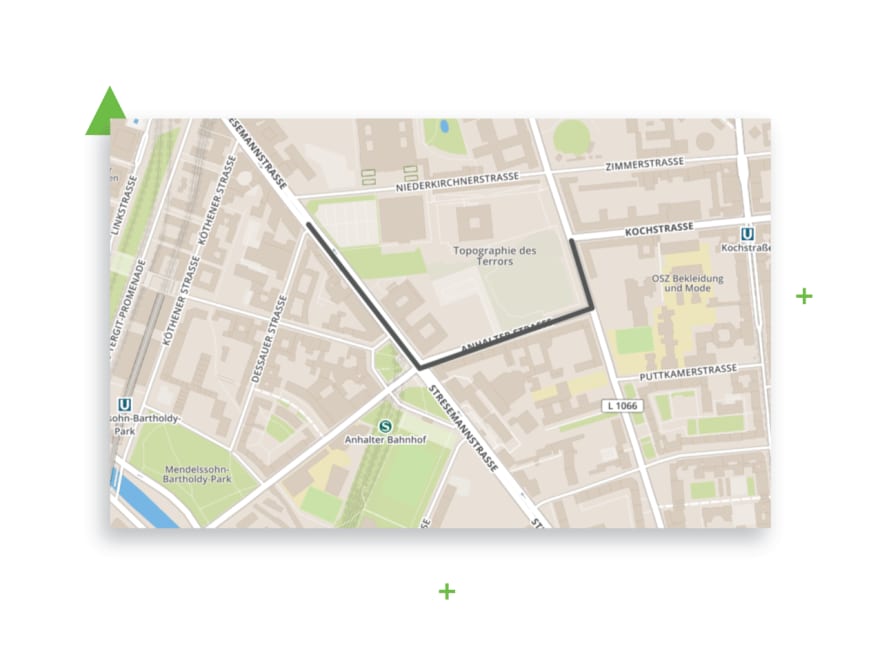
Path
A Path is a set of Points. You connect two or more Points to get a Path. As a result, this feature can show how a device was moving during the day or build the path to a destination.
Using the same food delivery app example, the Path shows the distance to be traveled from the delivery person to the pick-up location, and the route from the pick-up location to the drop-off location.
Path code representation
{
    "geometry": {
        "type": "LineString",
        "coordinates": [
            [
            13.379566669464111,
            52.50663540575101
            ],
            [
            13.38233470916748,
            52.50445422616214
            ],
            [
            13.386626243591309,
            52.50536850623138
            ],
            [
            13.38611125946045,
            52.50638725305074
            ]
        ]
    }
}
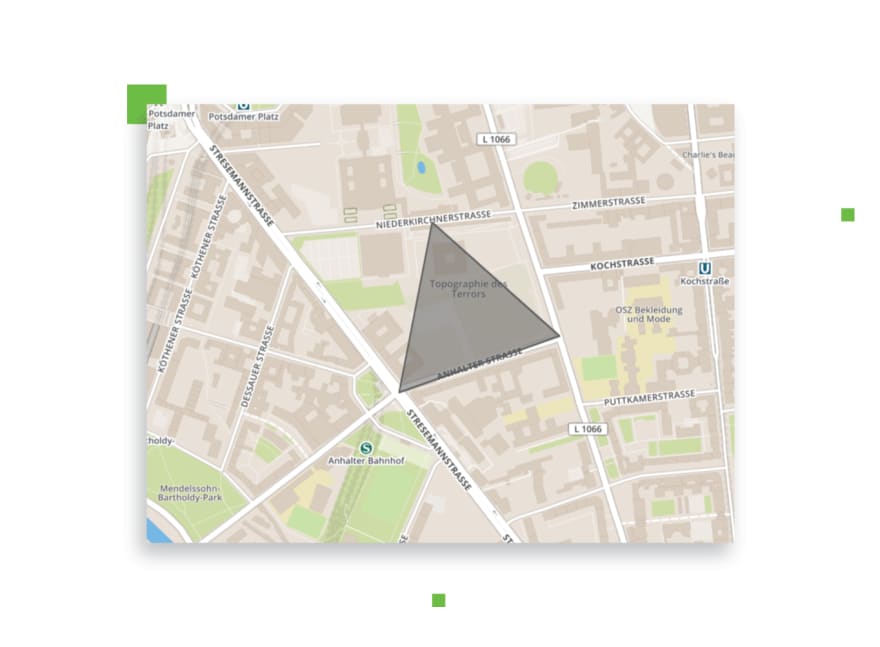
Polygon
A Polygon is an enclosed set of points. A Polygon looks like a Path, but with one important difference. The main rule for a Polygon geo object is to have the same first and last Point. As a result, your Path ends at the same Point where it started and forms an enclosed set of points called the Polygon. In other words, we get an area we can calculate or define whether or not a Point belongs to specific Polygon (i.e., area). There is one issue with Polygon: this kind of an object cannot exclude another Polygon or Point from itself (i.e., you cannot create one Polygon with a hole in the middle).
Using the food delivery app example, the Polygon will mark the zone where the delivery person can pick up the request and the zone where they will deliver the request.
Polygon code representation
{
    "geometry": {
        "type": "Polygon",
        "coordinates": [
            [
            [
            13.383235931396484,
            52.50723619069716
            ],
            [
            13.382356166839598,
            52.50448034871372
            ],
            [
            13.386626243591309,
            52.50539462823964
            ],
            [
            13.383235931396484,
            52.50723619069716
            ]
            ]
        ]
    }
}
Track
A Track is a set of Points with a Timestamp. Add time to every received Point, and you get a Track. Track provides information about a device’s location at each moment. This type of geo object is usually stored in GPX format, an XML schema designed as a common GPS data format for software applications. It can be used to describe waypoints, tracks, and routes.
Track code representation
<gpx>
    <wpt lon="-78.4814684" lat="38.0283608">
        <name>TP001</name>
        <ele>139.36167907715</ele>
        <time>2017-05-18T12:20:25Z</time>
    </wpt>
    <wpt lon="-78.48174" lat="38.02844">
        <name>TP002</name>
        <ele>139.58670043945</ele>
        <time>2017-05-18T12:20:37Z</time>
    </wpt>
    <wpt lon="-78.4817437" lat="38.0284428">
        <name>TP003</name>
        <ele>139.79161071777</ele>
        <time>2017-05-18T12:20:39Z</time>
    </wpt>
    <wpt lon="-78.48159" lat="38.02877">
        <name>TP004</name>
        <ele>139.78443908691</ele>
        <time>2017-05-18T12:21:14Z</time>
    </wpt>
</gpx>
Feature
A Feature is any geo object with additional information. All additional information related to any geo object can be stored in “properties” of the object, including time, address, etc.
In applications, this is useful for displaying a time when devices send coordinates, addresses, requests’ stage, etc.
Feature code representation
{
    "type": "Feature",
    "geometry": {
        "type": "Point",
        "coordinates": [
            30.492553710937496,
            50.46236709872438
        ]
    },
    "properties": {
        "created_time": "2019-07-04T12:15:32.753544Z",
        "address": "st. Glubochitskaya, 44"
    }
}
How to perform geolocation testing
Because geolocation depends on devices and networks, and because real-life conditions are never ideal (in addition to the code itself), for best results it is always smart to test applications using a range of physical and emulated Android and iOS mobile devices. Let’s review the tools and steps that can help with geolocation testing.
Geolocation data generation and validation tools
Effective and thorough geolocation testing requires tools and services to help generate and validate test data. Using the tools below will increase the testing speed and provide extra time for exploratory or other testing types.
Geojson.io
This free web service offers the ability to generate a GeoJSON code for Point, Path(LineString), and Polygon objects by simply clicking on the relevant place(s) on the map. Additionally, you can see the length of the built Path (in meters, kilometers, feet, yards, miles) as well as the square of the built Polygon (in square meters, square kilometers, square feet, acres, square miles).
GeoJSONLint
This free web service helps validate GeoJSONs. Using this simple tool, you can paste any GeoJSON into the validator and get a visualization of the object on the map to verify whether it matches the expected result.
CreateTrack
This free web tool is great for Track generation. It allows you to draw a Path, choose the needed speed, and download Tracks in various formats. The only inconvenience is a requirement to register to download files.
Android geolocation emulation
Data generation is only the first step, as it means nothing without emulation. Emulation assists in removing the need to run and drive all over the place for testing. Instead, use common approaches of emulation.
For Android-based devices, at the moment we have found 3 ways to do it: using Android API calls, built-in Android geo mock features, and purpose-built apps.
Android API calls
Here are the steps to emulate geodata using Android API calls:
- Turn on “developer” mode in the device settings by selecting the “Build number” section (About phone > Build number) several times. After a few taps, you'll see a small pop-up alert telling you that "You are now X steps away from being a developer", with a number that counts down with every additional tap.
- Connect your Android device to a laptop or PC using a USB cable.
- Make a request through the TELNET protocol by using the Command line and send the request, which will change location coordinates on the device:
import telnetlibport = b'5554' host = b'192.168.88.161' device = telnetlib.Telnet(host=host, port=port) device.write(b'geo fix ' + xpoint + b' ' + ypoint + b' ' + b'\n')
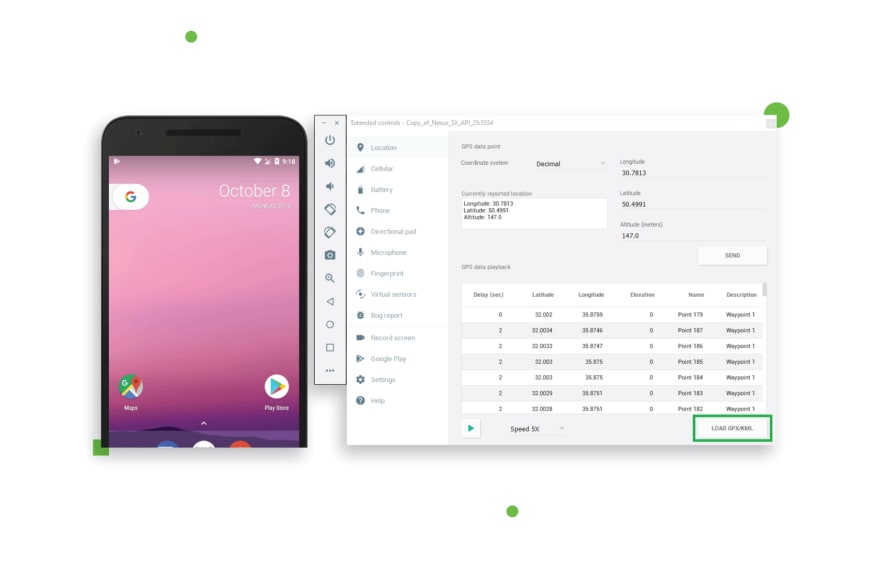
Android emulator built-in geo mocks
You can also emulate the Android device itself using your laptop or PC in connection with Android Studio.
- Open Android Studio
- Launch any Android Emulator
- Click the “More” button
- Edit Longitude and Latitude fields
- Upload GPX/KML file and click Start button
On-device apps
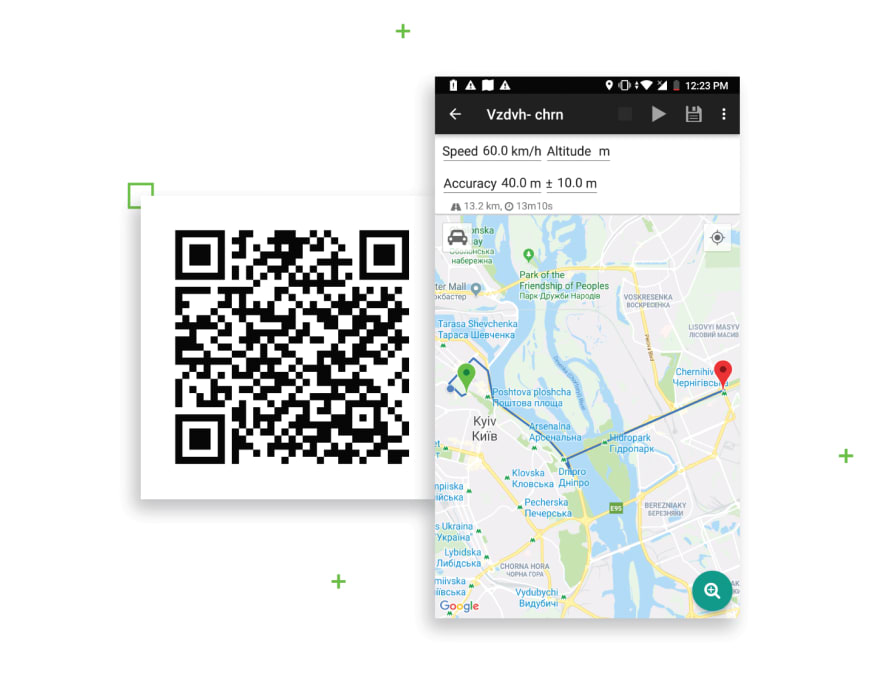
The easiest way to emulate location data is by using a dedicated app made exactly for this purpose. The only thing you’ll need is an Android device and the internet. Out of many apps in this category, one of the best is Lockito. This app can build a road-based Path from point A to point B, including a speed setting. Also, it allows for the reuse of previously created Tracks.
iOS geolocation emulation
iOS devices can also emulate geodata, but it is not as easy as it is with Android due to App Store restrictions that do not allow apps to change geolocation position. Still, there are several ways to generate mock data for IOS devices.
Xcode (for MacOS)
Xcode is an integrated development environment for macOS containing a suite of software development tools developed by Apple for developing software for macOS, iOS, iPadOS, watchOS, and tvOS. This tool gives you an opportunity to mock data on emulators as well as on real devices plugged into the laptop. You will be able to set custom location data (Screen 1) and upload a GPX file to emulate movement (Screen 2) on the device.

iSpoofer (for Windows)
iSpoofer can help you mock location data only for a physical device (i.e., it does not mock data using an emulator). The only issue with the tool is that it is not free, with the exception of a 3-day free trial period. Still, Windows users can use it without creating a virtual machine with MacOS.

Geolocation application testing levels
As you can see from the above, there are three key ways geolocation apps can be tested: API calls, on emulated devices using mock data, and on physical devices with real data.
API calls
Because all geolocation data is exchanged using APIs, the calls with which devices will communicate and exchange location data must be tested. We used Python with a Requests library, but any manual testing tool like Postman or scripts in any programming language will do. Of course, when testing API calls, you will need neither an emulator nor real devices.
Device emulator with mock data
Most Geolocation testing uses emulated devices with mock data, since the result is that all devices and emulators eventually generate API calls to communicate geolocation data with the database. Using emulators with mock data has its place, but you should be aware that this is still a very conceptual way to test and is only an approximation of real-world conditions.
Physical devices with real data
Considering the above, real data testing on physical devices is definitely the most important level of geolocation testing, because we cannot predict all possible cases that can happen in real life using an application. While expensive and time-consuming, if used strategically this type of testing can help you avoid major problems in a chaotic environment where networks and devices are running in far-from-idealized conditions.
Geolocation testing advice
To summarize geolocation testing, it is definitely an important aspect of any location-based app that can’t be overlooked. Luckily, with some dedication, this discipline can be mastered even by someone without too much initial experience. Keep in mind:
- Do not be afraid of geolocation testing. It is most likely about just 4 parameters in all (i.e., longitude, latitude, elevation and time).
- Latitude (1st) and longitude (2nd) have standard positions. Remember them, and don’t confuse them.
- Real data differs from mock data. It is not the same, so test your app using with real devices and data at least selectively.
- When testing, you can simply move the target object nearer to the device if you cannot emulate device movements.
- Be aware of how the application logic works in the back-end.
Further reading on geolocation
- https://macwright.org/2015/03/23/geojson-second-bite.html for more information about GeoJSON
- https://gisgeography.com/gis-formats/ about various geodata formats
- https://github.com/tmcw/awesome-geojson lear about other instruments related to geojson in one github repository
This article about Geolocation Testing is written by Vladislav Treshcheyko - QA Engineer at Django Stars. Originally posted on Django Stars blog.

Top comments (0)