In the previous post, we used DevOps to export a solution from out of the dev Power Platform environment and saved it into a source repository.
In this post, we will take that source repository and import it into another environment - this could be TEST or INT or PROD or whatever environments your organisation uses.
The purpose is that we want to be doing our development in DEV only and we want to make sure that the only code we deploy is code from our source repository.
Prerequisites
- You'll need a second Power Platform environment that isn't the one you exported your solution out of. The simplest and free way to do that is to just sign up for a 30 day Dynamics 365 Sales module trial
- You need a service principal that has access to this environment
- You'll need your solution stored in a DevOps git repo. See here for how to get that.
Creating a release
You should create a release in DevOps. Start with an empty job.
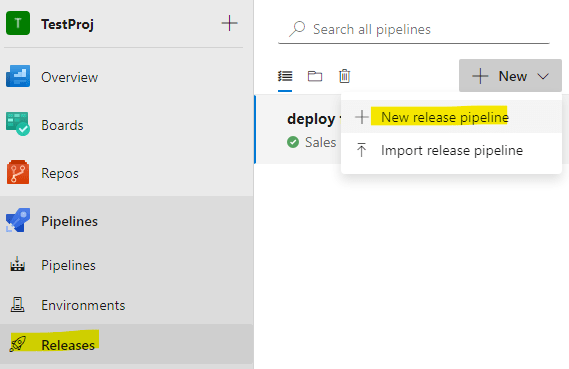
You should see something like this

Artifact
The artifact is what you'll be using to deploy the release. In our case, there's only be one artifact which should be your source control repo.

Stage
A stage in a release will take your artifacts through a series of steps and deploy into an environment. You should have a stage for each upper level environment you plan to deploy code to.
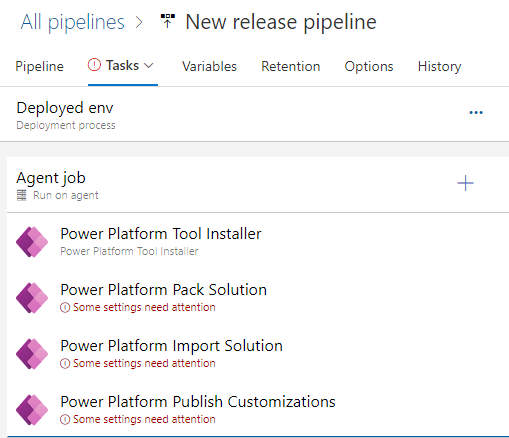
For our purposes, your stage should have the following steps and I'll go through and explain what they are.
Agent Job
This just specifies a couple of basic things like the agent pool you wish to use for deployment as well the referencing the artifact that you want to use.

Power Platform Tool Installer
Just installs the Power Platform Tools on the agent so you can do the rest of the steps
Power Platform Pack Solution
This is taking the solution in your source repo and packing it into a zip file.
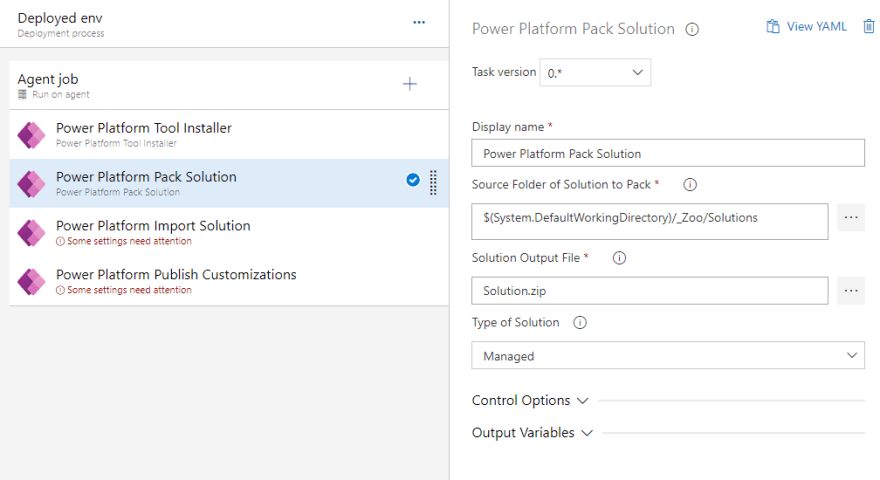
Source folder - that's where your solution sits in your repo
Source Output folder - that's what it'll pack the solution and save to.
Type of solution - you can specify whether to deploy a managed or unmanaged solution
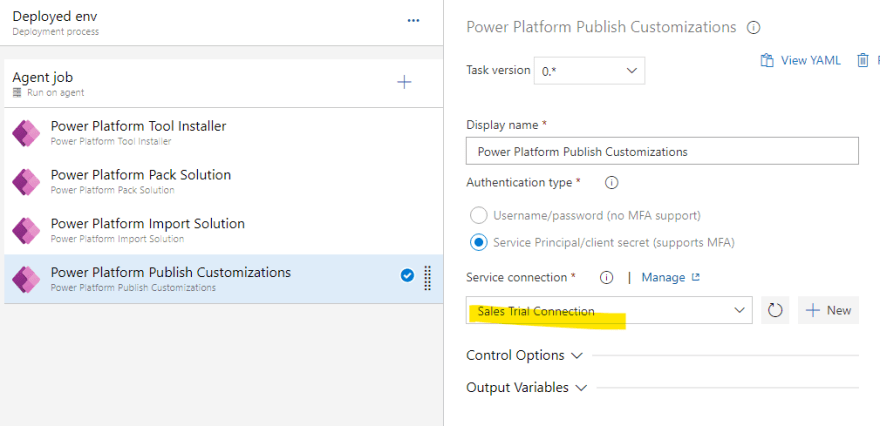
Import Solution
This is the first step that interacts with the environment. We have our solution, let's connect to the environment and import into it.
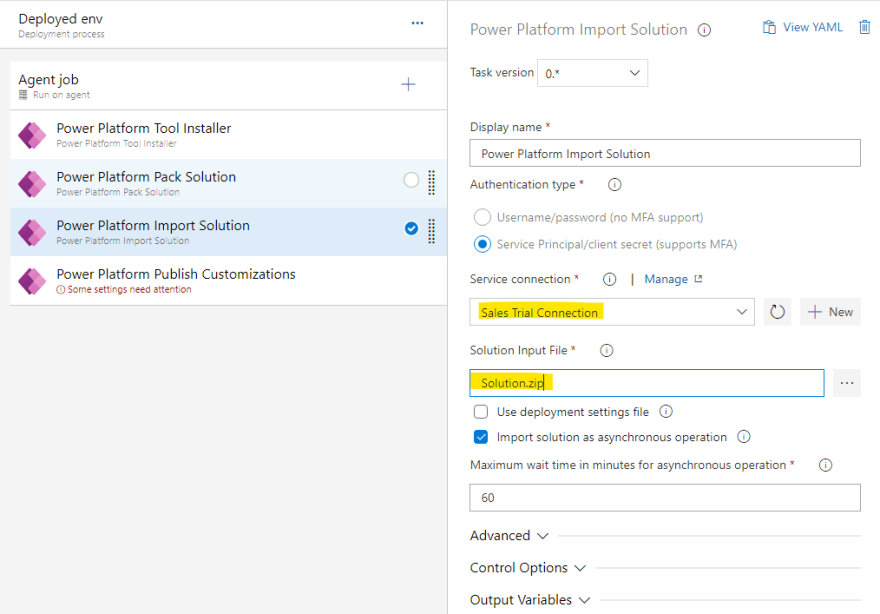
Service connection - that should be your service principal to connect to the higher level environment.
Solution input file - this should be the same as the source output folder in the previous step as you're taking that solution.zip file from there.
Publish Solution
The final step is to simply do a publish on the environment after you've imported the solution. The only thing you'll need here is once again your service principal.
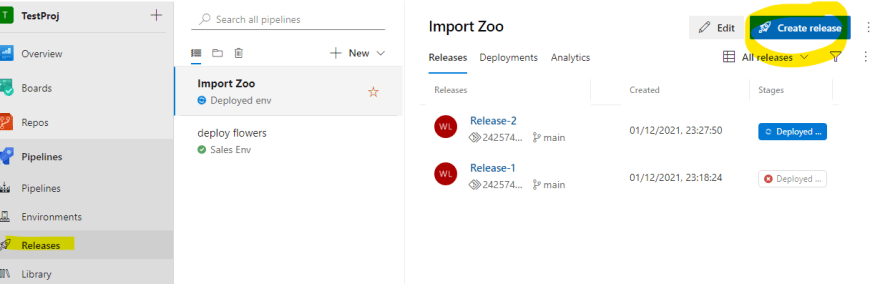
Running the release
Once you have this set up you just need to create a release. If you have set your stage to be manually triggered, you'll need to do that - otherwise it should automatically deploy that stage as soon as the release is created.
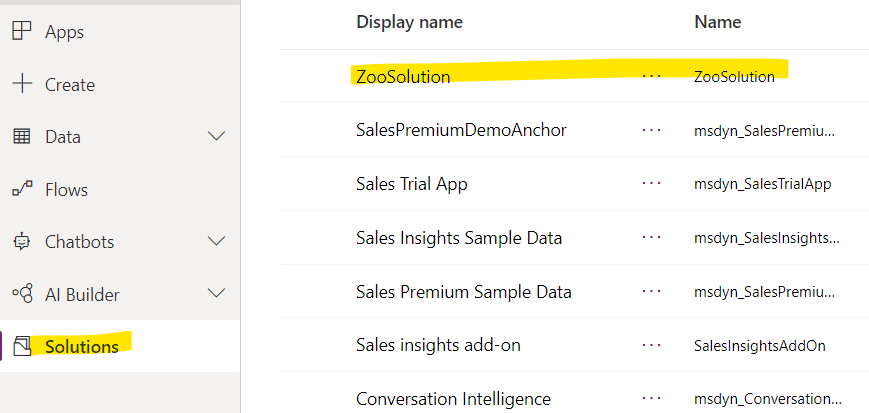
Result
If the release is successful, go to your new environment, go to Solutions and you should see your solution imported.

Oldest comments (0)