 Lost track of your filaments? I have a solution for that! 🛵
Everyone who owns a 3D printer knows the problem that you start to hoard filament reels after a while. If you now have a lot of spools, it becomes annoying to manage them or even to be informed early on when certain spools are slowly coming to an end. A developer (Donkie) has developed Spoolman to solve precisely this problem:

Spoolman is even so well integrated that it is even natively supported by Klipper and KlipperScreen, so your 3D printer communicates directly with Spoolman and also logs consumption.
Installation 🛠️
Spoolman is very easy to install via Docker, provided you have a Docker host. Donkie has also listed a compose file in his readme for the project, which you can simply execute and then Spoolman should be installed and running:
version: '3.8'
services:
  spoolman:
    image: ghcr.io/donkie/spoolman:latest
    restart: unless-stopped
    volumes:
      # Mount the host machine's ./data directory into the container's /home/app/.local/share/spoolman directory
      - type: bind
        source: ./data # This is where the data will be stored locally. Could also be set to for example `source: /home/pi/printer_data/spoolman`.
        target: /home/app/.local/share/spoolman # Do NOT change this line
    ports:
      # Map the host machine's port 7912 to the container's port 8000
      - "7912:8000"
    environment:
      - TZ=Europe/Stockholm # Optional, defaults to UTC
The first look 👀
When you open Spoolman, you will be greeted by a beautifully designed interface.

The first time you start, you will land on the start page, which shows you all the coils you have created. As you haven't created any yet, the overview is of course empty. So that you can now add your spools, you must now create filaments.
Create manufacturer
In order to create filaments, you should first enter all the manufacturers you use in the "Manufacturer" tab. You will need this later when you create the filaments.
Create filaments
Filaments are basically the types of filament on offer that you can buy and the spools are the spools that you have actually bought and physically have with you.
We will simply create a new filament for this. To do this, switch to the Filaments tab and then click on the "Create" button:

Now you can create all your data for the filaments used. I always recommend that you fill in all the data as well as possible, this saves you having to change it later. The nice thing about this is that you can even create metadata such as the color, nozzle temperature and bed temperature, which allows you to have a better overview later.
Once you have filled in and saved everything, you have created your first filament. Filaments actually only serve as a "blueprint" for the data of a spool.
Create spools
Your filament has now been created and you can now create a spool from the filament. To do this, simply switch to the "Spools" tab and create a new spool here.

Here you can even be so granular and even create spools and their weight that are already in use. Now select the previously created filament as the filament. Since my fictitious spool is still new, we assume 0g as the consumption. If you want to create several spools of the same type and the same filament, you can even specify the number below.
We'll leave the date of use values blank - we'll come back to this later.
In my opinion, it's also important that you specify a storage location, even if you only have one storage location. That way, you'll know where the spool is later if you actually have more than one.
Actually, you're already done with that. But Spoolman also offers one or two other gimmicks, such as QR codes.
QR codes
Once you have digitized all your spools, you can also print your own QR codes and stick them on the spools. For my part, I don't need this feature as I only have a few (< 15) reels. But it is very cool. In the reel management you have a button "Print QR code". With one click you get to the menu where you decide which one you want to print:

A window will then open where you will also be shown the print page:

You can even control everything so granularly that you can even use adhesive sheets.
Once you have stuck these QR codes onto the rolls, you can even scan them. There is a button for this at the bottom right of each page:

⚠️
Scanning QR codes only works, if your spoolman is accessible via HTTPS, i.e. you also have a certificate. However, with Lets Encrypt or Nginx Proxy Manager, this is now very easy and, above all, free of charge.
Integration in Klipper/Moonraker
If you use the Klipper software for your 3D printer, you can even integrate Spoolman directly into it. All you have to do is customize your moonraker.conf and add the following block:
# moonraker.conf

[spoolman]
server: http://192.168.0.123:7912
# URL to the Spoolman instance. This parameter must be provided.
sync_rate: 5
# The interval, in seconds, between sync requests with the
# Spoolman server.  The default is 5.
This will then (after a restart) integrate Spoolman directly and you will have a filament selection directly in the interface:

And you can also "insert" a new role directly after a change:

This has the charming advantage that you even get the consumption sent to Spoolman and can see live how much filament is left on the spool. Very very nice!

Integration in KlipperScreen
Because you have generally integrated Spoolman in Klipper/Moonaker, you would also get the same management displayed in KlipperScreen:


Gimmick: Integration in Home Assistant
Because that's not enough for me, I also wrote an integration for Home Assistant so that I can send notifications to my devices here too or automate it in some other way.

So then I can have nice dashboards:

The installation is quite simple using HACS (this should of course be installed beforehand). Once all this is done, you can simply select and configure the integration under "Integrations".
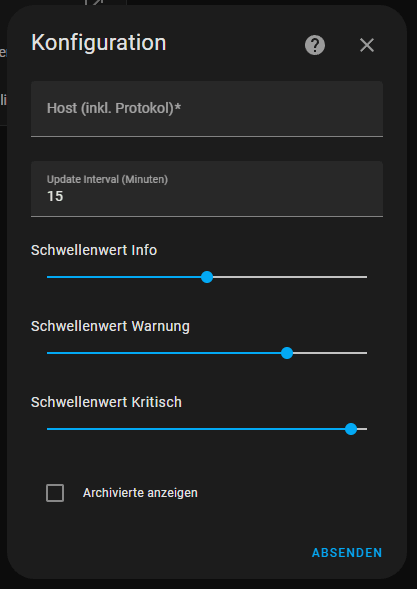
Here you can also define threshold values at which a Home Assistant event is fired. There are thresholds for "Info", "Warning" and "Critical". Depending on which threshold value is reached, the integration sends an event with the following name spoolman_spool_threshold_exceeded. You can react to this in automations.
Once the integration is set up, you should see all your spools per storage location:
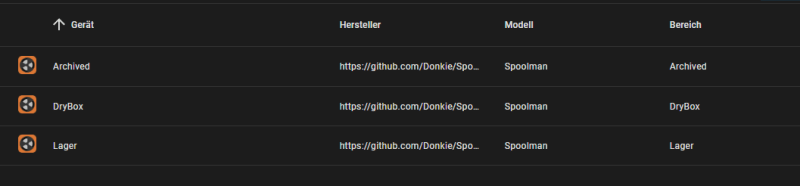
Each storage location then has your created coils alone (you should also specify the manufacturer and storage location in advance):
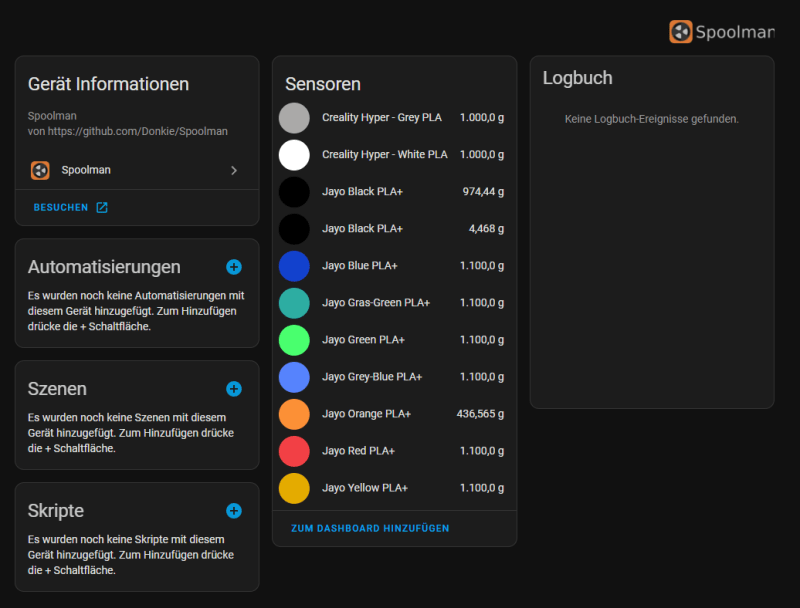
Each spool is then created with the corresponding color and has all the data from Spoolman within the attributes:

Examples of automation or the templates for cards can be found in the Readme.md of the project 👨🚀
With this, you have now digitized your spools, can monitor them and, if necessary, automate them via Home Assistant 🎉
Would spool management be something for you? Or rather not? Let me know in the comments 👇
If you like my posts, it would be nice if you follow my Blog for more tech stuff.

Top comments (2)
This is pretty dang cool, Marco. Good stuff! Appreciate ya sharing.
Thank you for the kind words! Hope you enjoyed the article and the pieces of software ☺️