Sass CSS – If you develop web applications and you have not heard about Sass, then today is your lucky day. To quote a note from the Sass website, it is the most mature, stable and powerful professional grade CSS extension language in the world.
Sass CSS
If you have ever had to work with CSS, you will love Sass. It is a feature rich CSS extension language. Sass CSS is also completely compatible with all CSS versions. It has actively been supported for many years and it is safe to say that it is widely adopted. What Sass will do is enable you to write CSS using Sass and have it compile into CSS when you save. You can also create a minified CSS file.
Looking for something else? Try these links instead:
- Cool Life Hacks using Simple Technology Hacks
- Email Automation Microsoft Flow – Automating Outlook.com
- Automate Trello using DevOps and Wunderlist
Adding to Visual Studio
If you are creating web applications in Visual Studio, you need to do the following to add Sass CSS to your project. Below you will see that I have a normal MVC web application. I am going to add Sass CSS to this project.

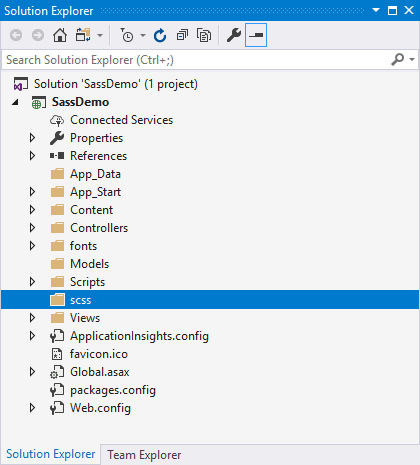
Create a folder in your project called scss. This is where you are going to add all your scss files.
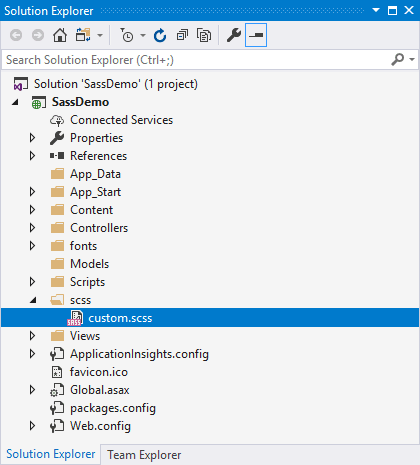
Right-click on the folder and add a new item. You might also see SCSS Style Sheet (SASS) as an option in the context menu.

Add the scss file and call it custom.scss. You can name it anything you like, just be sure to carry that through when looking at the examples in this article.
Adding the Web Compiler
We need to be able to compile the Sass CSS file into a CSS file. To do this, in Visual Studio from the Tools menu click on Extensions and Updates. Perform a search for Web Compiler created by Mads Kristensen and install that.

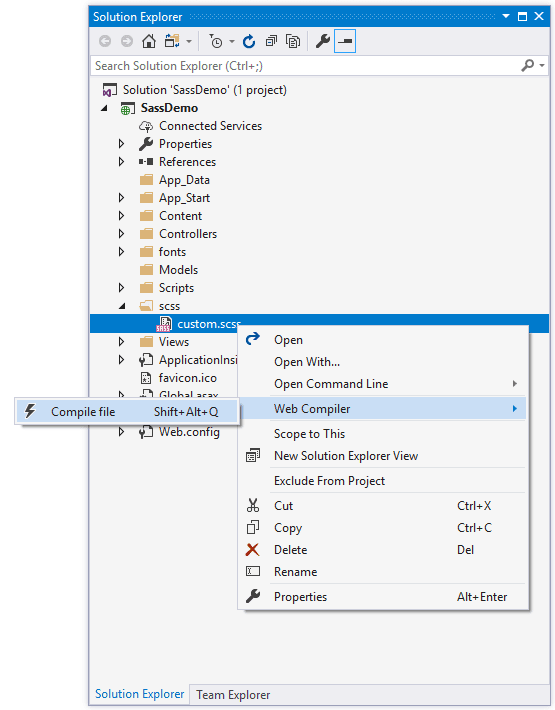
You can now compile the Sass CSS file by right-clicking it and selecting Web Compiler and then clicking on Compile file.
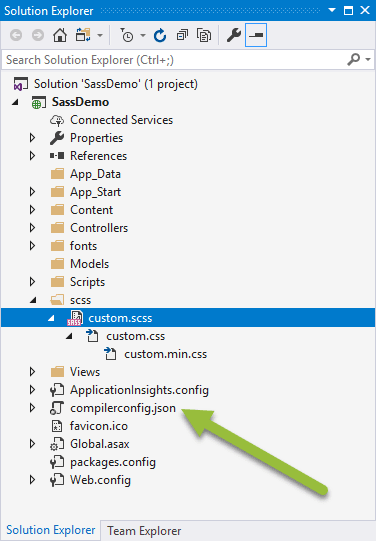
You will see that the compiler creates a compilerconfig.json file as well as a custom.css and custom.min.css file. That is great, but I don’t want to have my CSS files output to the same location as my Sass CSS file. Let’s change that behavior.
Changing the CSS File Output Location
Open the compilerconfig.json file. You will notice that it contains the input location and output location of your files.
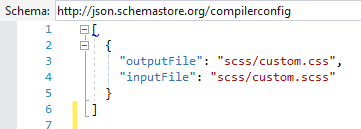
Modify the outputFile path to the Content folder. For the purposes of this article I will stick with the Content folder, but you can change the path to wherever you are storing your web application’s CSS files. You can also name your output CSS file whatever you like. I have just kept mine custom.css.

When you save your compilerconfig.json file, you will notice that the Web Compiler does a build again and the CSS file is output to the path that you specified. You will also notice that the Web Compiler has created the minified CSS file for you too. You can now delete the CSS files created earlier in the Sass CSS folder.

Using the Sass CSS FIle
Open up the custom.scss file and delete the contents. Add a new class called .redButton and set the background color to red.

Next, head on over to your Index.cshtml View and add the redButton class to an element on your page. I added the class to a button on my page.

Swing back to the App_Start folder and locate the BundleConfig.cs file. Add the custom.css file to the StyleBundle class.

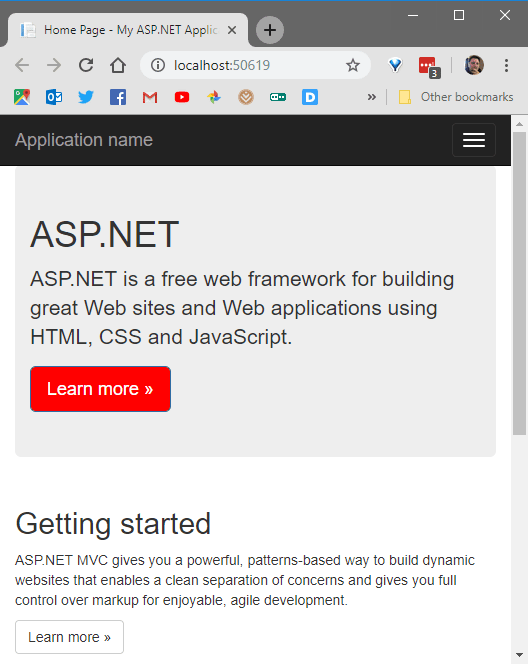
Build your Web Application and run it. You will see that the familliar Jumbotron button is styled red instead of its default blue.
Wrapping up
Sass CSS is a fantastic way to create custom CSS styles for your web application. There is a lot more to show you, so stick around. There will be more articles on Sass CSS in the coming weeks.
The post Sass CSS – This Awesome Extension Will Make You Sassy appeared first on Programming and Tech Blog.

Top comments (0)