Introduction
We shall explore CI/CD workflows in this tutorial, making use of Jenkins Pipeline to take a Spring Boot application from version control through integration, delivery and deployment processes.
The capabilities of Jenkins Pipeline will be used to orchestrate testing, code coverage analysis, containerisation, and deployment to a PaaS.
Your Spring Boot Application
A simple Spring Boot application using the Gradle build tool can be created using Spring Initializr. You will need the Web dependency to configure your app as a web application, and the Actuator dependency to provide a URL for checking the status of your application. Afterwards, generate, download and extract your application. Using an appropriate IDE, open your project files.
Version Control
You will need to init a git repo in the extracted folder and link the repo to GitHub.
Setting up Jenkins Pipeline
We will use a local Jenkins server to run our CI/CD processes. Install Jenkins if you do not have an existing installation. Next, install the Pipeline plugin as follows:
- On your Jenkins Dashboard Select Manage Jenkins.
- Select Manage Plugins.
- Select Available plugins.
- In the text box type in "Pipeline" and install the plugin.
Next, create a new item on your Jenkins dashboard and select Pipeline as the type. In the configuration menu, set the pipeline definition as "Pipeline from SCM" to source the pipeline script from GitHub. Set SCM as "Git" and provide the repository URL formatted as follows (replace angled brackets with relevant values):
https://<github access token>@github.com/<userName>/<name of repository containing pipeline script>.git
NB:
We will use the same GitHub repo used for the Spring application to house the pipeline script.
Set pipeline definition as "Pipeline" if you want to provide the pipeline script directly in Jenkins GUI instead of sourcing it from version control.
Defining a Pipeline Script
Define a Jenkins Pipeline by including a text file - named Jenkinsfile - containing the pipeline script, at the root of your application. The pipeline script specifies the CI/CD processes through which the application passes. You can treat your Jenkinsfile similarly to code and check it into version control.
In this tutorial, we will define a Scripted Pipeline using Groovy-related syntax. Include the following to define a Pipeline that clones your source code from GitHub using the Git plugin and builds your application using the Gradle build tool:
node {
  stage("Clone project") {
    git branch: 'main', url: 'https://github.com/<GitHub username>/<repo name>.git'
  }

  stage("Build project with test execution") {
    sh "./gradlew build"
  }
}
Commit and push your changes, then head to your Jenkins dashboard, select your pipeline and "Build Now". Jenkins will retrieve your pipeline script and orchestrate the stages defined in your pipeline script. Your build should complete successfully.
Setting up Code Coverage Analysis
Code coverage analysis tools quantify the amount of tested code, serving as a valuable tool to inform on code structure and testing related decisions. We will make use of JaCoCo, JaCoCo produces reports on multiple kinds of code coverage metrics including instructions, line and branch coverage.
Implement the following steps to configure JaCoCo:
- Install the JaCoCo Jenkins plugin.
- Add the JaCoCo plugin within the plugins block in your build.gradle file.
plugins {
  ...
  id 'jacoco'
}
- Configure JaCoCo to run after the Gradle test task.
test {
  finalizedBy jacocoTestReport
}
- Update Jenkinsfile, instructing the JaCoCo agent on what files to analyse, the location of the coverage report and to exclude test files.
node {
  stage("Clone project") {
    git branch: 'main', url: 'https://github.com/<GitHub username>/<repo name>.git'
  }

  stage("Build project with test execution") {
    sh "./gradlew build"
  }

  jacoco(
    execPattern: '**/*.exec',
    sourcePattern: 'src/main/java',
    exclusionPattern: 'src/test*'
  )
}
Commit your changes and build the Jenkins pipeline again. You should have a new Coverage Trend button on your Pipeline page linking to additional information about code coverage.

Deploying a Container Image to DockerHub
In this section, we will setup the automated generation and deployment of a Docker container image. You will need a Docker Hub account and the Jib Gradle Plugin.
Access Docker command from Pipeline Script
Using your Docker Hub account, create a repository to hold the container image. Afterwards, allow access to the docker installation on your computer. Implement the following steps to achieve this:
In Jenkins GUI, navigate to Manage Jenkins > Configure System > Global properties.
Set an environment variable for PATH+EXTRA with it's value as the directory containing your docker executable.
You can find your docker installation by runningwhere dockerin a terminal window. For example, given a location/usr/local/bin/docker, the relevant value is/usr/local/bin/.
Set Docker Hub Credentials in Jenkins
You also need to set your Docker Hub login credentials within Jenkins. Set a Username with password credential with ID "DOCKER_CRED" and the appropriate values for username and password.
Configure Jib
The Jib Gradle Plugin enables the generation of a container image without needing a dockerfile. Implement the following steps to configure Jib:
- Add the plugin to the plugins block in your build.gradle file and configure the values for the image's name and tags.
plugins {
  ...
  id 'com.google.cloud.tools.jib' version '3.3.1'
}

jib.to.image = '<docker hub username>/<repository name>'
jib.to.tags = [version, 'latest']
- Update Jenkinsfile adding steps to trigger the jib task. ```
node {
stage("Clone project") {
git branch: 'main', url: 'https://github.com//.git'
}
stage("Build project with test execution") {
sh "./gradlew build"
}
stage("Deploy to DockerHub with Jib") {
withCredentials([string(credentialsId: 'DOCKER_PASSWORD', variable: 'DOCKER_PASSWORD'), string(credentialsId: 'DOCKER_USERNAME', variable: 'DOCKER_USERNAME')]) {
sh '''
echo "${DOCKER_PASSWORD}" | docker login -u "${DOCKER_USERNAME}" --password-stdin
./gradlew jib -Djib.to.auth.username="${DOCKER_USERNAME}" -Djib.to.auth.password="${DOCKER_PASSWORD}"
'''
}
}
jacoco(
execPattern: '*/.exec',
sourcePattern: 'src/main/java',
exclusionPattern: 'src/test*'
)
}
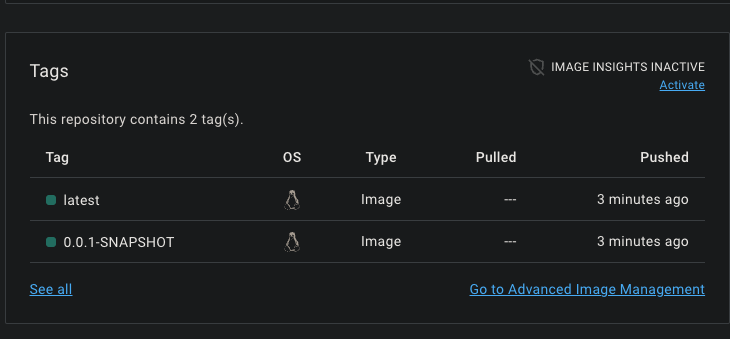
Commit your changes and build the Jenkins pipeline. After a successful build, the container image should be available from your Docker Hub repository.
## Deploying application to Heroku
We will tackle deployment as a final step, using Heroku platform as a service to host the spring boot application. You will need a [Heroku account](https://signup.heroku.com/) and the [Heroku Gradle plugin](https://github.com/heroku/heroku-gradle-plugin).
### Prepare App for Heroku
Create a new app from your Heroku [dashboard](https://dashboard.heroku.com/apps) and give it a name, then add a **Procfile** to the root of your Spring Boot application containing the following command to start up your application `web: java -Dserver.port=$PORT $JAVA_OPTS -jar build/libs/<Name of your jar file>.jar`. You can find your jar file in the **build/libs** directory after running the Gradle build task.
**NB:**
- Do not use the "-plain" jar file as it does not contain the dependencies required by your app to run.
- Also create a **system.properties** file at the root of your Spring Boot application and specify the java version used by your application within it. For example, `java.runtime.version=17` informs Heroku to launch the app using the Java 17 runtime.
### Set Heroku API Key as Jenkins Credential
Retrieve your Heroku API key from your [account settings](https://dashboard.heroku.com/account). Next, set a **Secret text** credential with ID "HEROKU_API_KEY" and paste your Heroku API key in the secret field.
### Configure Heroku Gradle Plugin
- Add the plugin to the plugins block in your **build.gradle** file and configure the values for the Heroku app name.
plugins {
...
id 'com.heroku.sdk.heroku-gradle' version '3.0.0'
}
heroku.appName = ''
- Update Jenkinsfile adding steps to run the Heroku deploy step in parallel with the Jib deploy step.
node {
stage("Clone project") {
git branch: 'main', url: 'https://github.com//.git'
}
stage("Build project with test execution") {
sh "./gradlew build"
}
stage("Deploy to DockerHub with Jib and to Heroku") {
parallel([
docker: {
withCredentials([usernamePassword(credentialsId: 'DOCKER_CRED', usernameVariable: 'DOCKER_USERNAME', passwordVariable: 'DOCKER_PASSWORD')]) {
sh '''
echo "${DOCKER_PASSWORD}" | docker login -u "${DOCKER_USERNAME}" --password-stdin
./gradlew jib -Djib.to.auth.username="${DOCKER_USERNAME}" -Djib.to.auth.password="${DOCKER_PASSWORD}"
'''
}
},
heroku: {
withCredentials([string(credentialsId: 'HEROKU_KEY', variable: 'HEROKU_API_KEY')]) {
sh './gradlew deployHeroku'
}
}
])
}
jacoco(
execPattern: '*/.exec',
sourcePattern: 'src/main/java',
exclusionPattern: 'src/test*'
)
}
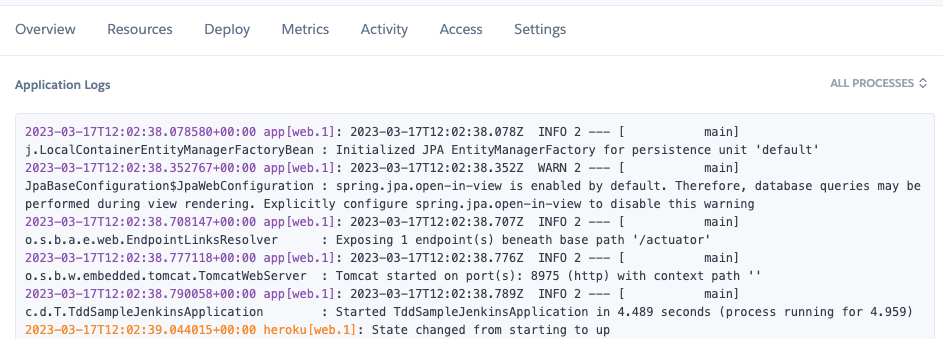
Commit your changes and build the Jenkins pipeline. After a successful build, your Heroku app should be acessible via `https://<Heroku app name>.herokuapp.com/`
## Conclusion
We covered a number of essential steps in this tutorial. First, we pushed our application to a GitHub repository, next we used Jenkins Pipeline to retrieve and build our application. After that, we introduced code coverage analysis and then pushed a container image to Docker Hub. Lastly, we deployed our application to Heroku PaaS, ready for consumption.
We have been able to harness the capabilities of Jenkins Pipelines to automate core aspects of CI/CD for a Spring Boot application. We have covered integration, delivery and deployment of the application and simplified the aforementioned steps to execute with the push of a button. We can take it further by taking advantage of Jenkins Pipeline build triggers to run the pipeline script periodically or based on some event, for example, pushing code to GitHub.
With the work done, new features can be delivered directly to various environments and to customers while maintaining quality by implementing test-driven development and hinging build success on the successful completion of tests.
You can find the complete code on [GitHub](https://github.com/dims26/TDDSampleJenkins).

Top comments (0)