Introduction
WordPress is one of the most widely used content management systems (CMS) in the world, making up over 33% of the web and providing technical and non-technical users alike a way to build and grow. As WordPress sites scale however, managing large sets of data and assets can sometimes surface latency errors that can affect end user load times.
In this tutorial, learn how to install Spaces, an S3-compatible object storage service that lets you store and serve large amounts of data, to optimize your WordPress site’s speed and performance.
Prerequisites
In order to complete this tutorial, you’ll need a DigitalOcean account, and ideally a WordPress installation on Ubuntu 20.04. There are many different starting points for your WordPress installation, including:
- A hosted solution providing WordPress on Ubuntu 20.04
- Manual installation on a Droplet
- A 1-Click App solution providing WordPress on Ubuntu 20.04
Whichever you choose, this tutorial will start with the assumption that you have a DigitalOcean account and WordPress installation configured with an administrative user on Ubuntu 20.04.
Create a Space
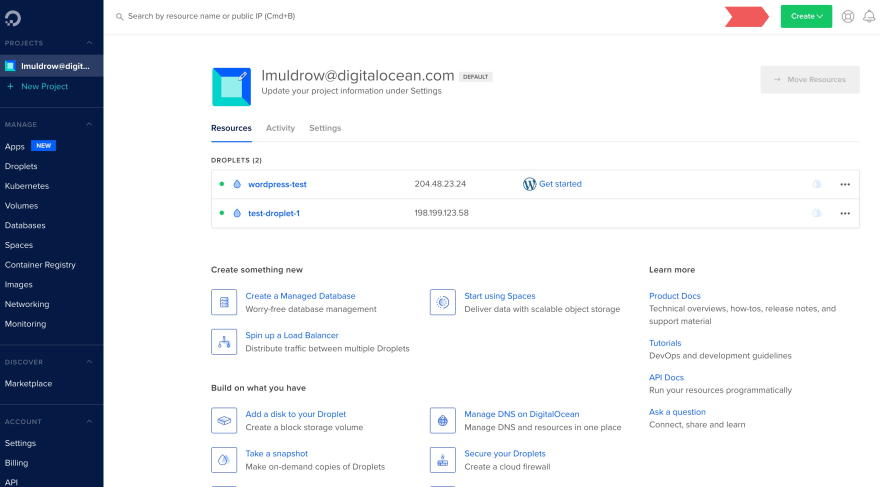
From your DigitalOcean control panel, click the Spaces button, in the sidebar on the left:
If you do not have pre existing Spaces created, you’ll see a button prompting you to create a space. You can click that button and follow along. If you have an existing Spaces installation, you'll see a list of your existing Spaces. In this case, you can use the Create button on the top right of the screen to create a new Space and follow the rest of this tutorial.
Next, you’ll make a series of choices to customize your Space. Let’s review each choice for your WordPress installation.
Select Datacenter Region
Pick the datacenter region closest to your customers general location.
Enable the CDN
A content delivery network (CDN) is a geographically distributed group of servers optimized to deliver static content to end users. This static content can be almost any sort of data, but CDNs are most commonly used to deliver web pages and their related files, streaming video and audio, and large software packages.
Using a CDN with your WordPress installation can give site visitors the speed and efficiency they’ve come to expect with WordPress. Should you choose to enable the CDN, you’ll be presented with two choices:
Enter a subdomain for your Space. For help on configuring your domain or subdomain with DigitalOcean servers, visit our tutorial, “How to Point to DigitalOcean Nameservers From Common Domain Registrars”. Edge Cache TTL is set at 1 hour by default – feel free to change this to fit your use case.
Static Site Hosting
You can use Static Site Hosting to serve your static html, images and js files. This can be helpful for WordPress installations to reduce content load time — if you decide to use it for your WordPress installation, you can access your Space via http protocol by adding a CNAME record to your DNS host. CDN custom domain cannot be used with static site hosting.
Allowing File Listing
File listing allows for anyone who queries to list the content of your Space. Choose whether or now to enable this setting, keeping in mind that restricting file listing only restricts access to the metadata detailing file contents. The file itself may still be visible.
Finalize and Create
Add your unique subdomain name and select the Project that you’d like your space to be assigned to:
If everything looks correct in your Spaces configuration, click Create Space. You’ll be taken to your new space, once created:
Add to your Space
There are several ways to add connectivity between your WordPress installation and your new Space.
If you intend to use DigitalOcean Spaces for your WordPress media library, follow our tutorial, “How to Store WordPress Assets on DigitalOcean Spaces”, to use the DigitalOcean Spaces Sync WordPress plugin to connect your installation with your new Space.
To extend the speed and performance of asset delivery using your new Space, our tutorial “How to Speed Up WordPress Asset Delivery Using DigitalOcean Spaces CDN” shares tips and suggestions on optimizing the Spaces CDN to deliver media assets efficiently.
Conclusion
Using Spaces with your WordPress installation enables you to provide a secure, fast, user-focused experience for site visitors. To dive deeper into using your new Space to benefit the speed and performance of your WordPress installation, visit the following tutorials:
To learn more about how to optimize your WordPress installation, visit our complete list of resources for Wordpress.


Top comments (0)