
Prologue
I use my Synology DS920+ mainly for the storage of family photos and videos and I have a ton of them. I also have documents, eBooks etc. stored on it. The NAS is not exposed to internet, and I usually access it through an L2TP VPN connection, which I'd configured on my Ubiquiti UniFi DreamMachine in the past, from outside of my home network. It's usually documents that I've accessed from outside so far and never really accessed photos and videos.
Last week I went on a family weekend getaway trip where I needed to look for some old family photos and videos. I flipped the VPN switch on my iPhone and got connected almost immediately. But not for long. It was frequently disconnecting while watching videos. Usually the L2TP connection works fine for me but something happened that day. I really wished that I had OpenVPN set up as an alternative. And that's exactly what I did first thing after returning home from the trip.
What we're doing
This tutorial will be split into 3 parts. In the first part, which is this post, we'll set up the OpenVPN server on our Synology NAS.
In the second part, we'll connect to the VPN server from Windows 10 and iOS, without using client-side Certificate Authentication.
And in the last part, we'll connect from Windows 10 and iOS using client-side Certificate Authentication.
The setup
It's critical to mention the details of the hardware and software being used because in the world of tech, the way of doing things can often change with the changes in hardware or software. So, following are our setup:
NAS: Synology DS920+, DSM 7.1-42661 Update 4
OpenVPN server app: VPN Server package (1.4.7-2901) by Synology Inc.
Router: Ubiquiti UniFi DreamMachine
OpenVPN clients:
- OpenVPN Connect 3.3.6.2752 on Windows 10
- OpenVPN Connect 3.3.2.5086 on iOS 16.0.2
The OpenVPN Connect client is an official client developed and maintained by OpenVPN Inc. It can be downloaded from here:
https://openvpn.net/client-connect-vpn-for-windows/
There's another client called OpenVPN GUI. This is a community project and can also be used on Windows. It can be downloaded from here:
https://openvpn.net/community-downloads/
We'll use the official OpenVPN Connect client as the UX is pretty identical on both Windows and iOS.
DDNS
For OpenVPN to work, we need a static IP address for our server. Like most people, I have dynamic external IP address, so creating a DDNS (Dynamic Domain Name System) hostname is required so that even if the external IP address changes, the server can be reached using the DDNS hostname. DDNS allows connection to the Synology NAS over the internet by mapping a hostname to its IP address. I've already configured DDNS using the free synology.me DDNS provider. It's beyond the scope of this post how to do it, but this doc from Synology may be followed: https://kb.synology.com/en-us/DSM/help/DSM/AdminCenter/connection_ddns?version=7
Let's say our DDNS hostname is myhostname.synology.me.
Note: if we have a static external IP address, which never changes, then we can simply use that and we do not have to configure DDNS.
Also note that configuring DDNS using Synology provider will require us to get a certificate from Let's Encrypt and set it as default. This certificate will be automatically used when we export the configuration to be used with the client in the second part.
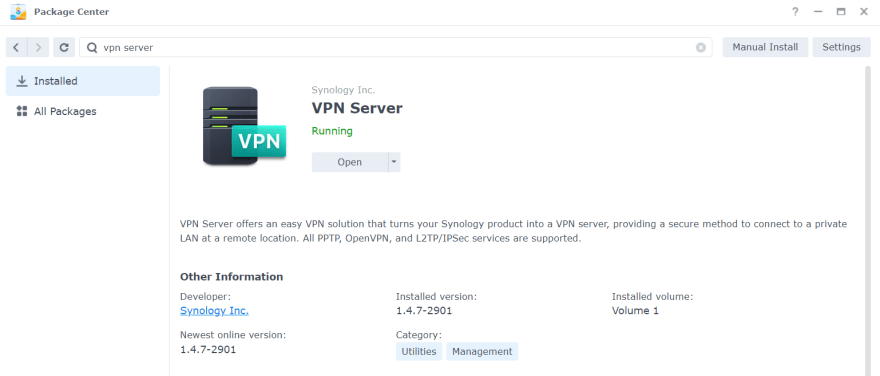
Installing the VPN Server package
It's probably the easiest task. We just search for it and install. That's it.
Creating a user to use with OpenVPN server
Any existing user we have on our NAS would work just fine. We only need to grant it the required privilege. But we should really create a separate user just for the purpose of connecting to the VPN server. In doing so, we can restrict the VPN user from pretty much everything else on the NAS. So, in case it gets compromised, it can't be used to access other apps or shared folders.
Let's open up Control Panel, select User & Group from the left-hand-side panel and hit the Create button.

The User Creation Wizard will pop up. On the first screen, we fill in the required details like Name and Password and hit Next.

On the next screen, we can add the user to any group we want. By default, the user is added to the System default group users. In case we want to create multiple VPN users for different members of the family, we may want to create a dedicated group, say 'vpnusers', with the required privileges or restrictions and assign all VPN users to that group. That way we wouldn't have to restrict or grant the same privileges to individual users manually. For the purpose of this tutorial, we'll leave this as-is and assign the restrictions/ privileges manually on the next screens.

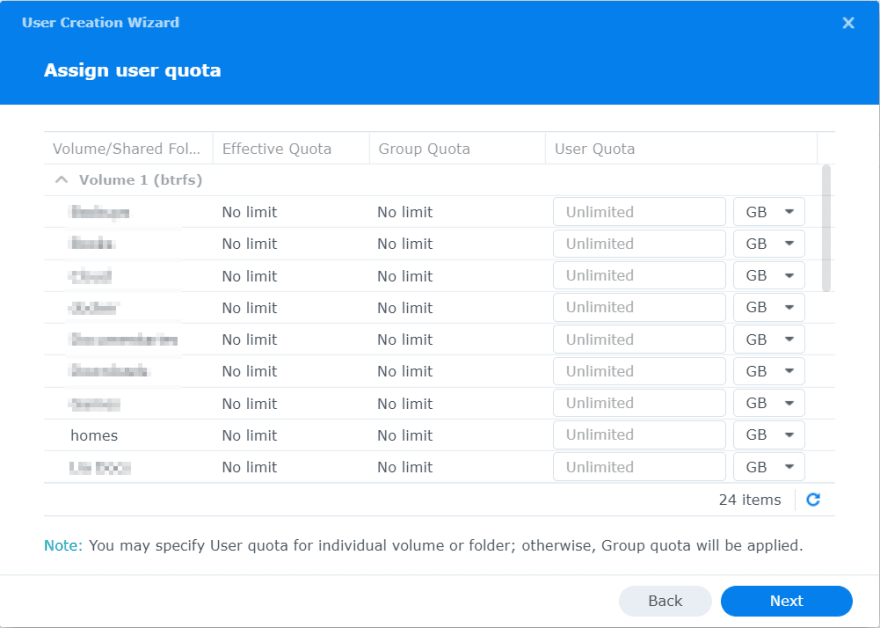
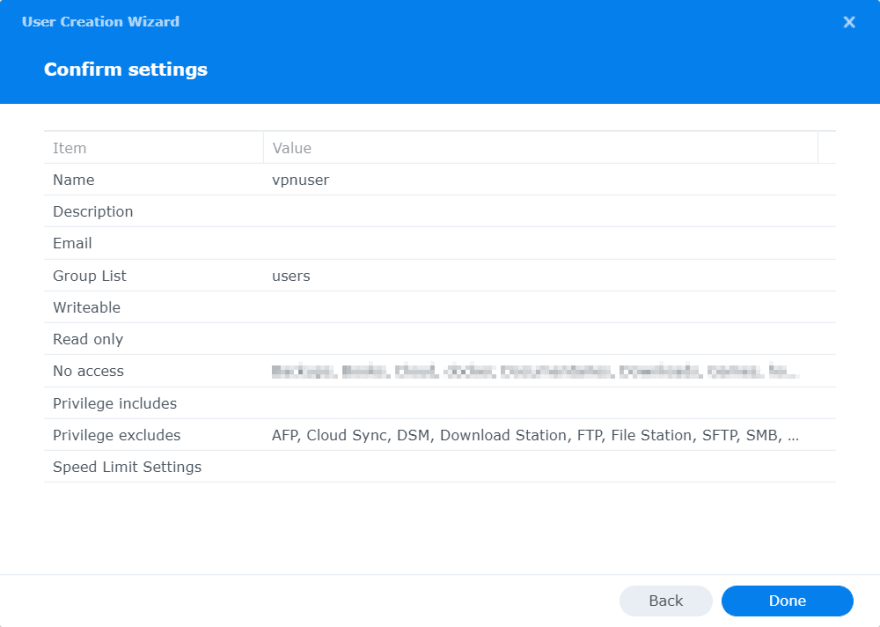
On the following screen, we can assign permission to access different shared folders. We don't want to assign any. So let's tick the No Access checkbox at the top to deny access to all shared folders.

We'll leave the next step as-is.
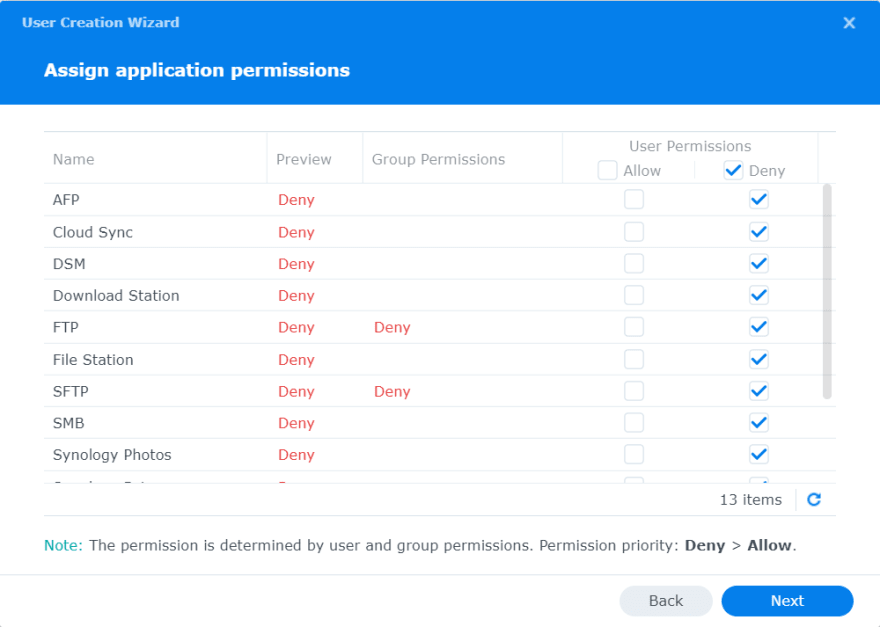
Next screen is for assigning application permissions and we want to deny access to all.
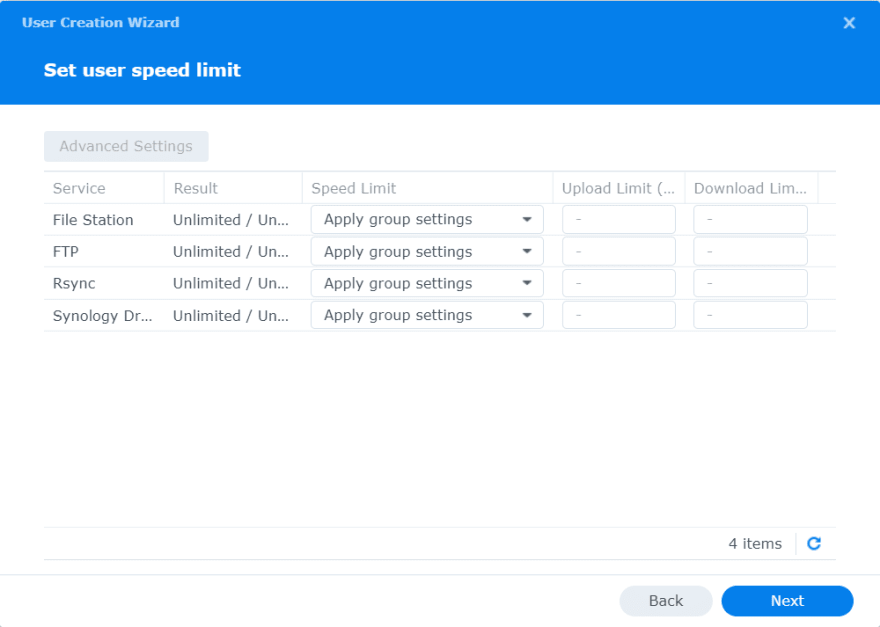
We'll leave the next step as-is.
The last step is for reviewing the settings and confirm.
Configuring the OpenVPN server
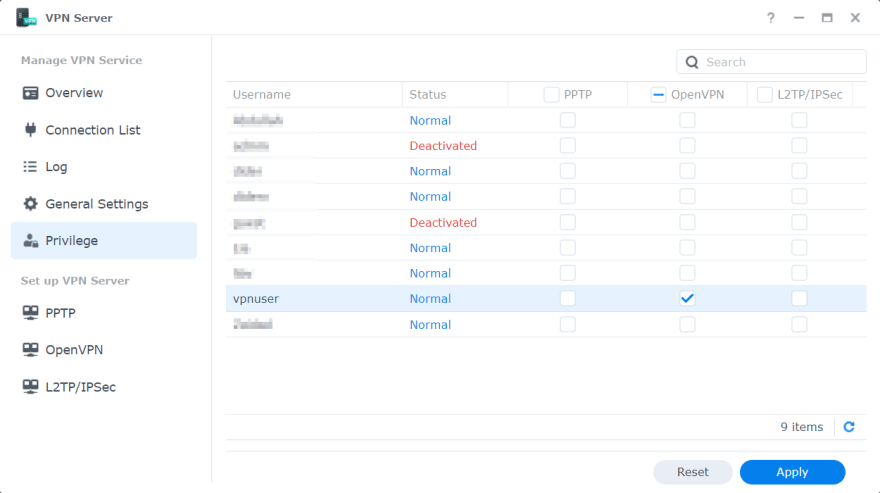
Let's open up the VPN Server app and head straight to the Privilege screen. We'll grant our newly created vpnuser the privilege to connect to the VPN Server.
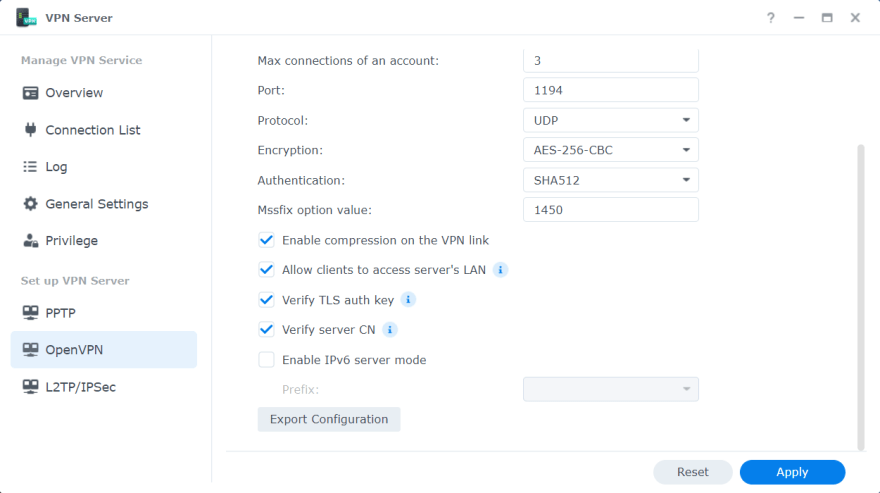
Next, we'll go to the screen for configuring OpenVPN and tick Enable OpenVPN server checkbox. On this screen we can customize each of the settings. We'll leave the dropdowns as-is, with the default values selected. Then we'll check only the first 4 checkboxes.
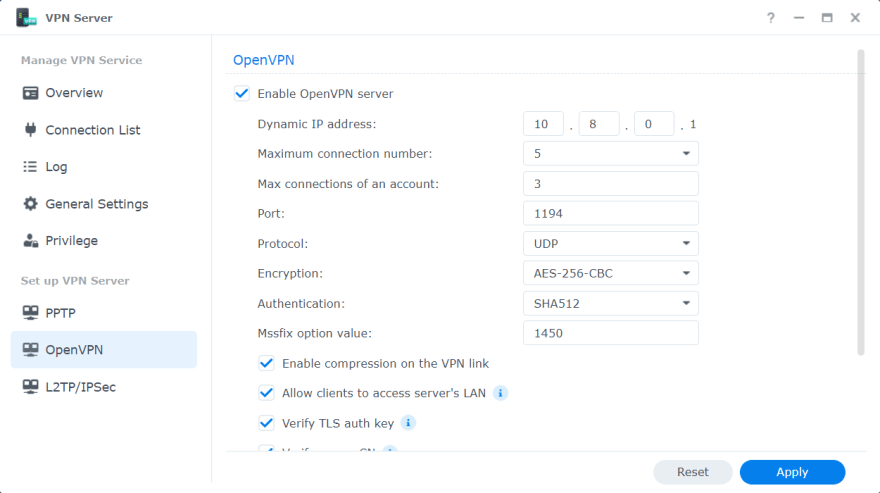
If we want to enable IPv6 server mode, we can check the last one too. But in order to enable OpenVPN server to send IPv6 addresses, we have to first get a prefix via 6in4/6to4/DHCP-PD in Control Panel > Network > Network Interface, then select the prefix on this screen.
If we don't want the clients to be able to access the server's LAN, we can untick the second checkbox Allow clients to access server's LAN.
Also, take note of the second-to-last checkbox Verify server CN. We can leave it unticked. But if we tick it, then it creates an issue for the OpenVPN Connect client, which we'll see when we configure the client in the second part of this tutorial.
Now we have to click Apply for the changes to take effect first before we export the configuration. After clicking the Apply button, we are shown an information dialog which tells us to check port forwarding and firewall settings on both the NAS and the router. We'll talk about those settings shortly.
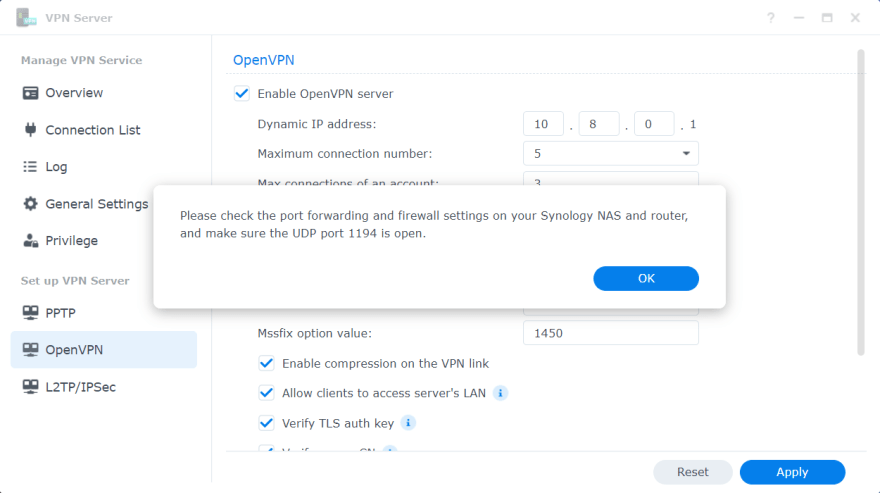
Note that it's a security best practice to not use any default configured port (like 1194 here) and instead use a different available port.
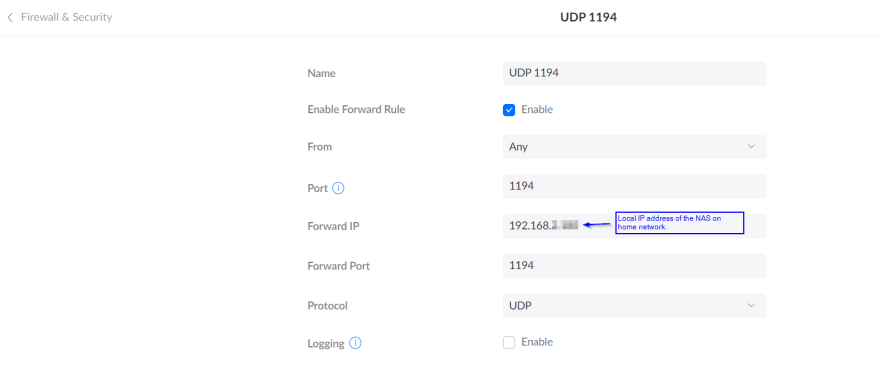
Enable port forwarding on the router
Before the VPN server connection request could reach the Synology NAS (where the VPN server runs), it reaches our router using the external IP address on port 1194. This is the default configured port, whcih we saw earlier. The router then forwards the request to the same port at the NAS' local IP address. But this does not happen automatically. That's why we need to enable port forwarding on the router. The process to do it is pretty much same on most routers and can easily be found online by searching with the router model name. Following is how it looks like on our Ubiquiti UniFi DreamMachine.
Check firewall settings on the router
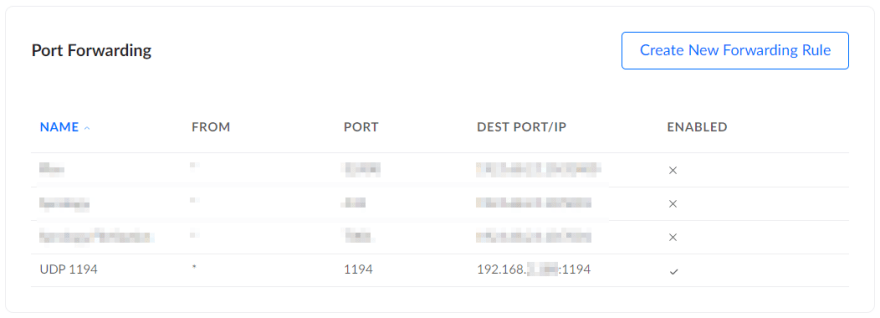
Most of the time any connection attempt on port 1194 will be blocked by default on the routers. So we need to allow this by creating a firewall rule.
Luckily on our DreamMachine, a rule is automatically created once the port forwarding has been set up.

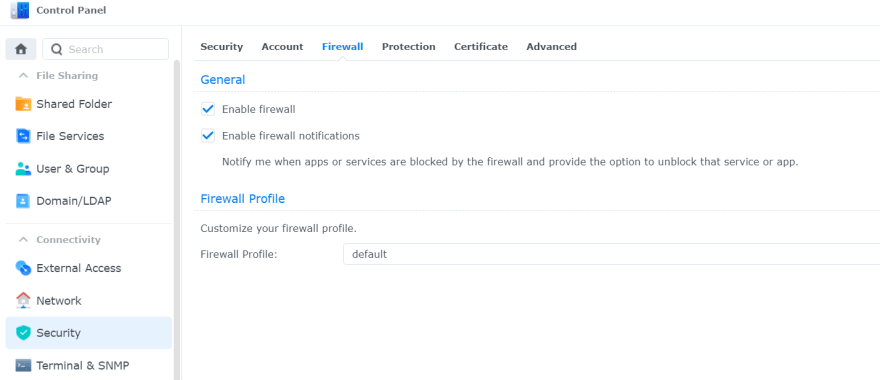
Check firewall settings on the NAS
We need to make sure that port 1194 is allowed to receive UDP connection requests in the Synology firewall. I already have firewall enabled with the default profile and found that the VPN connection can be established without having to add any additional rule. But if it's not the case then we have to add a rule to enable port 1194 (or whatever port we've configured).
Summary
That's basically it as far as configuring the OpenVPN server on Synology NAS is concerned. It's not too difficult but we do need to take care to check the firewall settings on both the NAS and the router as most of the time VPN connection issues are caused by misconfigured firewalls.
In the next part, we'll look at how to connect to the OpenVPN server we've just configured.

Oldest comments (0)