Welcome, Flutter enthusiasts and future mobile app developers! If you're looking to create dynamic, scalable, and real-time mobile applications, learning how to perform CRUD (Create, Read, Update, Delete) operations with Firestore in Flutter is essential. This beginner-friendly guide will walk you through the fundamental steps of integrating Firestore with Flutter and how to work with photos within your app.
Before diving in, make sure you have the following ready:
- A basic understanding of Dart and Flutter.
- Flutter installed on your machine.
- And make sure you were your thinking caps !!
Step 1: Create a Firebase Project
Navigate to your Firebase Console and click Add Project.
Step 2: Setup Your Firebase Project
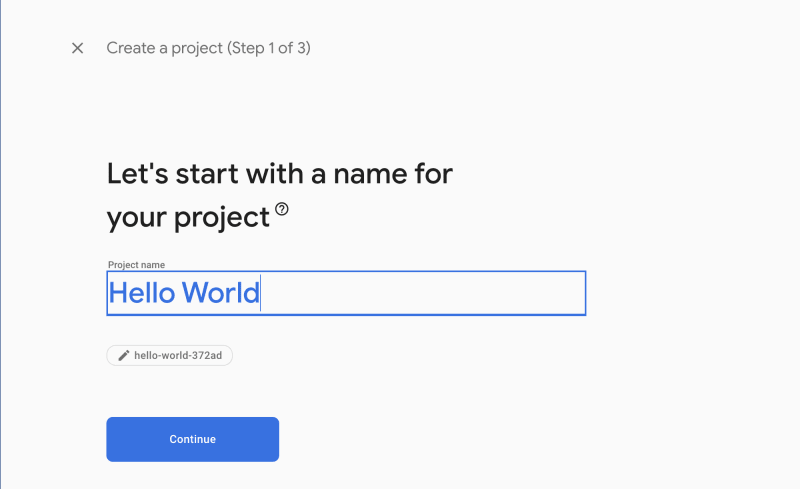
Give your project a name and enable google analytics.
Step 3: Connecting the Flutter App to the Firebase Project
To connect the flutter app to firebase, we must install firebase-cli. (PS: this requires nodejs to be installed https://nodejs.org/en/download)
npm install -g firebase-tools
firebase login
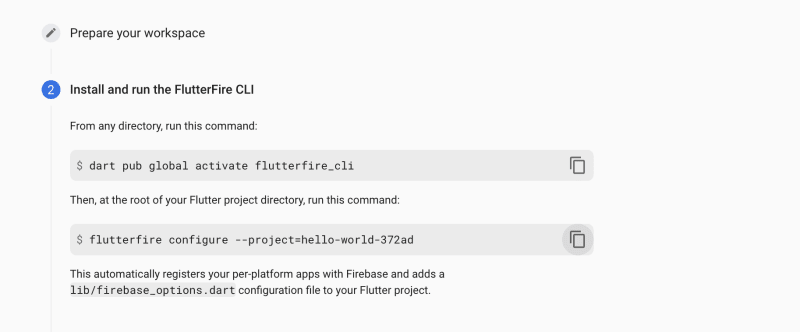
Now go ahead and click the Flutter icon on the dashboard of your firebase project.
Run the commands and you'll have your Firebase Project connected to your Flutter App
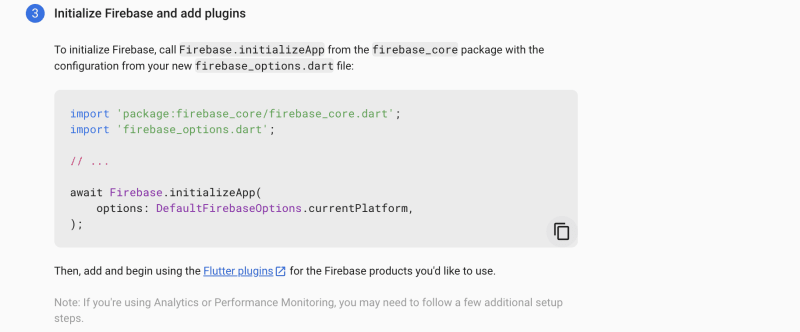
Now navigate to main.dart and paste this code just above your runApp()
Lesssgoooo 🎉 you've SUCCESSFULLY Connected your Flutter app to Firebase
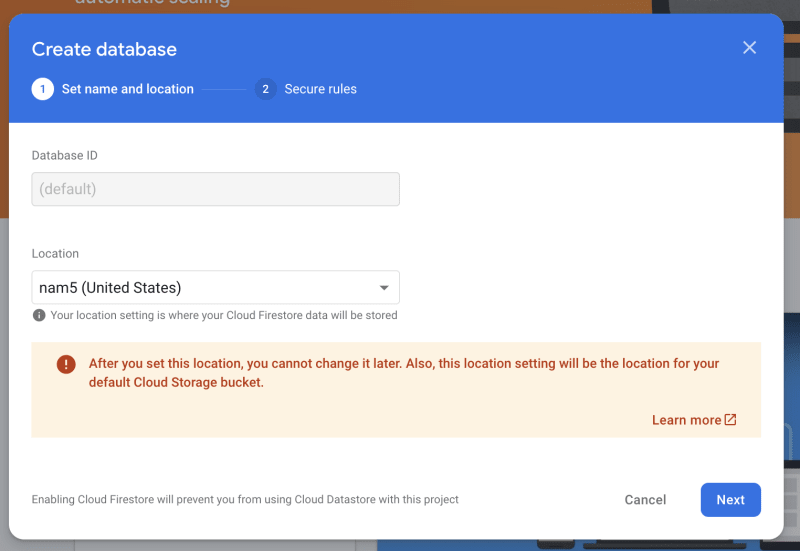
Now you just have to navigate to Firestore and enable the feature
Step 4: Adding Dependencies
First, add the necessary Firestore package to your pubspec.yaml file:
dependencies:
  flutter:
    sdk: flutter
  cloud_firestore: ^latest_version
  firebase_storage: ^latest_version
After saving the file, run flutter pub get in your terminal to install the packages.
CRUD Operations
Create (Adding Data)
To add data to Firestore, you'll use the collection and add methods:
FirebaseFirestore.instance.collection('users').add({
  'name': 'Jane Doe',
  'age': 30,
  'email': 'jane.doe@example.com',
});
Read (Retrieving Data)
To fetch data, you'll use collection and get:
FirebaseFirestore.instance.collection('users').get().then((querySnapshot) {
  querySnapshot.docs.forEach((result) {
    print(result.data());
  });
});
Update (Modifying Data)
For updating a document, you'll need its ID:
FirebaseFirestore.instance.collection('users').doc(documentId).update({
  'age': 31,
});
Delete (Removing Data)
To delete a document, also use the document's ID:
FirebaseFirestore.instance.collection('users').doc(documentId).delete();
Integrating Photos with Firestore and Flutter
Working with photos involves storing the images in Firebase Storage and keeping references in Firestore.
Uploading Images
Apart from just Firestore, Firebase offers a lot of other features to like Firebase Storage and much more....
Now lets take a loot at how to use Firebase Storage!!
Step 1: Uploading Images into the Firebase Storage
FirebaseStorage storage = FirebaseStorage.instance;
TaskSnapshot snapshot = await storage.ref('uploads/user-profile.jpg').putFile(imageFile);
String downloadUrl = await snapshot.ref.getDownloadURL();
Step 2: Storing Image URLs in Firestore
After uploading, save the image URL to Firestore:
FirebaseFirestore.instance.collection('users').doc(userId).update({
  'profileImageUrl': downloadUrl,
});
Step 3: Displaying Images in Flutter
To display the image, use the Image.network widget with the Firestore URL:
Image.network(downloadUrl);
Congratulations! 🎉🎉
You now have a foundational understanding of CRUD operations in Firestore with Flutter and how to integrate photos into your app. As you continue your journey, remember that practice is key to mastery. Keep experimenting, building, and learning.
Happy coding!








Top comments (0)