What I built
Introducing Caliex, an innovative command-line tool that simplifies the process of managing Github repositories. Caliex is designed to empower developers and streamline their workflows.
Caliex provides a fast and efficient way to manage Github repositories, without ever leaving the command line. Its seamless integration with Github API enables it to perform CRUD operations with ease, thus providing users with the power to handle multiple repositories simultaneously with simple and straightforward commands.
By building Caliex, I aimed to address the pain points developers often encounter when managing Github repositories manually. Caliex eliminates the need for manual navigation to the Github website, providing users with a smooth and hassle-free experience.
Category Submission:
Wacky Wildcards
App Link
Screenshots
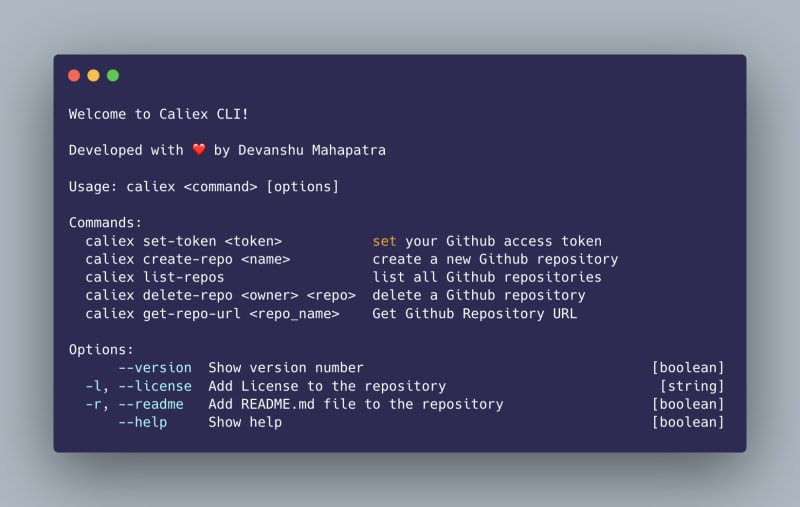
Image: Commands for Caliex 👇
Caliex Working
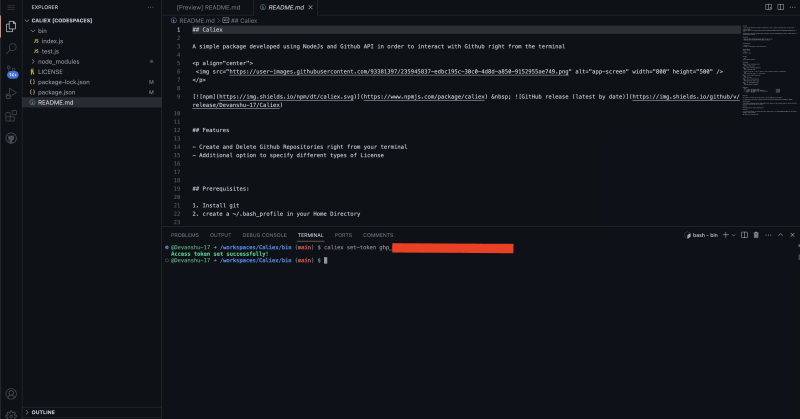
Image: Setting the Github Access token 👇
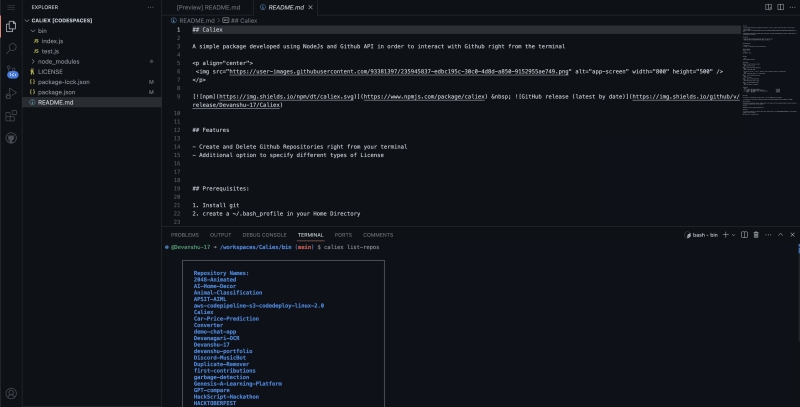
Image: Listing all the Repositories 👇
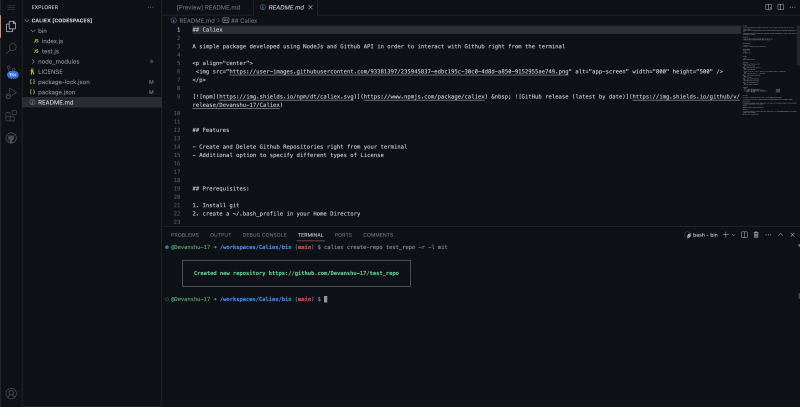
Image: Creating a Repository with Readme file and a License 👇
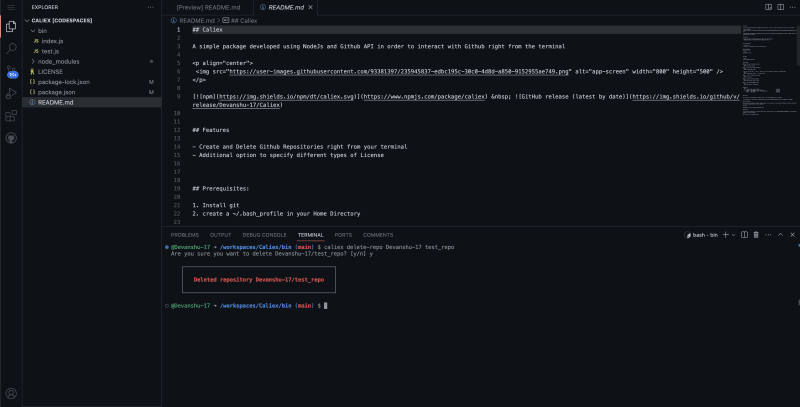
Image: Deleting a Repository 👇
Description
Caliex was built to simplify Github repository management for developers. With Caliex, users can create repositories with a single command, set an access token to authenticate their Github account, and delete repositories without having to navigate through the Github UI.
Link to Source Code
 Devanshu-17
/
Caliex
A simple package developed using NodeJs and Github API in order to interact with Github right from the terminal
Caliex
A simple package developed using NodeJs and Github API in order to interact with Github right from the terminal
Features
- Create and Delete Github Repositories right from your terminal
- Additional option to specify different types of License
Prerequisites:
- Install git
- create a ~/.bash_profile in your Home Directory
Installation
Install via NPM:
npm install caliex
Usage:
caliex <command> [options]
Commands:
- Set your Github access token
caliex set-token <token>
- Create a new Github repository
caliex create-repo <name>
- You can also use the "-r" and "-l" option to create a readme and license file respectively:
caliex create-repo <name> -r -l <license_name>
- List all Github repositories
caliex list-repos
- Delete a Github Repository
caliex delete-repo <owner> <repo>
- Get Github Repository URL
caliex get-repo-url <repo_name>
Options:
  -v, --version  Show version number                                   [boolean]
-l, --license…Permissive License
MIT License
Background (What made you decide to build this particular app? What inspired you?)
As someone who prefers working on the command-line interface, I found it tiring to go to the Github site every time I needed to create or delete a repository, and then switch back to the CLI for git commands. This led me to create Caliex, a command-line tool that allows me to perform all these tasks from the comfort of my terminal.
Caliex makes it easy to list, create, and delete Github repositories without ever leaving the CLI. It utilizes the Github API to fetch repository information and perform CRUD (create, read, update, delete) operations on them.
If you're someone who works on Github often and prefers working from the command-line, Caliex can save you a lot of time and effort. You can find the source code on Github and install it easily from NPM registry.
How I built it (How did you utilize GitHub Actions or GitHub Codespaces? Did you learn something new along the way? Pick up a new skill?)
Building Caliex was an exciting opportunity for me to learn about REST APIs and how to interact with Github's API. I developed my knowledge of Node.js and CLI tools and became proficient in creating interactive command-line interfaces with libraries such as Inquirer.js.
During the development of Caliex, I utilized GitHub Codespaces as my development environment instead of an offline terminal. This allowed me to build the entire application online, eliminating the need for local development environments. I learned how to set up my development environment with the necessary dependencies and configurations, as well as how to use the built-in VS Code editor to improve my workflow. Besides, managing multiple environments for different branches of the application's codebase became easy with Codespaces, and I learned new skills related to managing my development environment within the Codespaces.
I also utilized Github Actions to automatically publish new versions of Caliex to the NPM registry, whenever I release a new version on Github
Overall, GitHub Codespaces proved to be an efficient and effective way to build Caliex. Not only did it provide a convenient development environment, but it also helped me become proficient in developing code in the cloud. I intend to continue using GitHub Codespaces for future projects to take advantage of its features and benefits.
Additional Resources/Info
For more information on how to set up and use Caliex, check out the Caliex GitHub Repository. I encourage you to contribute, provide feedback, and help us improve this invaluable tool for developers. Together, we can make software development more secure and efficient! 🚀




Top comments (2)
That's great! It will certainly save me much time
Thank you :)