
This is the second in a three-part series on P5.js (from here 'P5') - a creative coding library that makes working with the Canvas API much easier. In part one, we covered how to draw elements on the screen and react to keyboard and mouse input.
Today, we're taking that theoretical knowledge and building some features you may need when creating a game. Then, in next week's final part, we will add voice functionality to our game using Deepgram.
Collision Detection
Every element you draw in a P5 sketch has a specific placement and size. Collision detection in games lets you know when one element overlaps with another or touches a location such as a wall. This is often used to avoid users going through walls or floors or to 'pick up' items such as food or hearts.
Assuming a collision check between you (the 'player') and another entity (a 'pick up'), a collision detection relies on four conditional checks:
- Is your x position greater than the leftmost x position of the pickup?
- Is your x position less than the rightmost x position of the pickup?
- Is your y position greater than the topmost y position of the pickup?
- Is your y position less than the bottommost y position of the pickup?
Let's start putting this into practice. Create an index.html file, open it in your code editor, and add the following to it:
<!DOCTYPE html>
<html>
<head></head>
<body>
    <script src="https://cdn.jsdelivr.net/npm/p5@1.4.1/lib/p5.js"></script>
    <script>
        const pickupX = 200
        const pickupY = 50
        const pickupSize = 100

        function setup() {
            createCanvas(500, 200)
        }

        function draw() {
            background(100)

            const collisionX = mouseX>pickupX && mouseX<pickupX+pickupSize
            const collisionY = mouseY>pickupY && mouseY<pickupY+pickupSize
            if(collisionX && collisionY) fill('green')
            else fill('red')

            square(pickupX, pickupY, pickupSize)
        }
    </script>
</body>
</html>
To see your sketch running, just double click the index.html file in your file explorer and it will open in your default browser. To see new changes once you save your code, refresh the browser.

If the player is bigger than a single pixel point, you need to offset the conditionals by the size of the player. Try this:
const pickupX = 225
const pickupY = 75
const pickupSize = 50
const playerSize = 50

function setup() {
    createCanvas(500, 200)
}

function draw() {
    background(100)

    fill('black')
    square(pickupX, pickupY, pickupSize)

    const collisionX = mouseX>pickupX-pickupSize && mouseX<pickupX+pickupSize
    const collisionY = mouseY>pickupY-pickupSize && mouseY<pickupY+pickupSize
    if(collisionX && collisionY) fill('green')
    else fill('white')

    square(mouseX, mouseY, playerSize)
}

If you want to learn more about collision detection, check out this lovely video by Dan Shiffman.
Example: Blocking Walls
The P5-provided width and height variables are always set to the canvas values provided in createCanvas(). You can use these along with the collision detection conditionals above to ensure a user cannot navigate outside of the canvas.
Expanding on our keyboard user input introduction in last week's post, try this:
let playerX = 20
let playerY = 20
const playerSize = 10

function setup() {
    createCanvas(500, 200)
}

function draw() {
    background(100)

    if(keyIsPressed) {
        if(key == 'ArrowLeft') playerX -= 1
        if(key == 'ArrowRight') playerX += 1
        if(key == 'ArrowUp') playerY -= 1
        if(key == 'ArrowDown') playerY += 1
    }

    // Not allowing out-of-bounds values
    if(playerX < 0) playerX = 0
    if(playerX > width - playerSize) playerX = width - playerSize
    if(playerY < 0) playerY = 0
    if(playerY > height - playerSize) playerY = height - playerSize

    square(playerX, playerY, playerSize)
}
If a player attempts to set playerX or playerY outside of the allowed bounds, they are set at the bounds. This means a player will see their square stop moving.
Entity Management
Games often have many entities: players, enemies, and items. Entities of the same category likely have similar logic but need to maintain their own state. In P5 sketches, it's common to use JavaScript classes for game entity management. Classes provide a blueprint for an object. They have their own properties, including data and functions (called 'methods' in a class). Try this code, and then we'll walk through it:
const bubbles = []

function setup() {
    createCanvas(500, 200)
    for(let i = 0; i < 100; i++) {
        bubbles.push(new Bubble(250, 100))
    }
}

function draw() {
    background(100)
    for(let bubble of bubbles) {
        bubble.move()
        bubble.display()
    }
}

class Bubble {
    constructor(x, y) {
        this.x = x
        this.y = y
        this.xOff = random(0, 1000)
        this.yOff = random(0, 1000)
    }

    move() {
        this.xOff += 0.01
        this.yOff += 0.01

        this.x = noise(this.xOff) * width
        this.y = noise(this.yOff) * height
    }

    display() {
        circle(this.x, this.y, 5)
    }
}

Starting at the bottom with the Bubble class. When a new class instance is created, it expects a starting x and y value, which is made available inside of the class as member properties called this.x and this.y. Two other member properties are also created - xOff (x offset) and yOff (y offset). More on these later.
This class has two methods - you can name methods whatever you want, but move and display are common in P5 sketches.
The move() method uses the P5-provided noise() function to return a value in a Perlin noise sequence. Perlin noise generates a random value that exists in a more natural-looking sequence - by very slightly modifying the value passed into noise(), the bubbles look to follow a 'path.' The small changes in xOff and yOff are used to move the bubbles smoothly. Perlin noise is fascinating, and I encourage you to read more about noise().
The display() method draws a circle at the new values stored in this.x and this.y.
During setup(), 100 Bubble instances are created with a starting position of (250, 100) and stored in the bubbles array. Every draw(), each bubble has it's move() and display() methods run.
The next example combines collision detection and entity management:
const bubbles = []

function setup() {
    createCanvas(500, 200)
    frameRate(10)
    for(let i = 0; i < 10; i++) {
        bubbles.push(new Bubble(250, 100))
    }
}

function draw() {
    background(100)
    for(let bubble of bubbles) {
        bubble.move()
        bubble.checkIfTouched()
        bubble.display()
    }
}

class Bubble {
    constructor(x, y) {
        this.x = x
        this.y = y
        this.xOff = random(0, 1000)
        this.yOff = random(0, 1000)

        this.radius = 10
        this.touched = false
    }

    move() {
        this.xOff += 0.01
        this.yOff += 0.01

        this.x = noise(this.xOff) * width
        this.y = noise(this.yOff) * height
    }

    checkIfTouched() {
        const d = dist(mouseX, mouseY, this.x, this.y)
        if(d < this.radius) {
            this.touched = true
        }
    }

    display() {
        if(this.touched) fill('green')
        else fill('white')
        circle(this.x, this.y, this.radius * 2)
    }
}
What's changed?
- The
frameRate(10)function insetup()drastically slows down the rate at whichdraw()is run from about 60 times per second to 10. This is only done to make this game playable. - There are only ten instances of
Bubblecreated instead of 100. - Two new properties are now included in
Bubble-radiusandtouched. Theradiusis used in the collision detection and when drawing the bubble. - A new
checkifTouched()method is included inBubble. This method determines the distance (dist()) between the mouse position and the bubble center (x, y). If it is less than the radius, you know a collision has taken place and setthis.touchedtotrue. - The color of the bubble changed once touched.
- The
checkIfTouched()method is called for every bubble indraw().

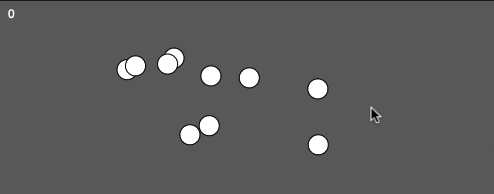
Keeping Score
Currently, every bubble currently tracks its own state, but there is no global indication of how a player has scored. This can be implemented with a global variable. Follow these steps:
- Add a global variable called
scorewith a value of0. - Inside of the
Bubble.checkIfTouched()method, beforethis.touchedis set totrue, check ifthis.touchedis still false, and then also incrementscore. - In the
draw()function, set the color to white usingfill('white'), and then display thescoreby usingtext().
In case you don't remember the parameters for text() that we went over in the previous post, text() takes three arguments - the text to display, and the (x,y) coordinates.
For step 2, the additional check is required to stop score incrementing more than once. If successful, your sketch should function like this:
Starting, Winning, and Losing
Most games have a number of states - a landing page on load, the game itself, and an endgame. This state can often be held in global scope, and code that runs in draw() can be altered as a result. Leaving your Bubble class unchanged, try this to implement game state management:
const bubbles = []
let score = 0
let win = false

function setup() {
    createCanvas(500, 200)
    frameRate(10)
    for(let i = 0; i < 3; i++) {
        bubbles.push(new Bubble(250, 100))
    }
}

function draw() {
    background(100)

    if(score >= 3) win = true

    if(!win) {
        for(let bubble of bubbles) {
            bubble.move()
            bubble.checkIfTouched()
            bubble.display()
        }
        fill('white')
        text(score, 10, 20)
    } else {
        textSize(36)
        textAlign(CENTER)
        text('You Win!', width/2, height/2-16)
    }
}
The win variable starts as false, and when the score reaches three or more, the game logic stops running, and the text 'You Win!' will be shown instead.
This is a simplistic example, but the same approach can be taken to implement more game states.

In Summary
Together with the first post in this series, I hope you have the tools you need to build a fun game with P5.js with these game logic implementations. For further inspiration, here are some of my favorite P5 examples:
- Particles in a flow field - this example uses perlin noise in a way which may help further illustrate how it works.
- A game of snake
- Full 2D platformer game
- A kaleidoscope drawing program
- Interactive artwork with animated interactive stars
- A generative painting program
- John Conway's Game of Life cellular automata
- L-Systems generative art
- Applying realistic forces like gravity
- Rainbow meatballs shader - this involved writing a shader which is an advanced topic but it looks extremely cool.
Next week in the third and final part of this series, we'll cover how to integrate voice into your P5 sketches. Until then, please feel free to reach out to us on Twitter at @DeepgramDevs if you have any questions or thoughts.

Top comments (0)