
What are we doing?
Taking the dev.to api, importing our articles as json files, then consuming those json files in our site, to display as html on our pages.
We will have a posts page with all of the titles, and then have each title will link to the individual post. We get all of this with little effort.
How I did it
Quick note: I'm using react for my site in this example. You need to know how to handle json files in your site for this to work.
Ok, now first thing you gotta do is go to the API docs for dev.to.
Here ya go! https://developers.forem.com/api/
I knew that I wanted my articles from dev.to to show on my website. Just a way to bring in my own content without having to recreate everything.
So that points me to the articles doc.
https://dev.to/api/articles?username=<username>
We see that we can get a lot of good information about posts but we don't have html just yet.
There are other routes, such as "users published articles", but it doesn't have the html we are looking for.
The api that shows the html is the "A published article by ID" api.
https://dev.to/api/articles/{id}
We do a combination of two api calls to get the job done.
First we get a list of all the published articles and write them to a json file. This comes in handy to show a list of your posts by title/id/whatever, and link them to an individual post.
Next we want each individual post and it's html. Looking at the api mentioned before, we can abstract out the html via the body_html prop.
Using https://dev.to/api/articles/{id} we can get each article based off the id's we retrieved from the call to the articles api.
Here is an example of the payload you would receive from calling the api endpoint.
{
  "id": 150589,
  "title": "Byte Sized Episode 2: The Creation of Graph Theory ",
  "description": "The full story of Leonhard Euler and the creation of this fundamental computer science principle, delivered in a few minutes.",
  "cover_image": "https://res.cloudinary.com/practicaldev/image/fetch/s--qgutBUrH--/c_imagga_scale,f_auto,fl_progressive,h_420,q_auto,w_1000/https://thepracticaldev.s3.amazonaws.com/i/88e62fzblbluz1dm7xjf.png",
...
  "body_html": "<p>Today's episode of Byte Sized is about Leonhard Euler and the creation of <a href=\"https://en.wikipedia.org/wiki/Graph_theory\">Graph Theory</a>.</p>\n\n<p>For more about how Graph Theory works, check out this video from BaseCS!</p>...\n",
  "body_markdown": "---\r\ntitle: Byte Sized Episode 2: The Creation of Graph Theory \r\npublished: true\r\ndescription: The full story of Leonhard Euler and the creation of this fundamental computer science principle, delivered in a few minutes.\r\ntags: computerscience, graphtheory, bytesized, history\r\ncover_image: https://thepracticaldev.s3.amazonaws.com/i/88e62fzblbluz1dm7xjf.png\r\nseries: Byte Sized Season 1\r\n---\r\n\r\nToday's episode of Byte Sized is about Leonhard Euler and the creation of [Graph Theory](https://en.wikipedia.org/wiki/Graph_theory).\r\n\r\nFor more about how Graph Theory works, check out this video from BaseCS!...",
  "user": {},
  "organization": {}
}
Now that we know this information, let's get to the code shall we? I'll make it short and sweet. I'm sure you've already figured out how easy this is, and if not then no worries because you're learning!
we will have 3 files totals, we are not counting the routing.
- syncDevToPost.js
- Blog.tsx
- BlogPost.tsx
File syncDevToPost.js
#!/usr/bin/env node

const path = require('path');
const fs = require('fs');
const fetch = require('node-fetch');

(async () => {
    // get list of 100 posts of user, for a list of posts id's.
    const response = await fetch('https://dev.to/api/articles?username=dechamp&per_page=100');

    // abstract out date in json format.
    const posts = await response.json();

    // Write the data to a json file, we use this on the site to make a list of our posts.
    fs.writeFileSync(`${path.join(__dirname, postPath)}posts.json`, JSON.stringify(posts));

    // loop through the list of posts for us to process each post.
    for (const post of Array.from(posts)) {

        // Skip if we already have a matching file by id.
        if (!fs.existsSync(path.join(__dirname, `${postPath}${post.id}.json`))) {
            // We have to pause so we don't upset the api by hitting the rate limit.
            await new Promise(resolve => setTimeout(resolve, 3100));

            // Grab the individual post.
            const postResponse = await fetch(`https://dev.to/api/articles/${post.id}`)

            // abstract out data in json format.
            const json = await postResponse.json();

            // Write the post to a file for us to consume on the site later.
            fs.writeFileSync(path.join(__dirname, `${postPath}${post.id}.json`), JSON.stringify(json))
        }
    }

    // alert the user we are done.
    console.log('done');
})();
Read the comments of the code to see what's going on. It's basically going to grab a list of posts based off your username, which you've updated from dechamp to your own user handle. If you don't know how to get your handle, then message me and I'll show you.
We then take that lists and get each post by id. Easy peasy.
Now update the postPath prop to point to where you want your files to be put. I chose my src/assets/data/posts dir.
To run the script, you need to first add execution permission. You can do this via chmod u+x syncDevToPost.js.
The following command tells the system in other words, "change mode user with exec on the following file".
Now you can run ./syncDevToPost.js in the terminal and it'll execute the file. Relative path is important. You can't just put syncDevToPost.js and expect it to work. Also the period is assuming you're in the same directory as your script.
Go ahead and run ./syncDevToPost.js and wait for it to finish. You'll see "done" and maybe some other message that you can ignore.
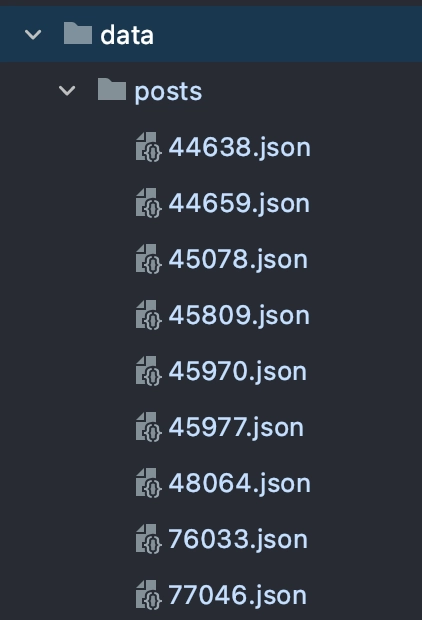
You should see posts with in the directory that you chose. It will contain files such as the following. As well as the posts.json file which is not pictured below but should be included.
At this point you're almost done! Pretty quick like I said. Next up is just including the json files and then iterating over the entries and formatting the output.
It's probably easier to just give you the code so you can see how I did it and then you can play around with it yourself. I did not peer review my code but it's working and looks decent to me lol. Always nervous to put my code out in public. :/
Anywho, here you go.
The Code
Blog.tsx
import React, {ReactNode, useEffect, useState} from "react";
import DefaultLayout from "../../layout/DefaultLayout";
import Post from "../../layout/Post";
import posts from '../../assets/data/posts/posts.json';
import {useNavigate} from "react-router-dom";

export default function Blog() {
    const navigation = useNavigate();

    const [content, setContent] = useState<ReactNode[]>([]);

    useEffect(() => {
        (async () => {

            let finalContent = posts.map<ReactNode>((post, index) => {
                return [
                    <Post className="post" onClick={() => navigation(`/blog/post/${post.id}`)} key={index} title={post.title} date={post.published_timestamp}>
                        <div dangerouslySetInnerHTML={{__html: post.description}}/>
                    </Post>
                ];
            });

            setContent(finalContent);
        })();
    }, []);

    return (
        <DefaultLayout>
            {content}
        </DefaultLayout>
    );
}
Wtf?
Ok so I might catch some heat on this next one and if you do feel the need to, please do tell me why this is a bad idea because I would love to learn something I may have not known.
However, I trust the source and I inspected the files that I'll be including in my site. So when I set the good old trusty dangerouslySetInnerHTML prop, I'm most certainly fingers crossed for good luck, that my site should be good.
Let's talk? Moving on.
BlogPost.tsx
import React, {ReactNode, useEffect, useState} from "react";
import DefaultLayout from "../../layout/DefaultLayout";
import Post from "../../layout/Post";
import {Link, useParams} from "react-router-dom";

export default function BlogPost() {
    const {id} = useParams();

    const [content, setContent] = useState<ReactNode>(null);

    useEffect(() => {
        (async () => {
            const post = await import((`../../assets/data/posts/${Number(id)}.json`));

            const finalContent = (
                <Post title={post.title} date={post.published_timestamp}>
                    <div dangerouslySetInnerHTML={{__html: post.body_html}}/>
                </Post>
            );

            setContent(finalContent);
        })();
    }, []);

    return (
        <DefaultLayout>
            <div><Link to="/blog">Back to posts</Link></div>
            {content}
        </DefaultLayout>
    );
}
I use react-router for the navigation so if you're wondering the routes then here it is just to be safe.
<BrowserRouter>
     <Routes>
         <Route path="/" element={<Home />}/>
         <Route path="/blog" element={<Blog />}/>
         <Route path="/blog/post/:id" element={<BlogPost />}/>
         <Route path="/projects" element={<Projects />}/>
     </Routes>
</BrowserRouter>
Whats it look like?
Time to show off the goods, Here it is. https://dechamp.dev/blog.
So easy and because the html is already nicely formatted I didn't really have to touch much css to make it look half decent.
I think the whole thing took me a hour or two playing around and it worked.
I hope it made sense and I hope you liked what I had to show.
Please feel free to comment on things I can improve on as well.
If you get stuck and want help, just reach out and I'm happy to help.
-- DeChamp

Top comments (6)
How well does this work with posts that have code blocks? For example, like this one? Your blog page doesn't have this post yet. Are there any that have a code block I can look at to see how formatting looks?
Thank you for the awesome idea. I ended up seeing that they were setup for highlighting out the gate. You just have to install highlight.js and it works. I now have the blog updated on the site and you'll be able to see the highlighting.
It looks like that works really well. This post but on your blog site is a good demo since you have several code blocks.
ya i was really excited how easy it was. Thanks to dev.to doing all the hard work lol.
I’ll check it today and let you know what solution I come up with.
Cool. I'm curious how well that might work or what's involved in getting it to. I'm assuming DEV handles the styling of code blocks with css. So assuming the html returned by the api includes any classes on elements, etc then it might be just the matter of including the relevant css.