
Are you looking to make it easy for clients or customers to contact you directly from your website? Adding a message-sending feature can do just that! In this easy-to-follow tutorial, I will show you how to integrate a messaging system into your website using EmailJS. With this feature, you'll have better control and easier communication with your users and visitors. Whether you're building a portfolio website or a business landing page, this tutorial is for you! Before we dive into the technical aspect of this guide, let me quickly introduce you to EmailJS.
What is EmailJS?
EmailJS is a powerful tool that can streamline communication between your website and your users or customers with client-side code using a simple API.
It supports various services such as Gmail, Outlook, and Yahoo to receive the messages sent from your website. With EmailJS, you can easily integrate email sending features into your website.
How to add a messaging feature to your React website using EmailJS
Step 1: Sign up for an account on EmailJS
To add a messaging feature to your React website using EmailJS, the first step is to sign up for an account on their website to be able to fully use their services. Click here to sign up.
When you are done signing up, click on the email services tab in the navigation menu, then click on 'Add new service'.

- You are to select an email service you want to use to receive the messages sent from your website. This could be your personal email or company email. In this tutorial, I will be going with Gmail.

- After you select an email service, a new tab will be shown to you where you will see Name and Service ID. You have the option to customize the name of the email service to fit your project. Copy your service ID and save it somewhere, I'd recommend Notepad for easy reach. You are also required to connect the email account you want to use for the project. Click on the connect button in blue and follow the due process that will be shown to you.
- When you have successfully connected your email account, click on "Create Service". With Gmail, you can receive up to 500 messages from the website per day.
Step 2: Install EmailJS service package using NPM
- After successfully creating an account on EmailJS official website, you need to install the service package in your React project. To install EmailJS via NPM, simply run the command below in your IDE terminal:
npm install @emailjs/browser --save
- After the installation has been completed, you need to import emailjs library using ES6 module syntax from the '@emailjs/browser' module. Create a EmailForm component, and import the emailjs library using the code below ```
import emailjs from '@emailjs/browser';
You also need to **import emailJS CSS file** in the component using the code below...
import './EmailForm.css';
####Step 4: Create form UI using JSX

-
The next thing we need to work on is the form UI that the user will interact with and send messages from. We will build the form UI using JSX. In case you are not so familiar with building forms in React, do not worry, it is similar to how we build forms with HTML.
Below is a snippet of a form using JSX.
export const EmailForm = () => {
return (
Send Message
)}
-
The code snippet above is a basic form that collects the user's email and also allows the user to write their messages directly within the `textarea`.
But it doesn't end there. We need to make the form functional.

We need to define a function in the component that will handle the form submission and send the message using the code below
const sendEmail = (e) => {
e.preventDefault();
emailjs.sendForm('service_ID', 'template_ID', form.current, 'public_key')
.then((result) => {
console.log(result.text);
console.log("message sent!")
}, (error) => {
console.log(error.text);
console.log("error sending message, try again!")
});
};
In this code, the "sendEmail" function prevents the default form submission behavior using "e.preventDefault()". Then it uses the emailJs library to send the form data to the email address we attached earlier, which is defined by **service_ID**, **template_ID**, and **public_key** in the arguments of the "sendForm" function. The function also includes two console logs that will log the result and any errors that occur.
If you have copied your service_ID as instructed earlier, paste it where we have the service_ID in the sendForm function. You also need a template_ID which you can obtain from the dashboard on your emailJS account.
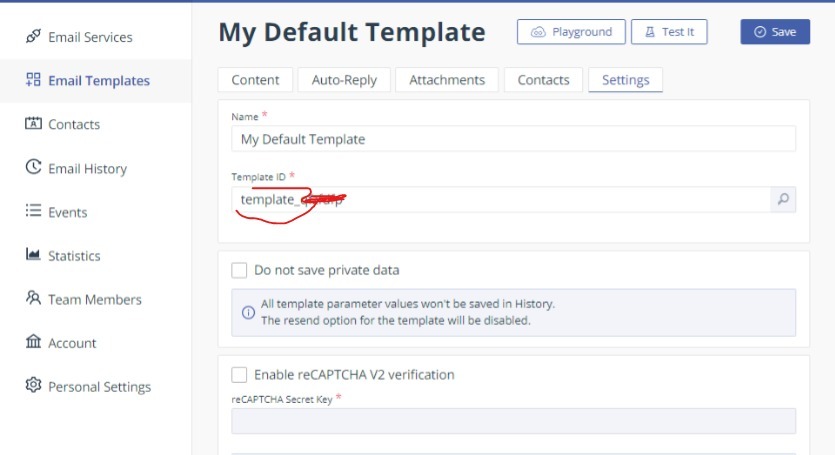
Click on the Email templates tab, go to settings, copy the entire template_ID. This is an example 'template_abcdfg'. Paste it where we have template_ID in the "sendForm" function.
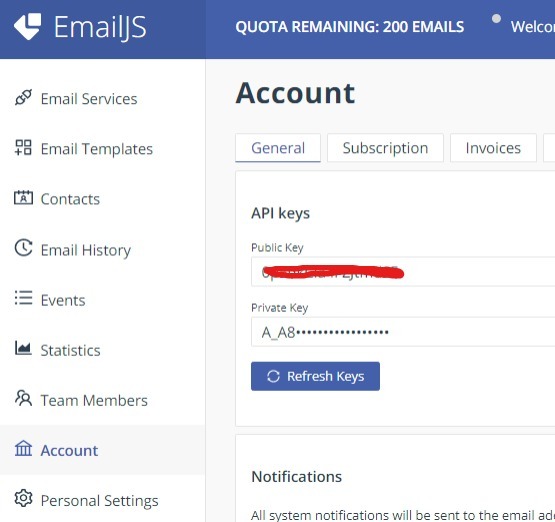
To obtain the public key, on your dashboard, click on the Account tab, copy the public key and paste it where we have 'public-key' in the code.
You need to define a ref for the form to submit it.
const form = useRef();
Finally, you can add an onSubmit handler to the form opening tag that will call the "sendEmail" function:
...
In this code, the "ref" attribute is used to create a reference to the form, which can be passed as an argument to the "sendForm" function. The "onSubmit" attribute is used to call the "sendEmail" function when the form is submitted.

**FULL CODE SNIPPET**
import React, { useRef } from 'react';
import emailjs from '@emailjs/browser';
import './EmailForm.css';
export const EmailForm = () => {
const form = useRef();
const sendEmail = (e) => {
e.preventDefault();
    emailjs.sendForm('service_ID', 'template_ID', form.current, 'public_key')
        .then((result) => {
            console.log(result.text);
            console.log("message sent!")
        }, (error) => {
            console.log(error.text);
            console.log("error sending message, try again!")
        });
    };
return (
Send Message
)};
Sending emails directly from a website is a useful feature. In this tutorial, we've explored how to do this using a library called EmailJS in a React app. By following the steps in this tutorial, you can easily send emails from your website without worrying about the complicated details. With EmailJS, sending emails is a breeze, and you can focus on building great applications without worrying about the complexities of email delivery.

Top comments (2)
Thanks for the guideline
A pleasure. I hope you found it helpful