
A Linked List is a linear data structure similar to an Array, Queue or Stack where each element called a Node is organized sequentially and each Node contains data of its value and a pointer or reference to the next Node. If you remember while we were kids in primary and even secondary school, we always had a general students assembly each morning where we placed our hands on our neighbours shoulders, recall that our only concern at that point was ourselves(node.value) and then our hands resting on the shoulder of the person next to us (next_node), this should give us a practical example of what a Linked List looks like.
So far, we have only discussed a Linked List where we only have a reference to the Node in front of us, what about a situation where we also want to keep have a pointer to the Node behind? This is where Doubly Linked List comes in, in Doubly Linked List, each node has three information, its value, a reference to the next node and also a reference to the node before it, meaning it is possible to traverse either forward or backwards in a Doubly Linked List.
As a Microverse student, the three first coding challenges in the Ruby curriculum are based on Linked Lists, while you are only required to solve these challenges in Ruby, I made an extra effort to see what it looks like to implement a Linked Lists and some of its methods in JavaScript. So let’s get started!
First, let us create a sort of mockup for our Linked List in a sequential order (pun intended);
- Define the Node class
- Define the Linked List class
- Create add method
Define the Node Class
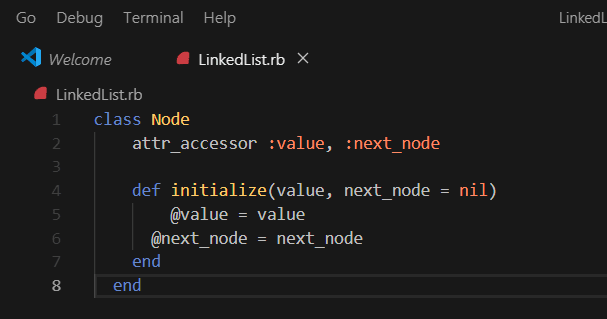
First, we must define a Node object that would have a data value and also contain a reference to the next_node, remember that a Node in a Linked List is simply each element in the Linked List.
Ruby Implementation
JavaScript
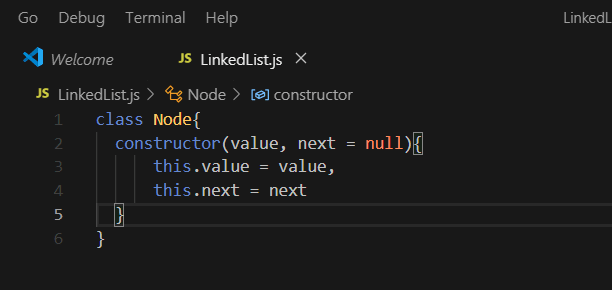
We set next/next_node to nil/null by default just in case no value is passed as an argument e.g when the current node is the last. We can also see that our node object has two properties.
Define the LinkedList class
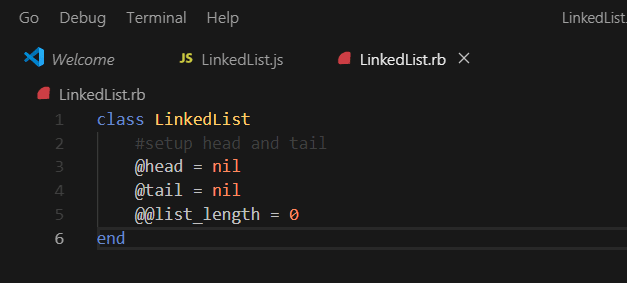
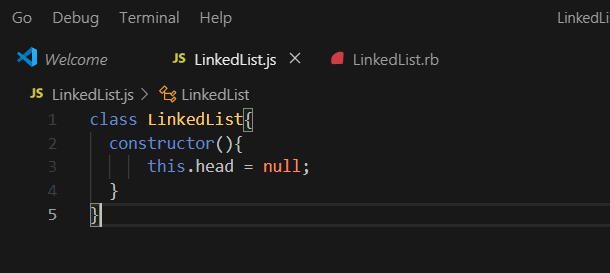
The next thing on our mockup list is to create a LinkedList class, this will contain the head which is the entry point into our Linked List, tail which is the end of the List. The LinkedList class should house the methods we will create.
Ruby Implementation
JavaScript
In Ruby, we also add a class variable list_length which will be useful in creating some of the methods.
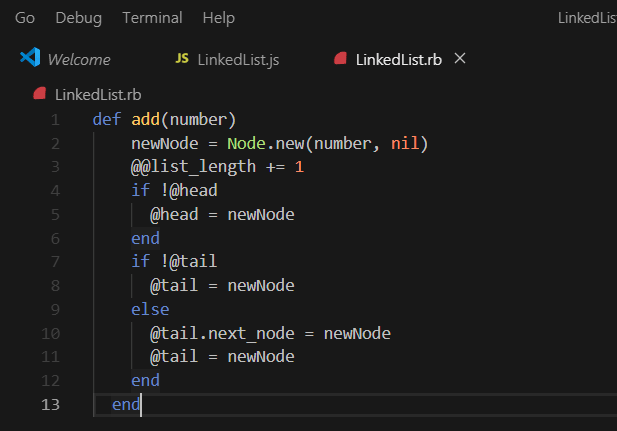
Create add method
Now that we have set up our Node and LinkedList class, the next thing we are going to do is to create an add method that will allow us to add new nodes to the end of the list. To achieve this, we will move(traverse) through the list to the end of the list find the tail node, then instead of the tail node pointer to point to null, we make it point to the newly created node.
Ruby Implementation
JavaScript

Conclusion
That is all for today, we have been able to create both the Node and LinkedList class and also create a method to add new nodes to the end of the list.


Top comments (2)
Nice! I like the side by side with two languages, it's like getting two explanations to think through.
Yeah thanks, the two languages share some similarities.