The Modern Data Stack (MDS) is gaining increasing popularity in recent years along with cloud computing. MDS put the cloud data warehouse such as Snowflake and Databricks at its core and uses modern data integration tools to load data into the cloud data warehouse.
In the post, I will demonstrate how to use some emerging MDS tools on the market to build a simple data lakehouse.
The tools I use are:
- Fivetran - a leading cloud-based data integration tool. It offers many connectors to help connect to the data source and load the data into cloud data storage.
- Databricks - Databricks is a well-known product in the AI/ML space for many years, and they launched Delta Lake - an open-source application in 2019. You can build a Data Lakehouse with it.
- Postgres - A open-source transactional database. I will use it as my source data database. The source data I use for this demo is called Chinook database. You can find the data here.
- I have launched an AWS RDS instance to host the database to let Fivetran read the data.
- dbt - an open-source application to build the data models.
The Task
In this demo, I will convert the OLTP database into a star schema.
The Source schema:

The target schema

Lakehouse layers design
The lakehouse contains the following layers:
Landing Layer
The landing layer contains all the data loaded by Fivetran. Tables have additional metadata fields for tracking purposes. All the data should be in their original format.
History Layer
The history layer contains history tables using SCD2 methodology. Every table in the landing area has a Historical table.
Integration Layer
The integration layer contains temporary tables to associate transformation. This is where you denormalize the source data and apply business rules.
Presentation Layer
The presentation layer keeps the transformed and business-friendly star schemas, in other words: the data warehouse.

The build
Step 1: Set up the environment
AWS RDS
As I mentioned before, I have used the AWS RDS to host a Postgres database and create the Chinook database. Allow For Public Access option is selected.
Databricks
First, create a cluster on your Databricks account (I am using Databricks on Azure). There are two types of clusters. For this practice, I created a single node cluster.

Step 2: use Fivetran to load the data into Databricks
Set up the destinations
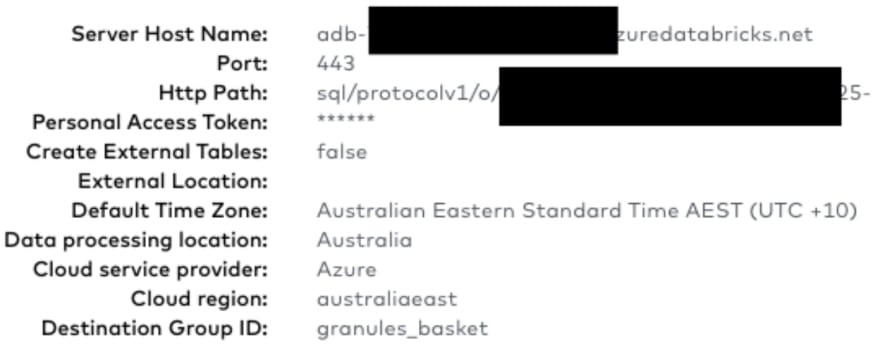
The Port and Http path can be found under Databricks cluster attribute.
Set up the connector
- Select Postgres RDS instance
- Set the schema prefix. I named it as source_fivetran_pg. This indicates the data in this schema are extracted from Fivetran and in their original format
Test the connection
During the connection setup, Fivetran may prompt you to select the certification, select the root level certification.
Strat Initial sync
Fivetran will start the initial sync after it can connect to the database. Select the table or schema you want to sync, the leave the rest to Fivetran.

Check your data on Databricks
Fivetran will create a new schema in Databricks called source_fivetran_pg_chinook_public, and all the tables I selected are in this schema.

Step 3: build the history tables
Fivetran creates two metadata columns in each source table: _fivetran_deleted and _fivetran_synced.
_fivetran_synced field contains the timestamp when Fivetran load the data into Databricks, I will use the column and the primary key of each table to create the history table.
In dbt, create the snapshot model file and use the config function to define the schema name of the history table, unique_key, update_at and file_format. The file_format parameter must be set to ‘delta’, dbt will create a delta table in Databricks.
Example of snapshot model in dbt:
{% snapshot CHINOOK_GENRE %}

{{

   config(

     target_schema='dev_dlh_hist_chinook',

     unique_key='genreid',

     strategy='timestamp',

     updated_at='_FIVETRAN_SYNCED',

     file_format='delta',

   )

}}

select * from {{ source('chinook_landing', 'genre') }}

{% endsnapshot %}
Then run the ‘dbt snapshot’ command. It will create the history table in the target schema.
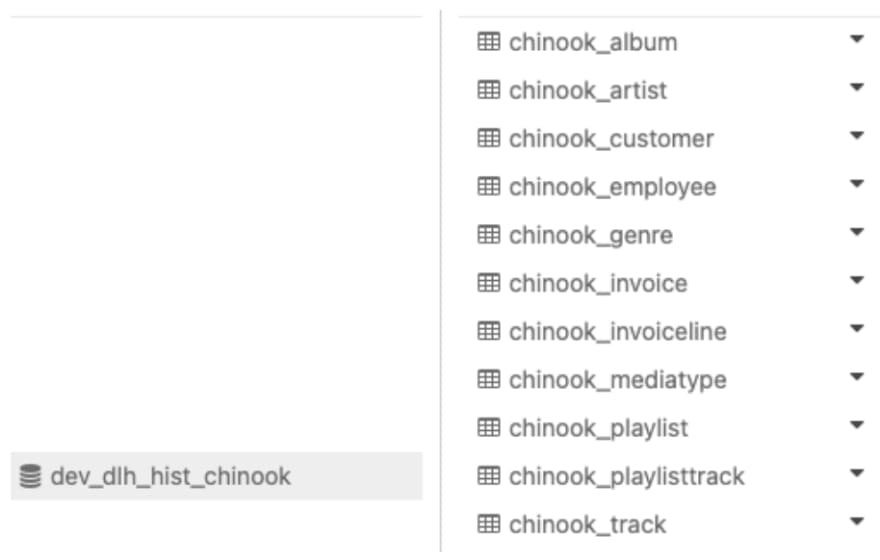
This is an example of the history Artist table (dbt creates 4 additional metadata columns to maintain the history of each table)

Step 4: Integrate the data
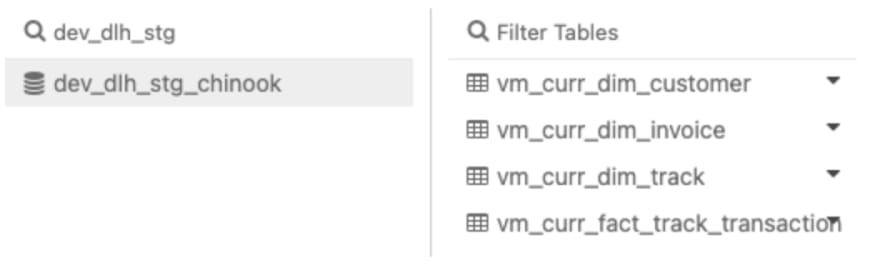
After the history tables have been created, we can start to join the tables together, apply the business logic and create the dimension table and fact tables.
The objects I created in this schema are views, not tables. They only contain the current values of each dimension and fact table.
Step 5: create the star schema
Finally, we can create the star schema. Once again, I use the incremental functionality from dbt to build the table. Each dimension table has start_timestamp and end_timestamp to maintain the history.

Example of the dim_track table:

Conclusion
MDS makes building the data lakehouse and ELT a lot easier. Fivetran is great for loading the data from the source systems into the cloud data warehouse; Databricks is very powerful for data insertion, selection, and table join.

Top comments (0)