
An Overview
On June 1, 2022 we released Cypress version 10.0 which includes two new major features:
- A New User Interface with a Unified Testing Experience
- Component Testing
In order to gain the benefits of these new features, it was necessary for us to change a few of the ways we were doing things in the past. This article walks you through those changes, to help make your experience upgrading to Cypress 10.0 as seamless as possible.
Feel free to follow along using this video as well:
Upgrading
Upgrading is simple and it just requires you to run the following in your project:
npm install -D cypress@latest
or
yarn add -D cypress@latest
Starting the Migration
All we need to do to kickoff our migration is running the following script:
npx cypress open
Once Cypress launches, you will be greeted by the following video from Cypress Staff Engineer, Jess Sach about some of the new features in Cypress 10.
Renaming Existing Specs
The first step renaming existing specs, will automatically rename and move your existing spec files to conform to the new 10.0 standards. This includes changing the default spec folder from cypress/integration to the new cypress/e2e folder. It also includes changing the default spec file extension from [filename].spec[.ext] to the new [filename].cy[.ext].

The table in each of the following steps provides a helpful before and after diff of each of the changes the Migrator will make in that step.
Renaming the Support File
The second step, automatically renames your existing support files. In 10.0, Cypress now serves different support files for both E2E and Component Testing. This step, essentially, renames the E2E support file from cypress/support/index.js to the new cypress/support/e2e.js

Migrate to the New Cypress Config
Finally, we will migrate our existing Cypress configuration, formerly cypress.json to the new Cypress configuration of cypress.config.js. This step is a little more detailed in that it not only renames the config file, but also seeds the new config with the corresponding options from the old.

At this point, you will see a "Welcome to Cypress" window and that E2E testing has been successfully configured in our project. However, you may also have noticed the option to add Component Testing. This is one of the exciting new features that ships with Cypress 10. Notice though that this testing type is labeled as Not Configured. Let's change that now.

Getting Started with Component Testing
Before we get started, It's important to note that the 10.0 release a Cypress add support for the following component testing frameworks:
- Vue 2 & 3
- Vue CLI 2 & 3
- Nuxt
- React
- Create React App
- Next.js
No need to worry if you don't see your applications framework listed, Cypress is working hard behind the scenes to add additional framework support, including Angular and others in the near future.
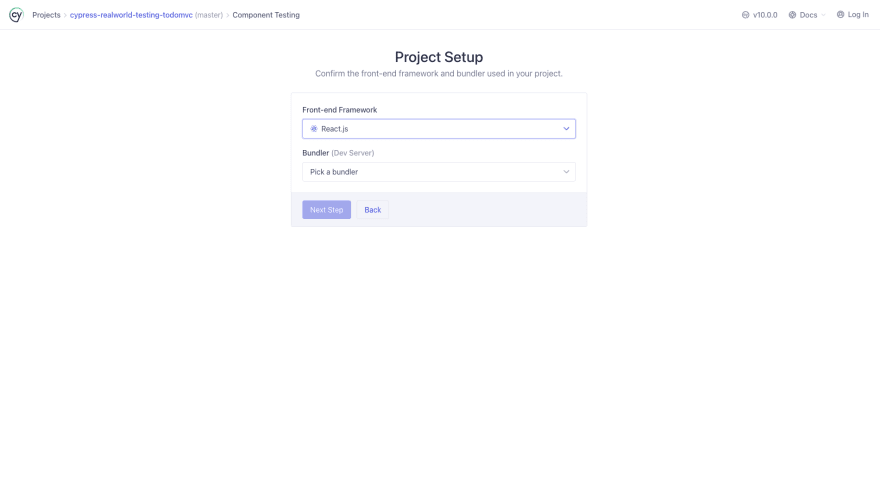
The first thing we need to do to enable Component Testing is to pick our front-end framework.

Once we selected the appropriate framework, we are now presented with the bundler or dev server we're using.
Next Cypress takes your answers to the previous two questions and provides the correct dev dependencies that need to be installed in your project. Simply copy the install script provided by the migration guide into your terminal and run.

Once all the needed dependencies have been installed in your application, you can proceed.

Finally, we are presented with an overview of all the files that will be added to the project. This includes an update to the following:
- Cypress Config
- Adding a
cypress/support/component.jsfile - Adding a
component-index.htmlfile
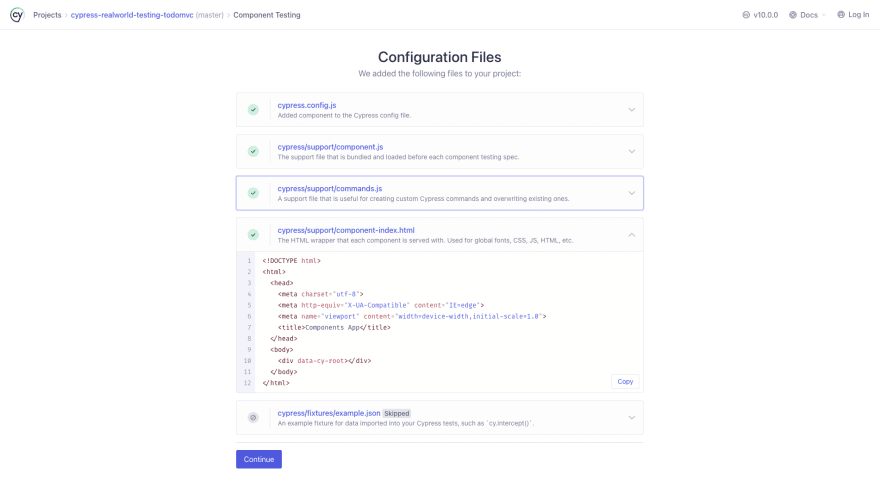
After reviewing all of the updated files, all we need to do is select the browser of our choice and begin testing!

Recap
Hopefully you found this guide, the video and the Cypress migration tool helpful in migrating your project to Cypress 10.0. For more details on how to get started with Component Testing I recommend visiting this section in our docs.
I also recommend giving this video a watch as my coleague Robert does a dive into "How to Write Component Test with Cypress"

Top comments (4)
It there a way to rerun the migration wizard through the command line for instance? Because somehow it did not start/work the first time so now it opens with still the old folder name "Integration" and also ".spec" instead of ".cy".
Yes I can rename it by hand but that's not handy with the many projects and files i have.
Thanks!
The easiest way is to use git to undo any changes that happened as a result of the migration and run cypress again
I eventually fixed it with an powershell script.
get-childItem -Path "C:\cypress\" -recurse -Include *.spec.ts | rename-item -NewName { $_.name -replace ".spec.ts",".cy.ts" }I'm having trouble with the migration helper choosing Typescript for the configuration file instead of just plain JS. Is there a way to make it choose JS for the migration?