Lately I've been checking out other articles on dev.to and have noticed a few easy areas of improvement. In this article I'll show some basic things you can do to improve the overall readability and layout of your article.
Headers
Dev.to pulls from markdown headers which in turn pull from HTML headers. The HTML headers range from <h1> all the way up to <h6>. Markdown matches the number of pound symbols (#) to the respective header level:
# = <h1>
## = <h2>
### = <h3>
#### = <h4>
##### = <h5>
###### = <h6>
The lower the number the higher in the hierarchy it is. # Header would map out to <h1>header</h1> which is the top level in the hierarchy. Lower header levels also have a bigger font size. If you view the source code for any article you'll notice the title is surrounded by an <h1> tag:
            <h1 class="fs-3xl m:fs-4xl l:fs-5xl fw-bold s:fw-heavy lh-tight mb-2 medium">
              Python Deployment: WSGI
            </h1>
It's important to note that while the other headers aren't restricted by duplication you want to always have only one <h1> header. Since the title already handles <h1> or # Header for you there's no need to use that level in the article itself. As an example of how you might organize things (assuming a title "Linux Basics"):
## Login
### Terminal Access
### SSH Access
## Editors
### vim
### nano
### emacs
In fact, starting with headers as an outline and filling content in can be a good way to structure things. Sometimes it can let you switch to other parts of the article on the fly if you're struggling with one part.
Table of Contents
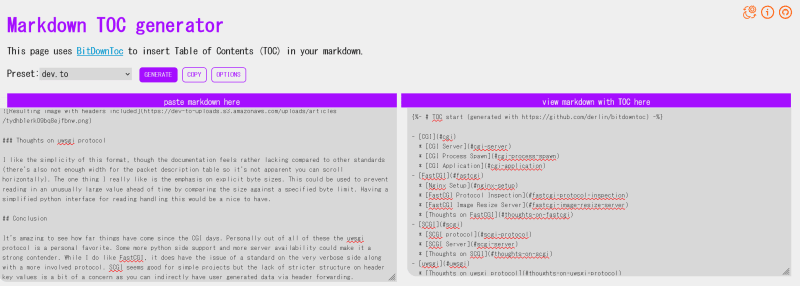
This leads to the next related topic: a table of contents. While not an out of the box feature there's a nice and simple solution for it. As an example, if I take one of my articles and copy everything besides the already generated ToC:
I get the following output:
{%- # TOC start (generated with https://github.com/derlin/bitdowntoc) -%}

- [CGI](#cgi)
  * [CGI Server](#cgi-server)
  * [CGI Process Spawn](#cgi-process-spawn)
  * [CGI Application](#cgi-application)
- [FastCGI](#fastcgi)
  * [Nginx Setup](#nginx-setup)
  * [FastCGI Protocol Inspection](#fastcgi-protocol-inspection)
  * [FastCGI Image Resize Server](#fastcgi-image-resize-server)
  * [Thoughts on FastCGI](#thoughts-on-fastcgi)
- [SCGI](#scgi)
  * [SCGI protocol](#scgi-protocol)
  * [SCGI Server](#scgi-server)
  * [Thoughts on SCGI](#thoughts-on-scgi)
- [uwsgi](#uwsgi)
  * [Thoughts on uwsgi protocol](#thoughts-on-uwsgi-protocol)
- [Conclusion](#conclusion)

{%- # TOC end -%}
Note that as the screenshot suggests you'll want to make sure the preset is dev.to so it matches the proper anchor generation algorithm. The cool thing about this generator is that it takes header levels into consideration and will indent ToC bullets for you depending on the level.
Syntax Highlight
Given that dev.to tends to be developer oriented, it features syntax highlighting of code blocks. Since dev.to is built on Forem, it utilizes the Rogue syntax highlighting system. A plain code block with no formatting looks like this:
import requests

post_data = {
    'test1': 'foobar',
    'test2': 'foobar',
    'test3': 'foobar'
}

r = requests.post('http://localhost:8000/', data=post_data)
print(r.content)
print(len(r.content))
By adding a label after the first three ticks of a code block, the result will be rendered with the appropriate syntax highlighting if supported:
```python
import requests

post_data = {
    'test1': 'foobar',
    'test2': 'foobar',
    'test3': 'foobar'
}

r = requests.post('http://localhost:8000/', data=post_data)
print(r.content)
print(len(r.content))
```
Becomes:
import requests

post_data = {
    'test1': 'foobar',
    'test2': 'foobar',
    'test3': 'foobar'
}

r = requests.post('http://localhost:8000/', data=post_data)
print(r.content)
print(len(r.content))
Supported Syntax Highlight Languages
To see if a particular language is supported you can use Rouge's handle tool rougify. First install a ruby interpreter. Then checkout the rouge source code and run bin/rougify list in the source code root directory:
$ git clone git clone https://github.com/rouge-ruby/rouge.git
$ cd rouge
$ bin/rougify list
== Available Lexers ==
abap: SAP - Advanced Business Application Programming

actionscript: ActionScript [aliases: as,as3]

ada: The Ada 2012 programming language

apache: configuration files for Apache web server

apex: The Apex programming language (provided by salesforce)

apiblueprint: Markdown based API description language. [aliases: apiblueprint,apib]

applescript: The AppleScript scripting language by Apple Inc. (https://developer.apple.com/library/archive/documentation/AppleScript/Conceptual/AppleScriptLangGuide/introduction/ASLR_intro.html) [aliases: applescript]

armasm: Arm assembly syntax

augeas: The Augeas programming language (augeas.net) [aliases: aug]

awk: pattern-directed scanning and processing language

batchfile: Windows Batch File [aliases: bat,batch,dosbatch,winbatch]

bbcbasic: BBC BASIC syntax
<snip>
You can either chose to identify the syntax highlight by the label before the first :, or by any of the aliases that are listed such as [aliases: aug]. For finding a particular language tag use grep or Select-String in Powershell:
$ ruby bin/rougify list | grep "dart"
dart: The Dart programming language (dart.dev)
> ruby .\bin\rougify list | Select-String -Pattern 'dart'

dart: The Dart programming language (dart.dev)
Advanced Highlighting
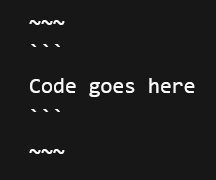
If you need to escape a code block, you can simply surround it with ~~~ like so:
```
Code goes here
```
The console parser also has a nifty feature that lets you syntax highlight when console prompts are present. As an example with the python interactive interpreter:
```console?prompt=>>>&lang=python
>>> print("Test")
Test
>>> import sys
>>> sys.exit()
```
Would produce:
>>> print("Test")
Test
>>> import sys
>>> sys.exit()
So it knows to ignore the >>> prompt and highlight everything after it with the language python. This is useful for basic shell commands as well:
```console?prompt=$&lang=sh
$ export FOO="BAR"
$ echo "Hello, World!"
```
Produces:
$ export FOO="BAR"
$ echo "Hello, World!"
Series
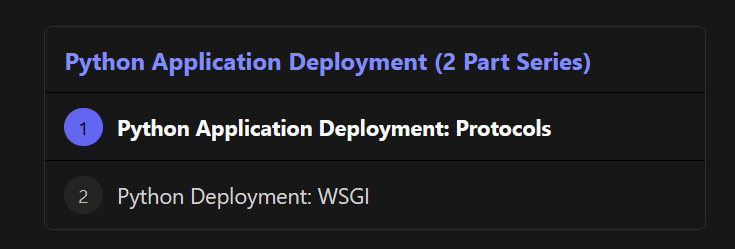
A favorite feature of mine is the series feature. Posts in a series will show up with a series table of contents at the top if there are at least two posts in a series:
To set a series, simply click on the post settings next to "Save draft":
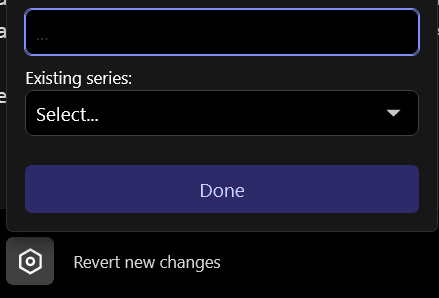
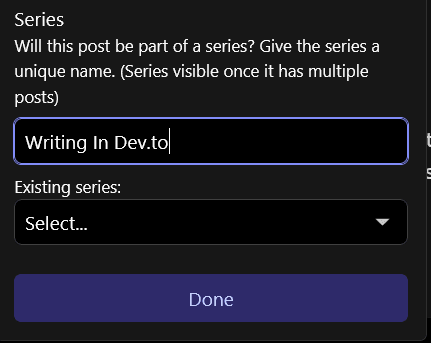
Then you can either enter a new series name:
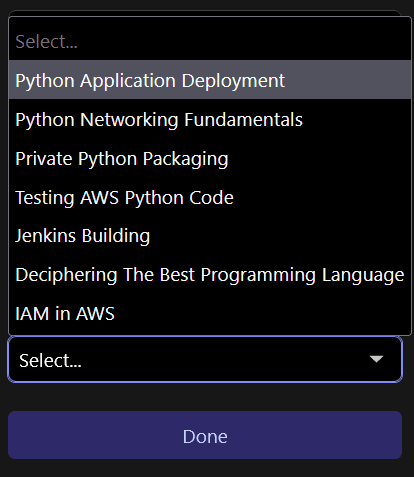
and click Done, or you can select an existing series:
If you want to make an existing post part of a series then simply edit the post and use the same workflow as above.
Tagging
Adding appropriate tags can help get your articles achieve more exposure. This is because as a feature users can follow certain tags to get related articles about what the tag represents. Some generic ones include:
- #webdev
- #devops
- #security
- #programming
- #tutorial
Along with a bit more specific ones
- #meta (related to dev.to)
- #aws (articles about Amazon Web Services)
- #python (articles about the python programming language)
If you're not quite sure what to pick try and see if someone else has done a related article and what tags they chose.
Conclusion
This wraps up my guide on a few items that can help with your dev.to articles. I hope it helps you get a better visual breakup and make series articles easier to navigate. Good luck and keep up the good writing!


Top comments (4)
Nice set of suggestions. I was already familiar with most of them, but I was literally wanting to explain in a comment to someone how to use syntax highlighting and ended up saying something like "put language name after the opening backticks" because I was unaware of the ~~~ trick.
Yeah I actually had to dig up a forem GitHub issue to figure out how it worked since the GitHub way I thought did (enclose with 4 ticks) wasn't quite working out!
The markdown TOC generator is pretty great. Thanks!
I would recommend this article to each author who is new to Dev.to