
I.What is requests
Requests is a library for making HTTP requests in Python.
To install requests, simply run
pip install requests
requests support all kinds of HTTP methods such as : POST,GET,PUT,DELETE ...
Below are example code for using requests:
# For post request
def create_new_user(self, username, password, fullname):
    return requests.post(API_SERVER_URL + API_USER_PATH, data=json.dumps(userinfo(username, password, fullname)),
                         headers={'Content-Type': 'application/json'}
                         )
II.Prepare service for test
The service we would be used to do the test is blog api .
This service is made in Java with spring-boot framework.
The database we would be using is MySQL.
We would also need maven as build tool.
So you would need to install the following things to be able to run it.
1.Java
Please install Java 8 for your machine
You could download Java 8 from Oracle official site : java8-oracle (You would need oracle account to download)
After download, simple install it from exe file to your machine (If you're working in Windows).
You would need to setup the JAVA path in order to work.
The JAVA_HOME would look like this : C:\Program Files\Java\jdk1.8.0_221
In the path, add more item like : %JAVA_HOME%\bin
To check whether it's working: Open CMD → java --version
it should show the java version
2.Maven
Please download maven from official site : maven-download
After that, extract it to the folder you want.
Add system path to Maven.
The MAVEN_HOME would look like this : C:\apache-maven-3.6.2
In the path, add item like : %MAVEN_HOME%\bin
To check whether it's working: Open CMD → mvn --version
it should show maven version
3.MySQL
Please go to MySQL official site to download mysql community version: mysql installer for windows
You might also need to install .net framework before install MySQL : .net framework 4.5.2
III.Test Structure for API testing
1.Environment configuration:
For environment configuration file, we will use yaml file.
YAML (a recursive acronym for "YAML Ain't Markup Language") is a human-readable data-serialization language. It is commonly used for configuration files and in applications where data is being stored or transmitted.
The yaml file would look like this :
api:
  user: /user
  authenticate: /authenticate
  blog: /blog
All the configurations settings will be located in resources folder:
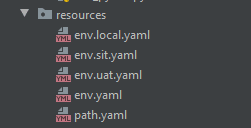
Here we have env.local.yaml, env.sit.yaml, env.uat.yaml.
Understand like this, if we want to test for local.yaml or sit.yaml, simply tell pytest to get configurations from the file and paste it into env.yaml.
Our project will use env.yaml.
How we do that:
In conftest.py, we define the fixture:
@pytest.fixture(scope='session', autouse=True)
def get_env_value(pytestconfig):
    files.copy_file(os.getcwd() + '/resources/env.' + str(pytestconfig.getoption('env')) + '.yaml',
                    os.getcwd() + '/resources/env.yaml')
We define the pytest_addoption option in the conftest.py too:
def pytest_addoption(parser):
    parser.addoption("--name", action="store", default="default name")
    parser.addoption("--env", action="store", default="local")
We read the environment path info as below:
def get_environment_info():
    return yaml.read_data_from_file(os.getcwd().split('practice')[0] + '/resources/env.yaml')


API_SERVER_URL = get_environment_info()['api_server_url']
And for the specific path:
def get_path_info():
    return yaml.read_data_from_file(os.getcwd().split('practice')[0] + '/resources/path.yaml')


API_USER_PATH = get_path_info()['api']['user']
API_AUTHENTICATE_PATH = get_path_info()['api']['authenticate']
API_BLOG_PATH = get_path_info()['api']['blog']
2.Models:
Define in models-api
For example for user model
def userinfo(username, password, fullname):
    return {
        'username': username,
        'password': password,
        'fullname': fullname
    }


class UserInfo(object):
    id: Optional[int]
    username: str
    password: str
    fullname: str

    def __init__(self, username, password, fullname):
        self.username = username
        self.password = password
        self.fullname = fullname
3.Methods call to API using requests:
Example below for create new user API:
class User:

    def create_new_user(self, username, password, fullname):
        return requests.post(API_SERVER_URL + API_USER_PATH, data=json.dumps(userinfo(username, password, fullname)),
                             headers={'Content-Type': 'application/json'}
                             )

    def create_new_user_data_class(self, username, password, fullname):
        user_info_instance = UserInfo(username, password, fullname)
        s = json.dumps(user_info_instance.__dict__)
        return requests.post(API_SERVER_URL + API_USER_PATH, data=s, headers={'Content-Type': 'application/json'})
4.Execute SQL to work with database:
In our example we are working with MySQL, so we need mysql connector:
Remember to install mysql-connector-python library.
pip install mysql-connector-python
The defined methods and how to work with them are like below:
class MySQL:

    def connect(self, host_name, database_name, user_name, password):
        try:
            connection = mysql.connector.connect(host=host_name,
                                                 database=database_name,
                                                 user=user_name,
                                                 password=password)

            if connection.is_connected():
                db_Info = connection.get_server_info()
                print("Connected to MySQL Server version ", db_Info)
                cursor = connection.cursor()
                cursor.execute("select database();")
                record = cursor.fetchone()
                print("Your connected to database: ", record)
                return connection

        except Error as e:
            print("Error while connecting to MySQL", e)

    def close(self, connection):
        if connection.is_connected():
            connection.cursor().close()
            connection.close()
            print("MySQL connection is closed")


class RestAPIDatabase:

    def get_user_info_by_username(self, connection, username):
        sql_query = 'SELECT * FROM user_info where username = %s'
        cursor = connection.cursor()
        cursor.execute(sql_query, (username,))
        row = cursor.fetchone()
        return row

    def delete_user_info_by_username(self, connection, username):
        sql_query = 'DELETE FROM user_info WHERE username = %s'
        cursor = connection.cursor()
        cursor.execute(sql_query, (username,))
        connection.commit()
IV.Test Steps in test suite
We will have the create data part, execute the test, and clear data after test.
Following are examples:
class TestUserInfo:
    user_api = User()
    restapi_query = RestAPIDatabase()
    random_gen = RandomGenerator()

    def test_create_new_user_success_using_pre_defined_def(self, set_up_mysql):
        username = self.random_gen.random_string(8) + '@gmail.com'
        response = self.user_api.create_new_user(username, 'Abcd1234', 'Le Dinh Cuong')
        try:
            result_user_info = self.restapi_query.get_user_info_by_username(set_up_mysql, username)
            assert result_user_info is not None
            assert 200 == response.status_code
        finally:
            self.restapi_query.delete_user_info_by_username(set_up_mysql, username)

    def test_create_new_user_success_using_object(self, set_up_mysql):
        username = self.random_gen.random_string(8) + '@gmail.com'
        try:
            response = self.user_api.create_new_user_data_class(username, 'Abcd12345$', 'Le Dinh Cuong')
            assert 200 == response.status_code
        finally:
            self.restapi_query.delete_user_info_by_username(set_up_mysql, username)
V.Run the test
You can run from pycharm or from command line with pytest
pytest practice\api\test_simple_blog_api.py
Thank you for reading till here.
As always, stay tuned for the next blog post.
Peace!!!
Notes: If you feel this blog help you and want to show the appreciation, feel free to drop by :

This will help me to contributing more valued contents.


Latest comments (0)