
If you have developed a Node.js project for your backend, you might have wondered where can I host it?
If you have developed something as a hobby or need to do some experimenting or PoC, then heroku is the best place to start.
In this article, we will discuss 2 different ways to deploy your projects to heroku and how much does it cost to have your project hosted in heroku.
Project Setup
First, let's create a sample Node.js project for this demonstration. Go to your terminal, navigate to the directory where you would like to create the project, and create a folder called nodejs-using-heroku-cli
Then run the following command to initialize an npm project with default settings:
npm init -y
Now open the folder in the code editor of your choice and you will see package.json created.
Update it with the start command as shown below:
{
  "name": "nodejs-using-heroku-cli",
  "version": "1.0.0",
  "description": "",
  "main": "index.js",
  "scripts": {
    "test": "echo \"Error: no test specified\" && exit 1",
    "start": "node index.js"
  },
  "keywords": [],
  "author": "",
  "license": "ISC"
}
Now open the terminal and install express.js to create the webserver using the following command:
npm i express
Now create a file named index.js in the root directory with the following content:
const express = require("express")
const app = express()
const port = process.env.PORT || 3000

app.get("/", (req, res) => {
  res.send({ message: "Hello World!" })
})

app.listen(port, () => {
  console.log(`Example app listening at Port: ${port}`)
})
Now start the application by running npm start
and open http://localhost:3000/ in your browser and you should be able to see the response as shown below:

Deploying to Node.js using Heroku CLI
First, go to heroku.com and register a free account for yourself.
Once you have registered, you will be able to see the dashboard as shown below
(of course you will not have any projects yet.):

In the right top corner, click on New > Create New App.
You will be redirected to a page as shown below. Provide the project name and click on the 'Create App' button.

Now your project will be ready. In the next section, we will see how to deploy it using heroku CLI.
Installing the Heroku CLI
There are different ways to install the heroku CLI as mentioned in their documentation.
Since we are deploying a Node.js project, I will prefer installing via npm.
Run the following command so that the CLI gets installed globally:
npm install -g heroku
Once the installation completes, log in to heroku via the command prompt by running the following command:
heroku login
This will open a browser tab, something similar as shown below and you will have to click on the Login button:

Once you have logged in successfully, initialize a git repository in your project by running:
git init
If you do not have git installed on your machine you can download it from here.
Once the git is initialized, create a file named .gitignore in the root directory of the project with the following content:
node_modules/
In this way, we are telling git not to push node_modules to the repository.
Now link your repo to the heroku remote repo by running:
heroku git:remote -a nodejs-using-heroku-cli
Now add the files to the repo and commit it using:
git add .
git commit -am "first commit"
Finally, deploy the files to heroku by pushing the changes (if your branch name is main, then replace master with main):
git push heroku master
After a few minutes, the deployment should be complete and you will be able to see the following logs in the console:
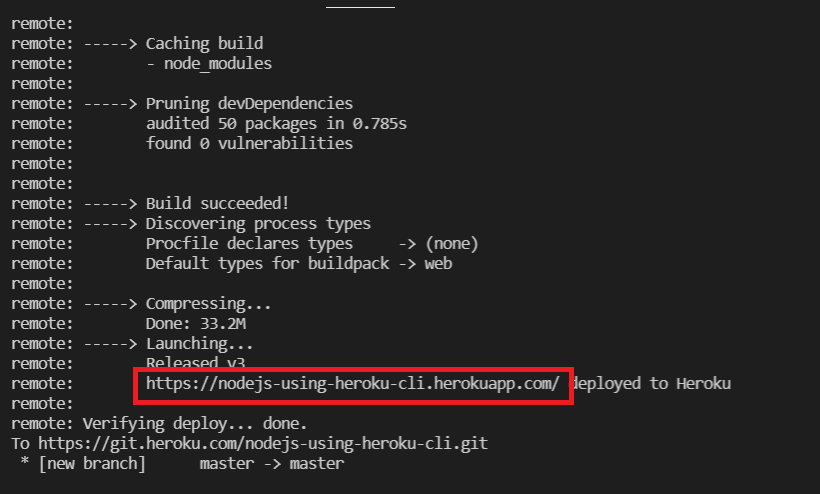
Click on the link highlighted above and you should be able to see your application deployed.

Deploying updates
When you want to deploy new changes, all you need to do is to run the following commands:
git add .
git commit -am "make it better"
git push heroku master
Deploying Node.js to Heroku using GitHub
If you store your project in GitHub, then you can integrate it with heroku.
First create a Node.js project called nodejs-using-github, as we have done earlier.
Now create a git repo in the same name and push your changes to GitHub using the following command:
git commit -m "first commit"
git branch -M main
git remote add origin https://github.com/collegewap/nodejs-using-github.git
git push -u origin main
Now your code will be pushed to GitHub.
You may fork this repo, in case you need to avoid the above steps.
Now create a new app in the heroku dashboard as we have done before.
Once the project is created, navigate to the deploy tab (if you have not already), and click on "Connect to GitHub"

Once you have authenticated, search for the repo to be deployed and click on 'Connect'

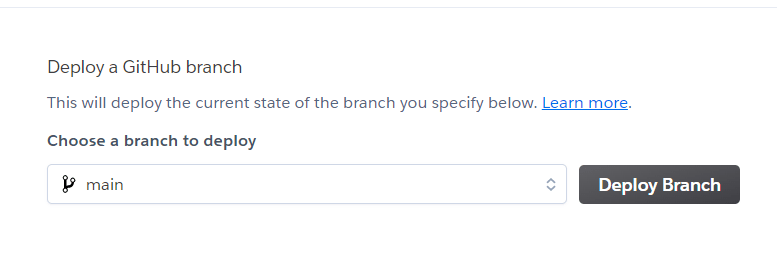
Now you can click on 'Deploy Branch' and deploy your project to Heroku.
Enabling automatic deploys in Heroku from GitHub
You may enable automatic deploys by clicking on 'Enable Automatic Deploys'
so that whenever you push a change to GitHub, it will be automatically deployed to Heroku.

Heroku Pricing
Heroku is free to start with, which can be used for non-commercial and personal projects.
If you want to scale you will have to pay monthly a fee.
Here is the snapshots of the pricing, you can see their latest pricing on their pricing page.

Dynos in Heroku
Heroku has a concept called Dynos. The free tier offers you 550 dyno hours per month.
That is, your app can run for 550 hours in a month.
However, we know that there are on average 720 hours in a month.
To increase this limit to 1000 dyno hours a month, you can add your credit card details in the billing section.
You will not be charged as long as your monthly utilization is under 1000 dyno hours.
Idling of dynos
If you are in the free plan, your server will go to sleep once it is idle for more than 15 minutes.
You can prevent this either by upgrading to hobby plan or by having addons like new relic.
You could also set up a cron job to hit your endpoint every 15 minutes using services like cron-job.org
so that your app doesn't go to sleep.

Top comments (0)