Matomo + Azure = 📈
What is Matomo?
Matomo is an all-in-one premium web analytics platform with the philosophy of 100% data ownership. Simply stated, you own your data, no one else. That means that no abuse of privacy via Google Analytics, Facebook analytics or any other third-party website analytics software.
Privacy has been a growing concern of mine and I'm starting, bit by bit, to take back some control of that and protect my end users from similar abuses. Be the change you want to see, so the saying goes.
What you'll need
Just like previous articles I'm an Azure user. Azure is great, it's friendly to use, simple, cost effective, and just good. That's what we'll be using.
Listed below are what we will need for required installation and configuration.
- An account on Azure
- Access to SSH to configure our virtual machine which will be Linux based (WSL, Linux, macOS, etc)
Getting started
Pre-requisites
Creating the virtual machine
Using the free account and credits for Azure we will leverage some of the other free marketplace Azure services.
Log into your newly created or existing Azure account and do a search for Free services

Select Free services and you'll be presented with a list of available free services. We're going to select the Linux Virtual Machine, this gives us 750 hours of free B1S this should provide us with some solid, cheap hours of use. Even after the free 750 hours credit it still would only cost, roughly, $8/mo. Pretty cheap, relatively speaking.
We need to configure our virtual machine, like so. Obviously fill in your own unique information. If you plan on accessing your VM from more than one computer that you select Password instead of SSH public key it's a bit less mucking about.
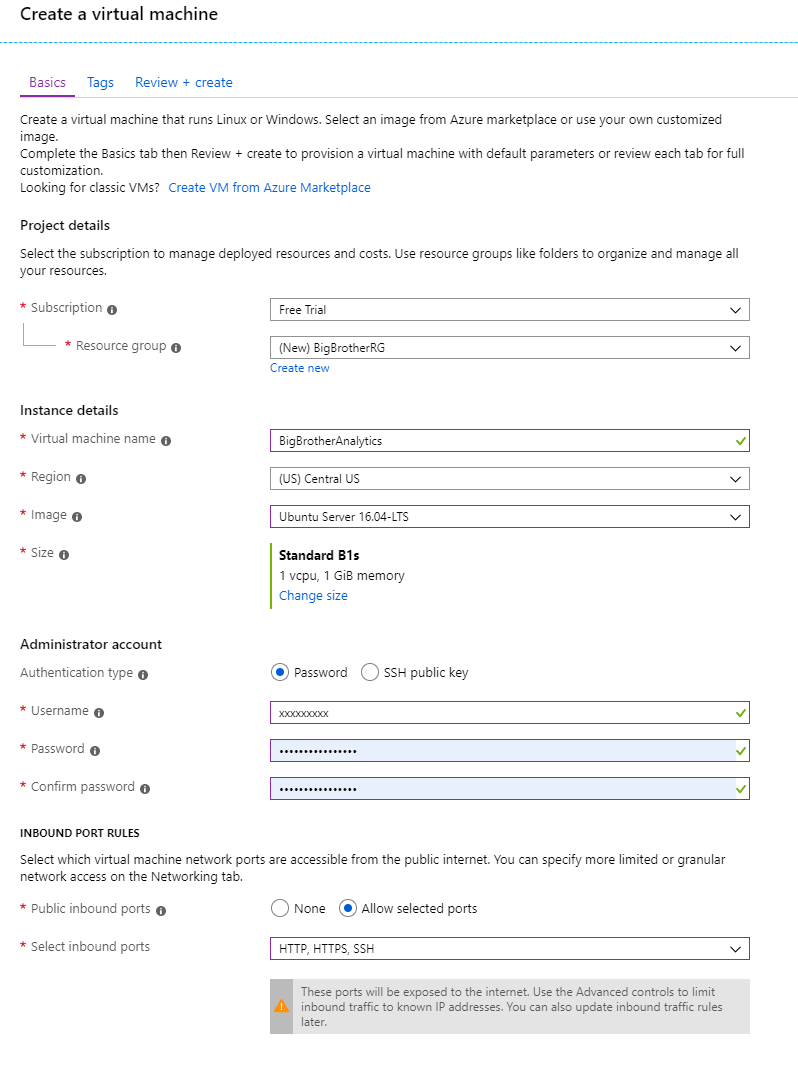
If everything was configured properly we should have passed validation, if you didn't fix your errors and try again. Then click Create to start creating your virtual machine.
Navigate to your VM and check what the Public IP Address is and then we will use that to ssh into our VM.
Configuring the Virtual Machine
SSH into your virtual machine by typing ssh [username]@[public IP address], replacing [username] with the username you specified in the creation of the virtual machine and then replacing [public IP address] with the public IP address of your virtual machine.
Once we're logged in update the virtual machine by running the following commands.
sudo apt install php7.3 php7.3-cli php7.3-fpm php7.3-curl php7.3-gd mysql-server php7.3-mysql php-xml php7.3-mbstring unzip -y
sudo apt update
sudo apt upgrade -y
Now that we're updated to the latest version(s) of our virtual machines software we can continue onto the install.
Creating a database
Before we can run Matomo we will need to create a database for Matomo to use. Let's sign into our MySQL as our root user.
mysql -u root -p
Create the database.
CREATE DATABASE matomo;
Create a new user for the new database.
CREATE USER `billybob@example.com` IDENTIFIED BY 'your_secret_password';
Grant new user the relevant permissions on the database.
GRANT ALL ON matomo.* TO `billybob@example.com`;
Flush privileges and exit the MySQL console.
FLUSH PRIVILEGES;
exit
Installing Matomo
Installing Nginx and configure Nginx for Matomo
Matomo will need some sort of web server software so that we can operate Matomo as intended. For the purpose of this tutorial we're going to instal Nginx.
sudo apt install -y nginx
Now that we've got Nginx installed we need to configure Nginx for our Matomo instance. First we'll need to create the file.
sudo nano /etc/nginx/sites-available/matomo.conf
Now we will need to populate the file with our server configurations. Obviously change the server_name with your specific server name.
server {

  listen [::]:443 ssl http2;
  listen 443 ssl http2;
  listen [::]:80;
  listen 80;

  server_name stats.fivethirtyfour.com;
  root /var/www/matomo/;
  index index.php;

  location ~ ^/(index|matomo|piwik|js/index).php {
    include snippets/fastcgi-php.conf;
    fastcgi_param HTTP_PROXY "";
    fastcgi_pass unix:/var/run/php/php7.3-fpm.sock;
  }

  location = /plugins/HeatmapSessionRecording/configs.php {
    include snippets/fastcgi-php.conf;
    fastcgi_param HTTP_PROXY "";
    fastcgi_pass unix:/var/run/php/php7.3-fpm.sock;
  }

  location ~* ^.+\.php$ {
    deny all;
    return 403;
  }

  location / {
    try_files $uri $uri/ =404;
  }

  location ~ /(config|tmp|core|lang) {
    deny all;
    return 403;
  }

  location ~ \.(gif|ico|jpg|png|svg|js|css|htm|html|mp3|mp4|wav|ogg|avi|ttf|eot|woff|woff2|json)$ {
    allow all;
  }

  location ~ /(libs|vendor|plugins|misc/user) {
    deny all;
    return 403;
  }

}
Now we will need to activate the new matomo.conf configuration by linking the file to the sites-enabled directory.
sudo ln -s /etc/nginx/sites-available/matomo.conf /etc/nginx/sites-enabled
Test the Nginx configuration for syntax errors.
sudo nginx -t
Reload the Nginx service
sudo systemctl reload nginx.service
Download & Extract Matomo
Before we download and install Matomo we need to create and move into our webserver's directory.
sudo mkdir -p /var/wwww/ && cd /var/www/
Now we need to download Matomo first before we can install it. From our console run the following commands. The first section is downloading the file, the second section is unzipping our file we just downloaded and the third section is to clean up the .zip file we downloaded.
wget https://builds.matomo.org/matomo.zip && unzip matomo.zip && rm matomo.zip
Finally let's change ownership of the /var/www/matomo directory to www-data user
sudo chown -R www-data:www-data /var/www/matomo
Installing a Let's Encrypt certificate for ssl
It's important to run our services and websites over SSL. Not only does it give us our privacy but it provides the confidence and privacy of our users.
First we need to install the required repositories to run LetsEncrypt
sudo add-apt-repository ppa:certbot/certbot
sudo apt update
sudo apt upgrade -y
sudo apt install certbot python-certbot-nginx -y
Now that the software is installed we need to create our certificate using the Nginx certbot plugin. Obviously changing the domain for what your site will be.
sudo certbot --nginx -d stats.fivethirtyfour.com
Now if we look at our /etc/nginx/sites-available/matomo.conf file we should see that certbot has added our SSL configurations for us.
######################################
## SNIPPET OF THE MATOMO.CONF FILE  ##
######################################

ssl_certificate /etc/letsencrypt/live/stats.fivethirtyfour.com/fullchain.pem; # managed by Certbot
    ssl_certificate_key /etc/letsencrypt/live/stats.fivethirtyfour.com/privkey.pem; # managed by Certbot
}

server {
    if ($host = stats.fivethirtyfour.com) {
        return 301 https://$host$request_uri;
    } # managed by Certbot

  listen [::]:80;
  listen 80;
  server_name stats.fivethirtyfour.com;
    return 404; # managed by Certbot
}
Now head over to your website where you deployed your site and you should see the Matomo installation page.
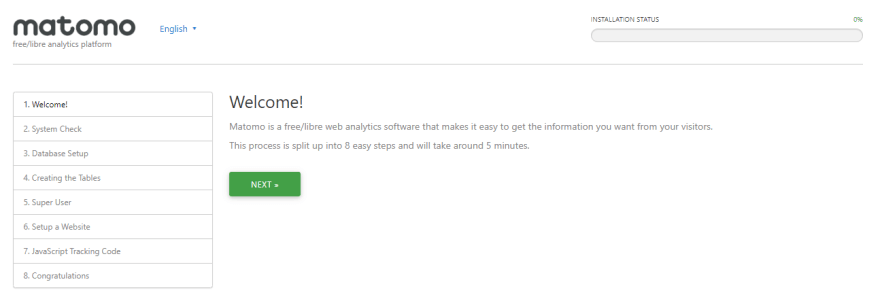
Completing the Matomo Analytics setup
Now go through the Matomo installation process and once you get to the Database Setup section make sure to file this in with the information you created in the Creating a database section earlier in this guide.

Continue going through the configuration and once you get to the Tracking code section make sure you copy your tracking code snippet. This is what you will use to add to your website to gather the analytics information.
Congratulations you now have Matomo Analytics running in Azure cloud instance!!!

Originally posted at https://fivethirtyfour.com
Matomo Web Analytics and Azure


Top comments (0)