1.overview
I have been building some web3 projects. All of these projects would need a wallet connect UI.That's why i write this post. Hand in hand, I will show you how to build an amazing wallets connect UI using next.js tailwindcss daisyUI wagmi and the most important rainbowkit. Here we go!
2.tech stack we gonna use.
- next.js
- wagmi(react hooks)
- ranbowkit(UI library)
- tailwindcss(css framework)
- daisyUI(UI library)
3.next.js setup
What's next.js ?
Next.js is a react framework for production.Therefore if you never used react.js before.Then you need to learn react.js first.I hope you did.Next.js has all the tools we need to make the web faster.Next.js has some features like zero config、fast refresh、SSR、typescript support、ect...
3.1 next.js setup
npx create-next-app@latest --typescript
# or
yarn create next-app --typescript
3.2 add tailwindcss library
Tailwindcss is css framework that help us reduce our css
npm install -D tailwindcss@latest postcss@latest autoprefixer@latest
In the next.js pages/_app.js , we need to import basic tailwindcss library.
// pages/_app.js
- import '../styles/globals.css'
+ import 'tailwindcss/tailwind.css'

  function MyApp({ Component, pageProps }) {
    return <Component {...pageProps} />
  }

  export default MyApp
Additionally, for make this project more sexy i add daisyUI library.
npm i --save daisyui
After all our above works done.We just need to modify the tailwindcss configuration file which is in the root document of this project.
/** @type {import('tailwindcss').Config} */
module.exports = {
  purge: ["./pages/**/*.{js,ts,jsx,tsx}", "./components/**/*.{js,ts,jsx,tsx}"],
  content: [],
  theme: {
    extend: {},
  },
  plugins: [require("daisyui")], //this is what we added.
};
4.rainbowkit configuration
We have to make some modifications to the _app.js file.First and foremost import dependency package like css、provider、chains.
And then we get a client abstract.Below is all codes.
import {
  WagmiConfig,
  createClient,
  configureChains,
  defaultChains,
} from "wagmi";
import { publicProvider } from "wagmi/providers/public";
//rainbow kit UI framework.
import "@rainbow-me/rainbowkit/styles.css";
import { getDefaultWallets, RainbowKitProvider } from "@rainbow-me/rainbowkit";

const { chains, provider } = configureChains(defaultChains, [publicProvider()]);

const { connectors } = getDefaultWallets({
  appName: "My RainbowKit App",
  chains,
});

const client = createClient({
  autoConnect: true,
  connectors,
  provider,
});
There are some optional parameters we could pass into client abstract.
- autoConnect
- connectors
- providers
- storage
- webSocetProvider
To get something detail document referer their official website:https://wagmi.sh/
After we get a client , we pass client and chains into MyApp function.
function MyApp({ Component, pageProps }) {
  return (
    <WagmiConfig client={client}>
      <RainbowKitProvider chains={chains}>
        <Component {...pageProps} />
      </RainbowKitProvider>
    </WagmiConfig>
  )
}
That's all we need to configure before we actually use it in our project.
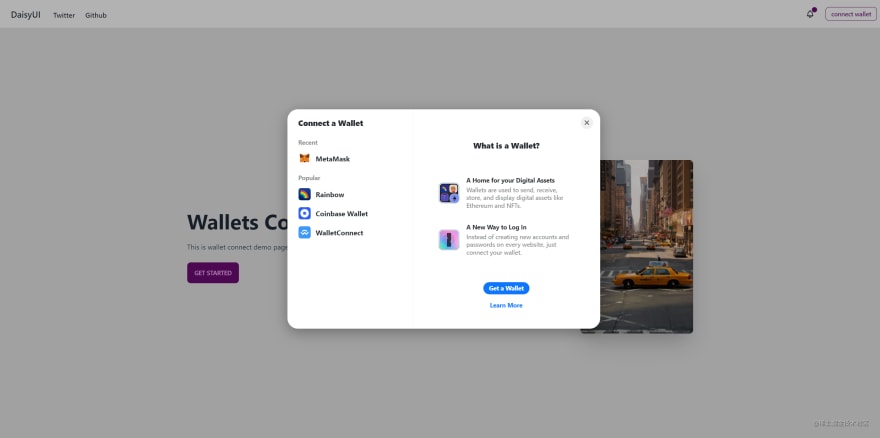
Basically it's quite simple to create a button like connect our wallet.
Let's say we create an button in our header components.
Here goes the code.
It's simple right ?
import {
    useConnectModal,
    useAccountModal,
    useChainModal,
} from '@rainbow-me/rainbowkit';
import { useAccount } from 'wagmi'

const { openConnectModal } = useConnectModal();
const { openAccountModal } = useAccountModal();
const { openChainModal } = useChainModal();
In react.js after we define the click event function, we attach the function to the onClick property.
That's all we need to do?
If you get any problem feel free to connect me!
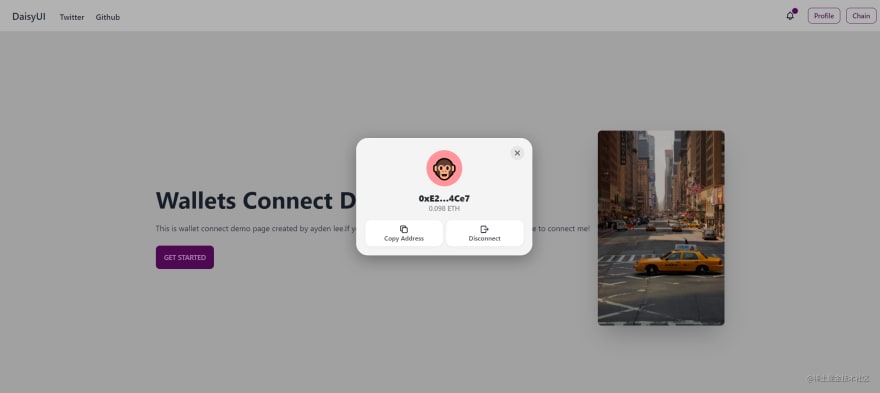
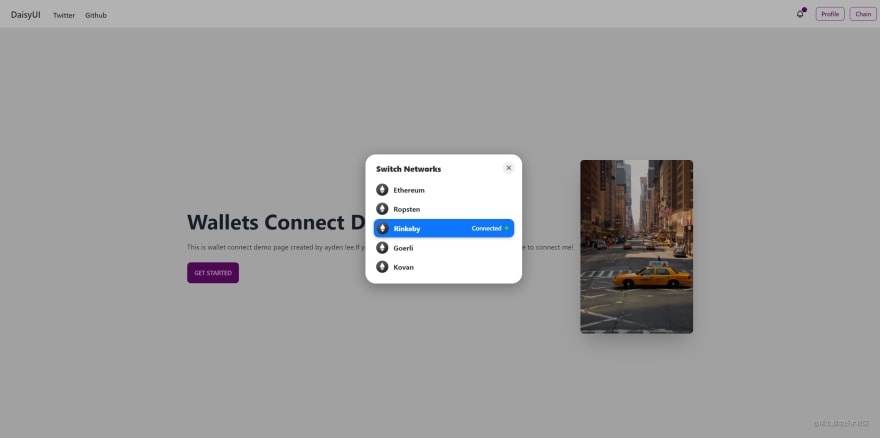
{isConnected ?
    (<><button class="btn btn-sm btn-outline btn-primary ml-3 normal-case" onClick={openAccountModal}>Profile</button><button class="btn btn-sm btn-outline btn-primary ml-3 normal-case" onClick={openChainModal}>Chain</button></>)
    :
    (<button class="btn btn-sm btn-outline btn-primary ml-3 normal-case" onClick={openConnectModal}>connect wallet</button>)
}

Top comments (0)