
This tutorial will explore some fairly complex triggers and Git practices.
Demo:
Angular Admin Site
Hugo Main Site
Steps
Billing Limit Reminder
Fork/Clone lesson-8-hugo
Create Hugo firebase hosting site
Create Hugo Content Google Cloud Build Trigger
Test Cloud Build Trigger
Fork/Clone lesson-8-firestore-functions
Build Angular Project
Deploy Firebase Hosting from CLI
Update Firestore Trigger to match your GitHub repo
Deploy Firebase Functions from CLI
Add a book, watch it show in Hugo site
Optional
- Cloud Build for CI/CD
Billing Limit Reminder
Reminder to try and stay as free as possible. You should not run into problems, but just in case. In your Billing Dashboard create a new Budget for your project incase you try this more than say 50 times.
If you want to put a hard cap on builds checkout Capping API Usage.
For the build API specifically you can go to Cloud Build API Quotas
To update checkout IAM & Admin->Quotas
Fork/Clone lesson-8-hugo
You can just clone lesson-8-hugo from GitHub but if you want to build out any triggers for Google Cloud building, I would suggest forking to your own repo.
Clone your Fork
I will run through our example by forking to my ajonp account, you should see it "forked from AJONPLLC/lesson-8-hugo"

You can do this by replacing your_name in this command.
git clone https://github.com/<your_name>/lesson-8-hugo.git && cd lesson-8-hugo
Test serving hugo locally
Your theme folder will be empty as it references a git submodule. First make sure that you have all of your submodules cloned locally.
git submodule init && git submodule update --remote
Now lets run the hugo serve command. This tells hugo to serve using ajonp-hugo-ionic theme and use the config.toml file.
hugo server -t ajonp-hugo-ionic --config config.toml
You should now see the home page listing the latest books at http://localhost:1313/.

You can also view all the books in a list format at http://localhost:1313/books/.

This will be based on whatever the latest content had in AJONPLLC/lesson-8-hugo if you don't want any of it feel free to clear all files in content/books.
Remember Hugo dynamically builds files, so if you delete all of the files in
content/booksyou will get a 404 onhttp://localhost:1313/books/.
Create Hugo firebase hosting site
Create firebase project
Start by Adding a new Project
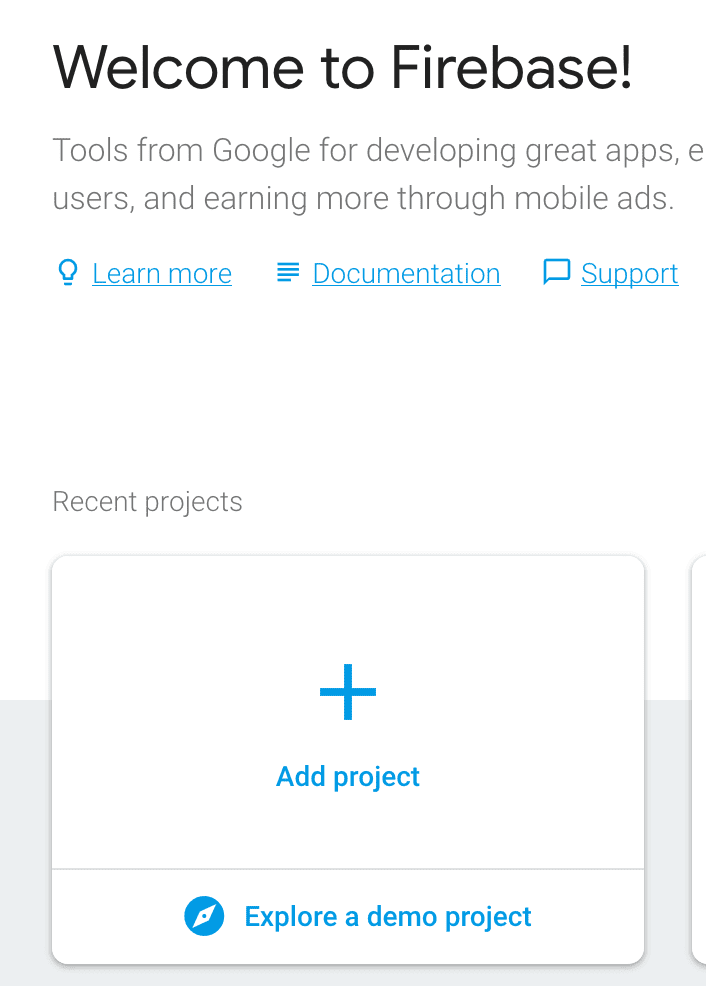
Give the project a good name.

You can then follow the Getting started under hosting, or follow the update local firebase files.

Update local firebase files
There are a couple firebase commands that you could use to manually add the correct hosting setup firebase use ajonp-lesson-8 and firebase target:apply hosting ajonp-lesson-8-hugo ajonp-lesson-8-hugo. However, I feel it is easier to just update two files.
.firebaserc
{
  "projects": {
    "default": "ajonp-lesson-8"
  },
  "targets": {
    "ajonp-lesson-8": {
      "hosting": {
        "ajonp-lesson-8-hugo": [
          "ajonp-lesson-8-hugo"
        ]
      }
    }
  }
}
Your update .firebaserc
{
  "projects": {
    "default": "your-project"
  },
  "targets": {
    "your-project": {
      "hosting": {
        "your-hosting-name": [
          "your-hosting-name"
        ]
      }
    }
  }
}
In the above example replace the default project to match your project. For targets this is mapping your project to your hosting names, we will define the hosting name in firebase.json as the target.
firebase.json
{
  "hosting": {
    "target": "ajonp-lesson-8-hugo",
    "public": "public",
    "ignore": [
      "firebase.json",
      "**/.*",
      "**/node_modules/**"
    ]
  }
}
Your update firebase.json
{
  "hosting": {
    "target": "your-hosting-name",
    "public": "public",
    "ignore": [
      "firebase.json",
      "**/.*",
      "**/node_modules/**"
    ]
  }
}
You will now be able to deploy your site using the firebase CLI.
firebase deploy
You should see a result with around 53 files.
If you only see a few check that you ran the submodule update.

Create Hugo Content Google Cloud Build Trigger
Now that we have manually tested that everything works, we want to validate that we can trigger a Hugo build everytime a commit occurs.
Google Cloud Project
Every Firebase project is really just a Google Platform Project. In order to use the cloud builder we need to enable billing, I suggest switching to the Blaze plan as you won't need to pay anything if you stay under the limits.

Now start by going to Google Cloud Console.
You should see a dropdown selection for the project, select the correct project.

Google Cloud Trigger Enable

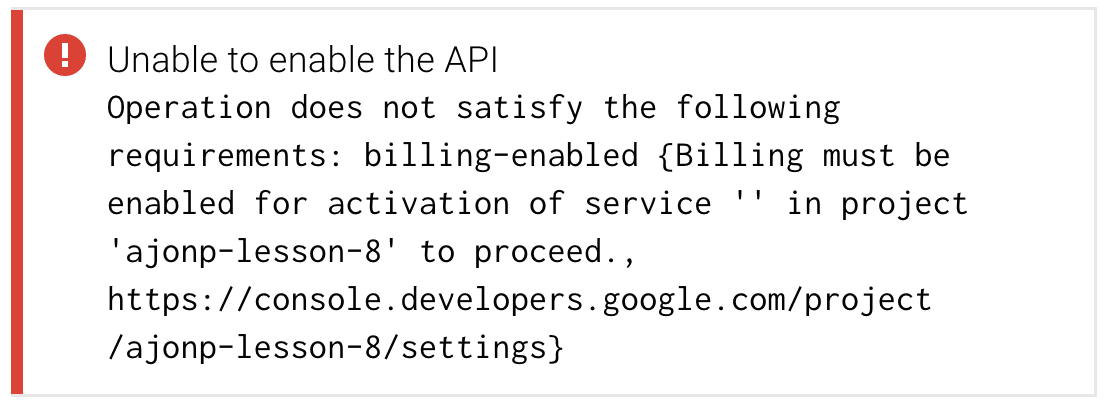
If this is a new project you will need to enable the cloud build API.

If you receive an error, please make sure that you have changed to a Blaze Plan in Firebase.
Google Cloud Trigger Create
If you need more help on this lesson check our Google Cloud Repositories CI/CD for a full walk through.
Select the source from GitHub, and consent.

After you authenticate to GitHub choose your project and continue.

Settings
Name: Hugo CI/CD
Branch: master
Build configuration: cloudbuild.yaml
-
Substitution variables: _FIREBASE_TOKEN = yourtoken.

Test Cloud Build Trigger
Before going further we want to make sure your trigger is working. So lets load a sample file into the content/books folder. Either copy the examplebook.md renaming to testtrigger.md or create a new file.
content/books/testtrigger.md
title = "Example Book"
date = 2018-11-26T14:45:13-05:00
images = ["https://res.cloudinary.com/ajonp/image/upload/w_500,q_auto/v1545282630/ajonp-ajonp-com/8-lesson-firestore-functions/bookExample.webp"]
+++

This is a commit test creating a book.
Local git push
Add the new file if needed.
Commit locally
Then push to the remote GitHub repository.
git push origin
Trigger History
You should now see a history from this trigger listed in Google Cloud Build History

Automatically Deployed to Firebase
The last step in cloudbuild.yaml deploys to to firebase, you should see a successful deploy message in your cloud build logs.
```plain text
Starting Step #5
Step #5: Already have image: gcr.io/ajonp-lesson-8/firebase
Step #5:
Step #5: === Deploying to 'ajonp-lesson-8'...
Step #5:
Step #5: i deploying hosting
Step #5: i hosting[ajonp-lesson-8]: beginning deploy...
Step #5: i hosting[ajonp-lesson-8]: found 54 files in public
Step #5: i hosting: uploading new files 2/48
Step #5: ✔ hosting[ajonp-lesson-8]: file upload complete
Step #5: i hosting[ajonp-lesson-8]: finalizing version...
Step #5: ✔ hosting[ajonp-lesson-8]: version finalized
Step #5: i hosting[ajonp-lesson-8]: releasing new version...
Step #5: ✔ hosting[ajonp-lesson-8]: release complete
Step #5:
Step #5: ✔ Deploy complete!
Step #5:
Step #5: Project Console: https://console.firebase.google.com/project/ajonp-lesson-8/overview
Step #5: Hosting URL: https://ajonp-lesson-8.firebaseapp.com
Finished Step #5
> Reminder if you don't see the new file it may be cached in the browser/service worker, you can force refresh the browser to see this.

# Fork/Clone lesson-8-firestore-functions

The [lesson-8-firestore-functions](https://github.com/AJONPLLC/lesson-8-firestore-functions) is setup to be the admin side of the site that will interact with [Firebase Firestore](https://firebase.google.com/docs/firestore/). I wrote this in Angular, but you could use any Web framework, iOS, Android, Unity...

## Install npm dependencies

Verify that you are in the base directory


```plain text
npm install
Serve locally
At this time you are still pointing at the AJONPLLC project database so you will see some books listed. You must switch to your new firebase project that we created above by changing.
Update the firebase configuration
You only need one environment file, but I often have a dev and production setup with both.
In your Firebase Project Overview there is a gear for Settings->Project settings.

Then select the "Add Firebase to your web app" under the "Your apps" section.

Copy the Javascript object that is assigned to config, in the next step we will paste this into our environment files.
src/environments/environment.ts and src/environment/environment.prod.ts
{
    apiKey: "your-apiKey",
    authDomain: "your-project.firebaseapp.com",
    databaseURL: "https://your-project.firebaseio.com",
    projectId: "your-project",
    storageBucket: "your-project.appspot.com",
    messagingSenderId: "your-messagingSenderId"
}

Authentication
Now because this is a new project that we are directing this app towards, you will most likely see an error if you go back to http://localhost:4200 as we have not updated our Authentication settings yet.
You can update this in Authentication -> Sign-in method. Edit the Google Sign-in provider and enable it. You can find more in the Firebase Authentication Docs
Firestore database
Back in your Firestore project select Database->Create Database

I recommend always starting in a lock mode, it helps you understand what security you will need throughout the app without forgetting something later. At times it even helps with you Data Model as some setups on security are just terrible.

Note at this point because your project is in lock mode you will not be able to successfully update the Firestore database and you will see failures, as every login we update a users record.
Firebase Hosting Updates
Update the project name everywhere
You can do a full project find and replace looking for ajonp-lesson-8-admin and replace with your-name.
Example I changed mine from ajonp-lesson-8-admin to ajonp-lesson-8-admin2. If you use VSCode you can do it like below.

src/styles/ajonp-lesson-8-admin -> your_name
If you get an error that looks similar to this, it is because the styles file was changed and we just switched all the references in the line above.

I changed mine from ajonp-lesson-8-admin-app-theme.scss to ajonp-lesson-8-admin2-app-theme.scss.
At this time you can test adding and deleting books from the database, but we still have plumbing to work on getting these to build the Hugo site.
Build Angular Project
At this time I have not started using the Ivy rendering engine, but I hope it can complete builds faster in the future. Grab a quick coffee when you run this one.

Now your entire site is ready for hosting, you can try it locally but running firebase serve.
Deploy Firebase Hosting from CLI
Now that we have a production Angular build in dist/ajonp-lesson-8-admin2 we can deploy this out to our Firebase Hosting, we just need to create a new site that is authorized.
Create new site
Hosting->Dashboard->Advanced select "Add another site"

Update Authorized Domains
Because we are serving this from a different domain than normal you will need to add it to our Authorized Domains. You can find this in Authentication->Sign-in method->Authorized domains, select "Add domain".
This will be your-project-admin.firebaseapp.com
You should now see three localhost, default (our Hugo site), your-project-admin site.

Update Firestore Trigger to match your GitHub repo
Now that we have both a Hugo site up and running and an Angular admin site up and running we can setup a Firebase Function to trigger everytime we add/delete a book.
Create Your Github Personal Token
You will need to Create Github Personal Token, otherwise you will be sending your password for each request. You can find this in settings->Developer Settings->Personal Access Tokens, select "Generate New Token". This is like a password but you can restrict what access the token is allowed.
For this you can give the repo and read:user access, Name it something meaningful.

Add GitHub Personal Token to Firebase Functions
You can not run this command to save your token out where only Firebase Functions will have access. In a future lesson I am going to show how to secure these better.
You should see a message like this.
Deploy Firebase Functions from CLI
Now Deploy your functions, this will transcode the typescript and put the js files in the lib directory. I have both of these set to run on Node 8.
You should see a success message

Add a book, watch it show in Hugo site
Warning you could have a race condition occur where your first trigger to build happens after your last. There are a few work arounds for this that I don't cover in this lesson. Remember everytime you save a build happens in Google Cloud Build to regenerate your entire Hugo site.
In the bottom right corner you can click the + fab button, this will open the form for a New Book.

Once you click save this will trigger the Cloud Function gitBookCreateHugoCommit. Checkout the logs
Watch for the build to take place in Google Coud Builder History
You can then navigate over to your Hugo site (after about 2 minutes) and see the new book.
Delete a book
This does the same thing as adding except it will trigger the gitBookDeleteHugoCommit Cloud Function.

Top comments (0)