
Serverless cloud infrastructure is the next step in building apps. But if you’ve tried to navigate the vast number of services in the AWS console, you know that using the cloud is easier said than done. Today’s developers are overwhelmed with the amount of services AWS offers.
The solution? AWS Amplify, which helps developers to easily build and deploy complete mobile and web apps by providing a collection of CLI tools, libraries, frameworks, and cloud services.
How Does AWS Amplify Work?
Your main interaction point when using Amplify is the CLI tool, which comes with many commands that help you set up and maintain a serverless project. The Amplify CLI can create infrastructure by generating and deploying CloudFormation code. It also includes code generators for mobile and web apps that use the following languages: JavaScript/TypeScript, Dart, Swift, Java and GraphQL.
This way, you get new AWS resources deployed to the cloud, configured with best practices, and the boilerplate code needed to connect your frontend with these resources.
Amplify also has its own set of cloud services which you can use to set up and manage your apps, including web hosting based on Amazon S3 and Amazon CloudFront, the Amplify Console and Amplify Admin UI. The Amplify Console is used to get insights into your app’s workings after you deploy it, while the Amplify Admin UI is a visual alternative to the Amplify CLI, where you can create backends in the browser.
There is also a large set of frontend libraries and components that help you connect with the AWS services and ease the integration of Amplify with frontend frameworks like React or Vue. This includes a library for authentication with Amazon Cognito, AWS’ own identity management service, and a GraphQL client to connect to AppSync, a hosted GraphQL API service.
With Amplify DataStore, Amplify even includes a relatively high-level library that eases the pain of setting up offline functionality and real-time synchronization for your apps.
Building an Image Gallery
To get a better understanding of what Amplify can do, let’s build something with it! An image gallery web app is a simple task for Amplify. This tutorial shows you how to use the Amplify auth, hosting, and storage plugins, and how to generate most of the code with the Amplify CLI.
1. Prerequisites
This tutorial requires the following:
- AWS account
- AWS CLI
- Node.js & NPM
- Amplify CLI
If you use the Cloud9 IDE to follow along, you only have to install and configure the Amplify CLI manually; everything else is set up correctly out of the box. Make sure that the Amplify CLI was configured via amplify configure, to use your AWS credentials. AWS has a detailed guide on installing and configuring the Amplify CLI.
2. Initializing the Sample Application
First, you need to create a new directory for your app with several sub directories.
$ mkdir image-gallery
$ cd image-gallery
$ mkdir src
$ mkdir dist
The src directory is used to store the JavaScript code, while the dist directory is used by Amplify to bundle, minify and upload the JavaScript and HTML to the cloud.
Create a package.json file in the projects root directory with this content:
{
  "name": "image-gallery",
  "version": "0.1.0",
  "scripts": {
    "build": "esbuild src/app.js --bundle --minify --define:global=window --outfile=dist/app.js"
  },
  "dependencies": {
    "aws-amplify": "latest"
  },
  "devDependencies": {
    "esbuild": "^0.13.15"
  }
}
You should use ESBuild to bundle and minify the Amplify SDK with your application code for deployment. The amplify publish CLI command will automatically call the build script and search the dist directory for files to upload to Amplify’s hosting service.
3. Initializing Amplify
Initialize Amplify in the project with the below command. When asked, choose the defaults.
$ amplify init -y
This command will set up basic Amplify-related resources in the cloud, including two IAM roles and a S3 bucket for deployment-related data. It will also generate a src/aws-exports.js file that contains all the credentials your frontend needs to connect to the services you’ll deploy later. This file will be updated with every call to the Amplify CLI, so you should never change it manually.
Next, add hosting, auth, and storage, in that order.
$ amplify add hosting
Select the defaults, which are listed below.
? Select the plugin module to execute: Hosting with Amplify Console (Managed hosting with custom domains, Continuous deployment)
? Choose a type: Manual deployment
$ amplify add auth
Next, the CLI will ask you some questions, with default answers given. Here, the defaults are okay too. They are as follows:
Do you want to use the default authentication and security configuration? Default configuration
How do you want users to be able to sign in? Username
Do you want to configure advanced settings? No, I am done.
$ amplify add storage
The storage category needs a bit of customization. The default configuration only allows authenticated users to access the storage, but you also want unauthenticated users to view the images. For this, you’ll need the following configurations:
? Select from one of the below mentioned services: Content (Images, audio, video, etc.)
✔ Provide a friendly name for your resource that will be used to label this category in the project: ...
✔ Provide bucket name: ...
✔ Who should have access: Auth and guest users
✔ What kind of access do you want for Authenticated users? create/update, read, delete
✔ What kind of access do you want for Guest users? read
✔ Do you want to add a Lambda Trigger for your S3 Bucket? no
For the storage, select Auth and guest users to make sure you have access. Authenticated users need permission to create, update, and read files, and guest users need permission to read files.
4. Writing the Source Code
Create an index.html file in the dist directory with the following content:
<!DOCTYPE html>

<meta charset="utf-8" />

<title>Amplify Image Gallery</title>

<link rel="stylesheet" href="//unpkg.com/bamboo.css@1.3.7/dist/dark.min.css" />

<style>
  button {
    width: 100%;
  }
</style>

<h1>Amplify Image Gallery</h1>

<div id="signin-status">Sign Up or Sign In.</div>
<br>

<h2>Step 1: Sign Up</h2>

Username <input id="signup-username" /><br>

Email <input id="signup-email" /><br>

Password <input type="password" id="signup-password" /><br>

<p>
  Passwords must be 8 characters long, contain one number and one special
  character.
</p>

<button id="signup-button">Sign Up With Email</button><br>

<h2>Step 2: Confirm Sign Up</h2>

Confirmation Code <input id="signup-confirmation-code" /><br><br>

<button id="confirm-signup-button">Confirm Sign Up</button>

<br><br>

<h2>Step 3: Sign In</h2>

Username <input id="signin-username" /><br>

Password <input type="password" id="signin-password" /><br><br>

<button id="signin-button">Sign In</button><br><br>

<h2>Step 4: Upload image</h2>

<input type="file" id="upload-input" />

<h2>Images</h2>

<div id="gallery"></div>

<script src="app.js"></script>
This HTML page has a few buttons for the sign-up process. They will be hooked up with logic in the following JavaScript file.
Create a app.js file in the src directory with this content:
import Amplify, { Auth, Storage } from 'aws-amplify'

import awsconfig from './aws-exports'

Amplify.configure(awsconfig)

const getElement = document.getElementById.bind(document)

const statusDiv = getElement('signin-status')

async function refreshGallery() {
  const galleryDiv = getElement('gallery')

  galleryDiv.innerHTML = ''

  const files = await Storage.list('')

  for (let file of files) {
    const image = document.createElement('img')

    image.src = await Storage.get(file.key)

    galleryDiv.appendChild(image)
  }
}

refreshGallery()

getElement('signup-button').addEventListener('click', async () => {
  const username = getElement('signup-username').value
  const email = getElement('signup-email').value
  const password = getElement('signup-password').value

  await Auth.signUp({ username, password, attributes: { email } })

  statusDiv.innerText = `Check "${email}" inbox for a confirmation code.`
})

getElement('confirm-signup-button').addEventListener('click', async () => {
  const code = getElement('signup-confirmation-code').value
  const username = getElement('signup-username').value

  await Auth.confirmSignUp(username, code)

  statusDiv.innerText = 'Sinup confirmed. You can sign in now.'
})

getElement('signin-button').addEventListener('click', async () => {
  const username = getElement('signin-username').value
  const password = getElement('signin-password').value

  const result = await Auth.signIn(username, password)

  statusDiv.innerText = 'Signed in as ' + result.username
})

getElement('upload-input').addEventListener('change', async (e) => {
  const [file] = e.target.files

  await Storage.put(file.name, file)

  await refreshGallery()
})
The app.js file fills the HTML with life. The aws-exports.js file contains all the credentials your client needs to interact with the deployed infrastructure. You’ll use it to initialize the Amplify SDK.
The refreshGallery function fetches a list of all the names of the files you uploaded to AWS Amplify Storage, which is essentially an S3 bucket. Then, it uses the Storage.get method to generate signed URLs that can be put into img HTML elements to display your images.
Next, event listeners are added to all buttons to manage the authentication flow. The Amplify SDK offers an Auth object with various methods to sign up, sign in, and confirm email codes. A sign-in is required to use the upload feature later.
To install the Amplify SDK for JavaScript and ESBuild, run the following command:
$ npm i
After the libraries are installed, you can deploy a serverless infrastructure with the Amplify CLI and publish the changes to the AWS cloud:
$ amplify publish
This command will deploy the serverless infrastructure and package, as well as upload your frontend code. It can take a few minutes to complete because many resources will be provisioned.
5. Using the App
After the deployment is finished, Amplify will present you with an URL. The app will look like the image in Figure 1, below.
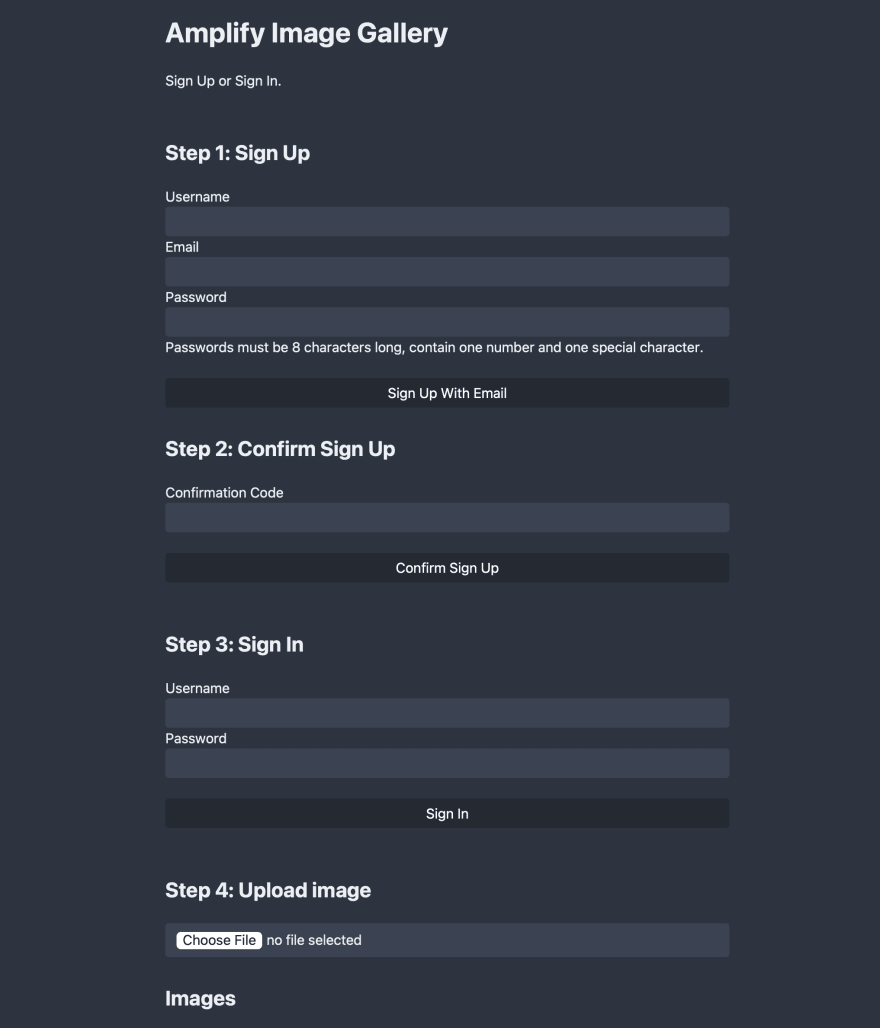
Figure 1: Image gallery app
Open the URL in a browser and simply follow the instructions:
- Sign up with your email
- Enter the confirmation code you received from AWS Cognito and validate it
- Sign in
- Upload an image
The image will be sent directly to an S3 bucket that was created by Amplify when you set up the storage category with the CLI. The Amplify SDK is then used to generate signed URLs, which allow you to access the images via HTTP. The whole code for loading the images is in the refreshGallery function inside the src/app.js file:
async function refreshGallery() {
  const galleryDiv = getElement('gallery')

  galleryDiv.innerHTML = ''

  const files = await Storage.list('')

  for (let file of files) {
    const image = document.createElement('img')
    image.src = await Storage.get(file.key)
    galleryDiv.appendChild(image)
  }
}
6. Cleanup
After you’ve deployed and used the system, you can delete it with just one Amplify CLI command:
$ amplify delete
This command will delete all local files Amplify generated and destroy the CloudFormation templates and all related resources deployed in the cloud.
Check the S3 console for buckets related to the project, after calling the above command. To prevent data loss in Amplify, and in turn, CloudFormation, they won’t be deleted automatically.
Also, the IAM user created by Amplify to deploy resources will be left after calling the delete command. You find it in your IAM dashboard, where you have to delete it manually.
What About the Pricing?
If you’ve ever used services like Firebase or Heroku, you probably know that solutions that ease developers’ interactions with the cloud can become expensive, especially when scaling up later. Usually, these solutions are built as totally stand-alone services, specially crafted for one purpose: making the cloud easier to use.
AWS went in a different direction with Amplify. It’s built on the AWS infrastructure services you already know, so you have to pay the same amount of money as when you use these services without Amplify. And since the services it uses are serverless, they all offer on-demand payment options. If you build a system that nobody wants to use, you don’t have to pay for the unused resources.
If you build an Amplify-based app, check out the AWS Pricing Calculator to estimate how much it will cost you. All resources follow the same pricing models with and without Amplify.
Summary
AWS Amplify is an exciting approach to serverless infrastructure. It caters mainly to frontend and mobile developers, so its projects can be maintained even if you don’t have enough full-stack or backend developers at hand.
Amplify differs from solutions like Firebase in that Amplify is just an abstraction layer above existing serverless AWS services. Besides the Amplify console and the Amplify Admin UI, which manage your app, it doesn’t introduce special services to run your app. This is also why the costs of running an app with Amplify are the same as when configuring all underlying services manually.
For our latest insights and updates, follow us on LinkedIn

Top comments (0)