
In this post we will show how to ensure that Google web crawlers can find all of the pages on your Gatsby based website.
If site crawlers are so good at finding new websites why can’t we just put a new page up on the internet and wait for Google to find it? That’s a good question! It turns out that even if Google is aware of your domain, having an XML sitemap makes it easier for the web crawler to find all of your pages on your site. Without it, if you added a new page, Google wouldn’t actually know that it exists until some other page links to it.
How to add Sitemaps to Gatsby
The first step to add sitemap functionality to your site is to add the gatsby-plugin-sitemap package to the project. Navigate to the root folder of your project and type the following into your terminal:
npm install --save gatsby-plugin-sitemap
Then we need to add the plugin to the gatsby-config.js file which is in the root of the project. We add the gatsby-plugin-sitemap line to the plugins array and the site url to the siteMetadata section:
module.exports = {
  siteMetadata: {
    title: `Gatsby Default Starter`,
    description: `Kick off your next, great Gatsby project with this default starter. This barebones starter ships with the main Gatsby configuration files you might need.`,
    author: `@gatsbyjs`,
    siteUrl: `https://www.fullstack-serverless.com`,
  },
  plugins: [
    `gatsby-plugin-sitemap`,
    `gatsby-plugin-react-helmet`,
    {
      resolve: `gatsby-source-filesystem`,
      options: {
        name: `images`,
        path: `${__dirname}/src/images`,
      },
    },
    `gatsby-transformer-sharp`,
    `gatsby-plugin-sharp`,
    {
      resolve: `gatsby-plugin-manifest`,
      options: {
        name: `gatsby-starter-default`,
        short_name: `starter`,
        start_url: `/`,
        background_color: `#663399`,
        theme_color: `#663399`,
        display: `minimal-ui`,
        icon: `src/images/gatsby-icon.png`, // This path is relative to the root of the site.
      },
    },
  ],
}
Now we can deploy the website. An excellent way to do this is using AWS Amplify since it automates everything for you. I previously wrote a tutorial that shows how to do this, so check it out if you want a good boilerplate to start from or check out the end of this post for an example boilerplate project with this sitemap code already included.
In any case, once you update your website you will see that there is a new xml file at the root of your domain. You can check out an example at https://www.codemochi.com/sitemap.xml, which looks like this:
<urlset xmlns="http://www.sitemaps.org/schemas/sitemap/0.9" xmlns:news="http://www.google.com/schemas/sitemap-news/0.9" xmlns:xhtml="http://www.w3.org/1999/xhtml" xmlns:mobile="http://www.google.com/schemas/sitemap-mobile/1.0" xmlns:image="http://www.google.com/schemas/sitemap-image/1.1" xmlns:video="http://www.google.com/schemas/sitemap-video/1.1">
<!--Many more urls are omitted below for clarity-->
<url>
  <loc>https://codemochi.com/</loc>
  <changefreq>daily</changefreq>
  <priority>0.7</priority>
</url>
<url>
  <loc>https://codemochi.com/about/</loc>
  <changefreq>daily</changefreq>
  <priority>0.7</priority>
</url>
</urlset>
We can see that there will be a <url> entry for each page in the website. Codemochi.com has an entry for the home page and also for the about page. In the future as we add pages to our Gatsby site, this plugin will add more entries automatically.
How to add a sitemap to Google Search Console
Now that we have a sitemap, we should register our domain with Google Search Console. In the process that we will show below, the general idea is that we need to add the domain to Google Search Console and then verify that we own it by adding a secret key to AWS Route 53 which will prove to Google that we own the domain that we are registering in the console. This process will be identical if you are using a competing DNS registrar such as Namecheap, Google or GoDaddy. Once we finish that, we can give it the url path to the sitemap.xml file and Google will index it and figure out all the web pages that your site contains.
First we go to Google Search Console and log in with our Google account. If we click add a domain we are prompted with this screen:
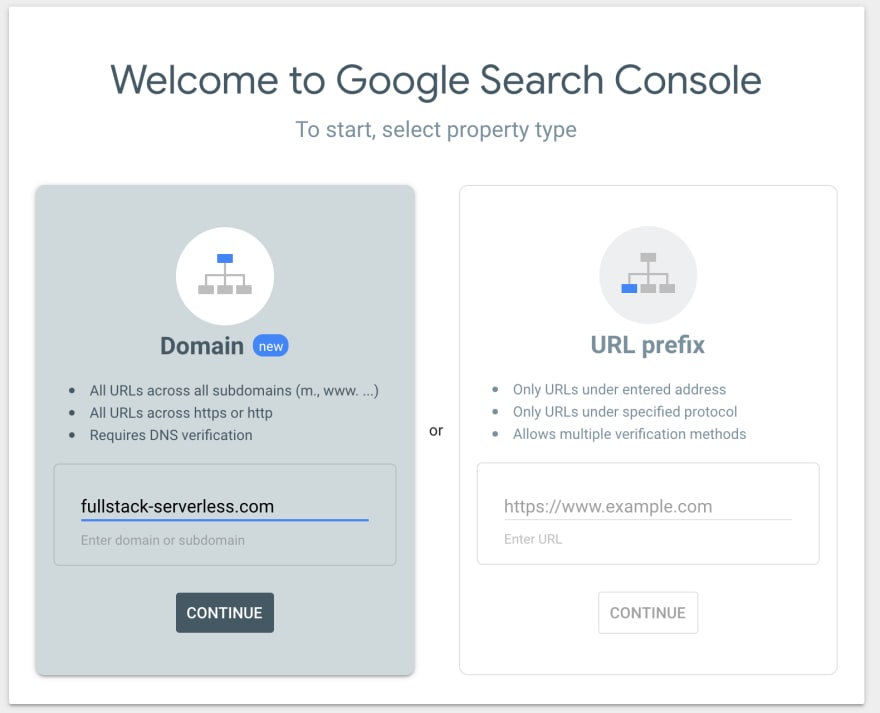
It is much easier to register an entire domain rather than a single URL prefix, so add your domain to the field on the left and click continue. Next, we have to verify the domain ownership using a DNS record.

Copy the TXT record and then head over to AWS Route 53. Click on Hosted Zones and then the particular hosted zone you are interested in registering.

Now we have to create a new record set. You can leave the name blank and change the record set type to TXT. Then, you need to change the TTL to something low- like 1 second. The TTL is how often the update gets pushed to the Domain Servers around the world, so we want to set that value low so that it gets updated immediately after we make our changes. (Make sure to change this number back to 1 day after everything gets set up since it is unnecessary to update so fast once everything is properly configured.)

Take the text snippet that we copied from google search console and add it to the Value field. Make sure that you wrap your string in double quotes and click the Create button. (If you get an error at this step it might be that you forgot the double quotes- I made that mistake the first time!)
Now you can go back to the Google Search Console and click verify. If everything went as planned you should be greeted with this confirmation box:
 

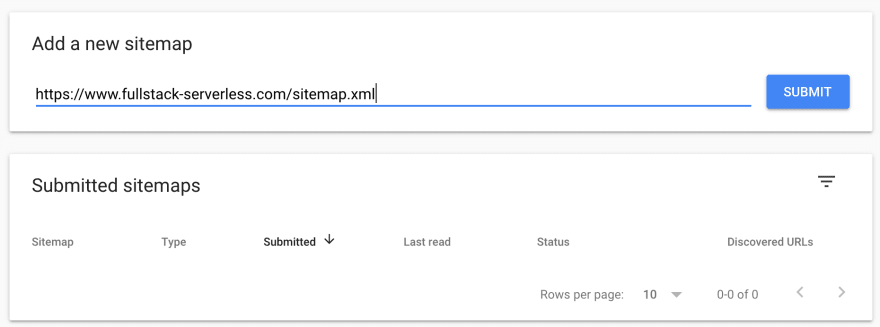
Now we can go and add the sitemap to the google search console. On the sidebar click the sitemaps tab.
 

Then put in the full path of your sitemap and click submit.


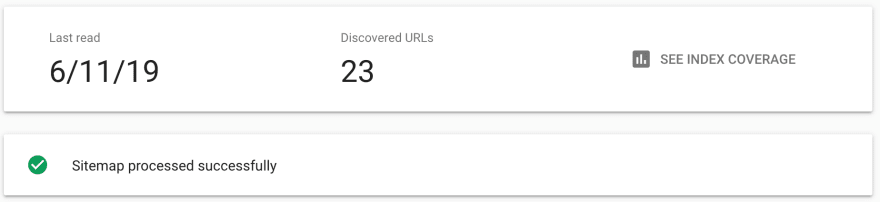
That should be it and if you wait a short amount of time, you will see Google indexing all your pages. You should see that it discovered all the pages in your sitemap. If there are any errors with missing pages you will also be notified there as well.


Example Project
Check out a starter Gatsby project with the sitemap plugin already configured.
There is more where that came from!
Click here to give us your email and we'll let you know when we publish new stuff. We respect your email privacy, we will never spam you and you can unsubscribe anytime.
Originally posted at Code Mochi.


Top comments (0)