
In this article (originally posted to Codemagic blog) Ivy Walobwa will show you how to build and publish a signed Android version of your Flutter app to App Center with Codemagic.
Sharing your application with real users in real environments before your app goes live has to be one of the most exciting stages of app development. You get to release your application to targeted users to test and uncover bugs in your app --- in other words, to beta test it.
Speed and automation are critical factors when releasing your app to beta testers. Therefore, it's necessary to work with tools that can integrate new code into the existing codebase, perform tests, and release an updated version of the app automatically in less time.
Codemagic and App Center
Codemagic is a CI/CD tool for mobile app projects. It works by automatically handling all the builds, tests, and releases for you. It has a repository integration that helps connect with the Git provider that hosts your Flutter app. You can then set up a workflow for development, testing, and releasing your app.
Building your app with Codemagic generates your app artifacts, which can be distributed through App Center. App Center enables you to ship applications faster and with greater confidence.

Prepare App for release
First, you'll need a Flutter app hosted on your favorite Git provider. To prepare the app for release, you need to:
- Set the app launcher icon
- Set the app name
- Assign a unique app ID
You can follow the guide in the official Flutter documentation to prepare your app for release. This tutorial uses a sample counter app that is prepared for release.
Set up Codemagic
You need a Codemagic account to use the CI/CD tool. If you don't have one, you can sign up here. Codemagic is free up to 500 free build minutes every month.
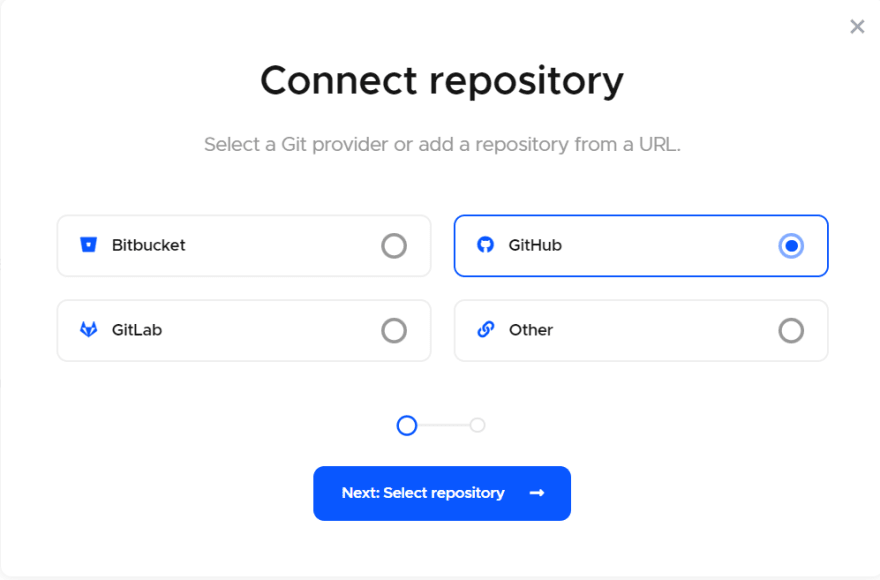
Once signed in, add a new application by connecting to your Git provider.
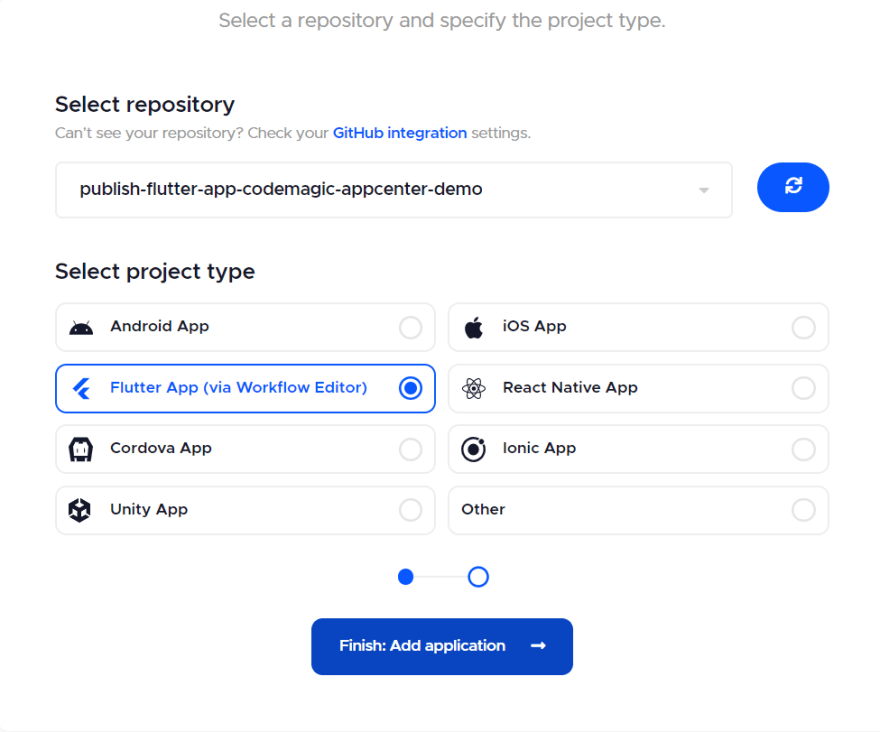
Next, select your repository from the dropdown and choose the project type. In this case, the project type is Flutter App (via Workflow Editor).
Your app is ready, and you can now add some settings to determine how your app will be built, tested, and deployed using the Workflow Editor.
Build your app with Codemagic
To build your app, you need to customize the build settings to suit it:
Select your build platform. This tutorial publishes Android artifacts to App Center.
Expand the "Build triggers" section and select your preferred build triggers. You can also configure the watched branches and tags. These settings will start a build whenever a selected trigger occurs.

If your app contains some tests, you can configure the test settings accordingly.

Expand the "Build" section and select your app's build format and mode. Since you'll be publishing your app to App Center, select "AAB" or "APK" for the build format and "Release" for the mode.

Sign your app
To publish your app to App Center, you need to give it a digital signature. You can add code signing to your app via the Flutter Workflow Editor by following these steps:
- Create an upload keystore by running the command below in your Windows terminal and completing the prompts: keytool -genkey -v -keystore c:\Users\USER_NAME\upload-keystore.jks -storetype JKS -keyalg RSA -keysize 2048 -validity 10000 -alias upload
Replace USER_NAME with your username. This command creates a Keystore file and stores it in your home directory.
If you are on Mac/Linux, run the command described in the official Flutter documentation.
-
Add the keystore information in the
android/app/build.gradlefile, as shown below:
def keystoreProperties = new Properties()
def keystorePropertiesFile = rootProject.file('key.properties')
if (keystorePropertiesFile.exists()) {
    keystoreProperties.load(new FileInputStream(keystorePropertiesFile))
}

android {
      ...
}
The code snippet above references the keystore file that will be uploaded to your Codemagic workflow.
-
Find the
buildTypesblock in theandroid/app/build.gradlefile, and replace it with the code snippet below:
signingConfigs {
    release {
        keyAlias keystoreProperties['keyAlias']
        keyPassword keystoreProperties['keyPassword']
        storeFile keystoreProperties['storeFile'] ? file(keystoreProperties['storeFile']) : null
        storePassword keystoreProperties['storePassword']
    }
}
buildTypes {
    release {
        signingConfig signingConfigs.release
    }
}
The code snippet configures automatic signing for your app's release builds.
- Go back to the Workflow Editor page, expand the "Android code signing" section under "Distribution", and enable code signing. Add your keystore password.

- Upload the keystore file you generated in step 1 to the Keystore section. Add
uploadas the key alias; this is the alias you added to the command in step 1 (... -alias upload).
You have successfully added code signing to your workflow and are now ready to publish your app to App Center.
Set up App Center
You need an App Center account to release your app. If you don't have one, you can create an account for free.
Once signed in, add a new app, give it a name, and select "Beta" as your release type. It's recommended to give your app on App Center the same name as your Android app name.
Since you configured Codemagic to build for Android, select "Android" as your OS and "Java/Kotlin" as your platform. You can upload your app icon as well.

You are now ready to release your app for testing!

Under the "Distribute" tab, select the "Groups" tab to create a new group. Add a new group by giving it a name and inviting members to it. Since you are releasing your app to beta testers, name it "Beta Testers".

You now have a group ready for your app's first release.
Add App Center user API token
An API token is required to release your Flutter app to App Center. It's recommended to create a new user API key for Codemagic.
You can add a new user API token from the "Settings" tab. Give your token a description and full access.

Copy the generated key and head back to your Workflow Editor on Codemagic. Expand the "Environment variables" section and add an APP_CENTER_TOKEN variable for the key generated. The value of the variable is the key copied from App Center.
You can also add the path to your build output as your environment variables: build/app/outputs/bundle/release/app.release.aab.

Publish your Flutter app to App Center automatically with Codemagic
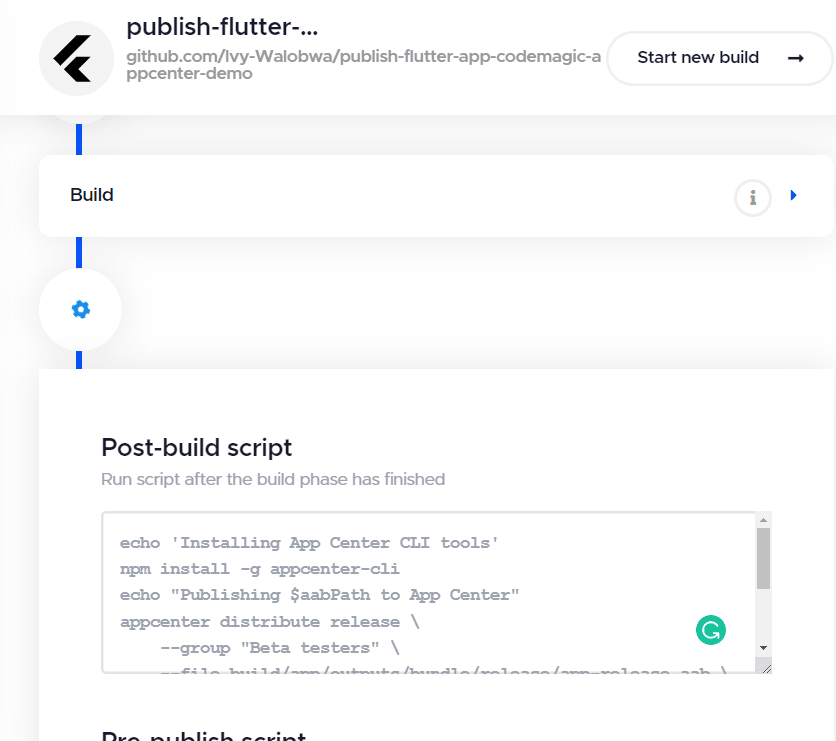
To distribute your Android artifacts to App Center, you'll need to add a post-build script to your workflow.
Click on the plus icon between your build and distribute configurations to add a post-build script. The script is meant to publish your artifact to App Center.
-
Add the code snippet below as your post-build script:
echo 'Installing App Center CLI tools' npm install -g appcenter-cli echo "Publishing $aabPath to App Center" appcenter distribute release\
--group "Beta testers"\
--file $aabPath\
--release-notes 'App submission via Codemagic'\
--app ivywalobwa/Counter-App\
--token $APP_CENTER_TOKEN\
--quiet
The code snippet above installs the App Center command-line interface (CLI) that will be used to interact with App Center. It then distributes your app artifacts to App Center with the following configurations:
-
Beta testers--- the name of your group -
$aabPath--- the path to your.apk,.aab, or.ipaartifacts -
$APP_CENTER_TOKEN--- the token obtained from the user settings in App Center -
ivywalobwa/Counter-App--- username/app name
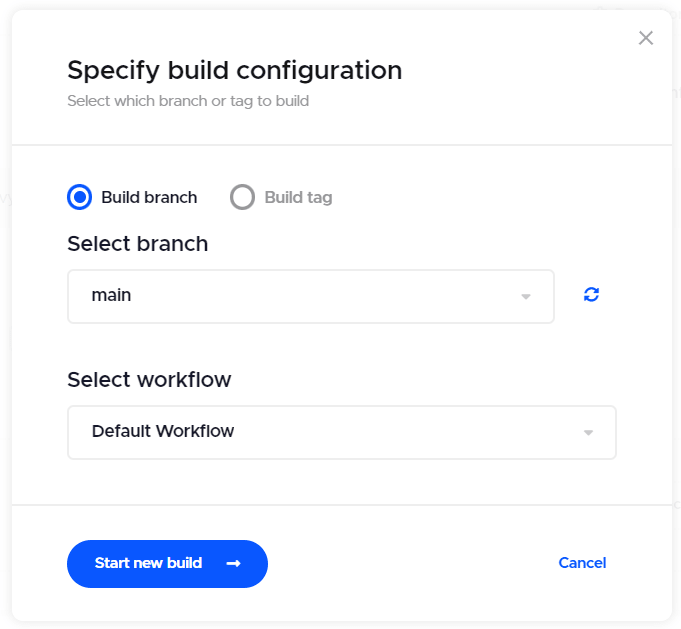
- Save your changes and start a new build. You will be prompted to specify your build branch.
Codemagic will automatically publish your build to App Center for you and add a green checkmark next to your app name if the build and deployment were successful.

When you check your group on App Center, you should see a new release of your app.

Pat yourself on the back --- you just performed some code magic!
Conclusion
Codemagic is the ultimate CI/CD tool. It automates your mobile app's entire build, test, and release pipeline. During a build, Codemagic generates a signed app artifact that can be distributed through App Center.
In this article, you learned how to build and release your Android app's signed version to App Center with Codemagic. You can now easily automate your Android app builds and deployment and save yourself some development time.
The application used in this tutorial can be found on GitHub. We hope you enjoyed this tutorial!

Top comments (4)
Great walkthrough!
Thank you!
Hi! I'm having an issue in my "post-build script", thats says: API token does not belong to the requested app. Anyone have an idea of what it can be?
yes i am having the same issue