
React Router DOM is a popular library for creating routing in a React application, It allows developers to dynamically navigate through web pages.
Tailwind CSS is a utility-based CSS framework that makes it easy to create custom designs without writing any CSS.
In this tutorial I will show you how to install and use React Router DOM in your code with Tailwind CSS to create a simple navigation system for a React app.
Step 1:
Create a react app and start the server using these commands below.
npm start
If you are making use of yarn you say.
yarn start
After it is installed you move over to the next step.
Step 2:
Install React Router DOM package.
npm install react-router-dom
For yarn users.
yarn install react-router-dom
After it is installed you can confirm in your package.json file.

Step 3
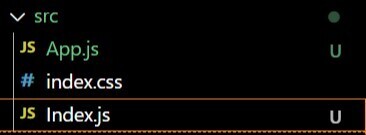
Create a folder name it src, the folder would be used to store react files. create a file inside the src folder, i would call mine Index.js.

In the Index.js file, write the following commands. Importing the components you want to use from each library. For example, to use the BrowserRouter component from React Router.
import React from 'react'
import ReactDOM from 'react-dom'
import { BrowserRouter } from 'react-router-dom'
import App from './App'

ReactDOM.render(
  <BrowserRouter>
    <App />
  </BrowserRouter>,
  document.getElementById('root')
)
)
Before the code can run properly without errors we need to import each element from their respective locations.
A router component can only have one child element, if two elements are used will throw an error message.
The <BrowserRouter> is housing the <App/> file, the App.js file is where we will run our codes.
Step 4
Create another file in the Src folder and name it App.js.
In the App.js file import Route, Routes from 'react-router-dom'.
import { Route, Routes } from 'react-router-dom'
After importing the elements from their respective location we run the following codes.
import { Route, Routes } from 'react-router-dom'

function App() {
  return (
    <div>
      <Routes>
        <Route/>
        <Route/>
      </Routes>
    </div>
  )
}

export default App
The Routes tag house the Route tag. the Route tag is a self closing tag, this is where we specify the path and links to route through.
Step 5
Create a file in the components folder name it Home.js, create another file name it About.js.

Step 6
Now lets work on the individual pages, in the home page we add a header and a text.
import React from "react"
const Home = () => {
  return (
    <div className="flex items-center p-10">
      <h1 className="text-2xl">Take me to About Page</h1>
      <button className="bg-blue-500 px-4 text-white ml-4 rounded-full">
        About
      </button>
    </div>
  );
};
export default Home;
Copy from line 4 to 9 and paste it on the About page. change the text and the button.
import React from "react"
const About = () => {
  return (
    <div>
      <div className="flex items-center p-10">
        <h1 className="text-2xl">Take me to Home Page</h1>
        <button className="bg-blue-500 px-4 text-white ml-4 rounded-full">
          Home
        </button>
      </div>
    </div>
  );
};
export default About;
Step 7
After making the Home and About page, we link the in the App file. Import the Home and About pages and route them in the routes tag, the element key specifies the file to be route, the path key prop specifies the URL path for the route.
import { Route, Routes } from 'react-router-dom'
import Home from './components/Home'
import About from './components/About'

function App() {
  return (
    <div>
      <Routes>
        <Route path='/' element={<Home/>} />
        <Route path='/about' element={<About/>}/>
      </Routes>
    </div>
  )
}
export default App
Step 8
Head back to the home file and link the button to the About page.
        <Link to="/about">
          <button className="bg-blue-500 px-4 text-white ml-4 rounded-full">
            Home
          </button>
        </Link>
Go to the About page and do this same.
        <Link to={"/"}>

          <button className="bg-blue-500 px-4 text-white ml-4 rounded-full">

            Home

          </button>

        </Link>
Step 9
Lets check the code on the browser.

Click the button to go to the About page.

Click the button again and go back to the Home page.
Conclusion
React Router is a powerful and flexible library for creating routes in a React.js application. By using React Router, you can easily define the paths that should be rendered in your app, and take advantage of its many useful features.
If you're interested in learning more about React Router, be sure to check out the official documentation, as well as tutorials and other resources online. And if you're ready to start using React Router in your own projects, take a look at the getting started guide to get up and running quickly.
Thanks for reading, and happy routing with React Router!
About Author
Princess Uhiene is a programmer who is passionate about learning the art of content writing. She is determined to become an expert in the field and is always looking for new ways to improve her skills. In her free time, she enjoys reading books on writing and practicing her craft by writing short stories and blog posts. Princess is known for her creative ideas and clear, concise writing style. She is an avid learner and is always eager to try new things in order to grow as a writer.

Top comments (0)