
If you are here, you know what we are talking about and you want to get your hands dirty as soon as possible, so this post is for you 😀.
If you are not familiar with Kafka or you are not sure about what it's used for, you can visit these links.


Ok, we already know what Kafka can be used for, so let's try to run it locally, test basic commands, and create a basic app to publish events and another one to use them using Net Core.
Kafka + Docker
In order to set up our environment, we create a Docker Compose file where we will instantiate a Zookeeper service and a Kafka service (you can then set up additional ones and build the clusters).
The base images we are going to use are the ones from our Confluence friends.
This is not the only option, you can also use the images from Bitmani|Zookeeper, Bitmani|Kafka, Spotify or Wurstmeister.
Our docker-compose file results as follows:
version: '2'
services:
    zookeeper:
        image: confluentinc/cp-zookeeper:latest
        environment:
            ZOOKEEPER_CLIENT_PORT: 2181
            ZOOKEEPER_TICK_TIME: 2000
    kafka:
        image: confluentinc/cp-kafka:latest
        depends_on:
            - zookeeper
        ports:
            - 9092:9092
        environment:
            KAFKA_BROKER_ID: 1
            KAFKA_ZOOKEEPER_CONNECT: zookeeper:2181
            KAFKA_ADVERTISED_LISTENERS: PLAINTEXT://kafka:29092,PLAINTEXT_HOST://127.0.0.1:9092
            KAFKA_LISTENER_SECURITY_PROTOCOL_MAP: PLAINTEXT:PLAINTEXT,PLAINTEXT_HOST:PLAINTEXT
            KAFKA_INTER_BROKER_LISTENER_NAME: PLAINTEXT
            KAFKA_OFFSETS_TOPIC_REPLICATION_FACTOR: 1
Important: To access Kafka from outside of the container, you must replace the
localhostat ADVERTISED with the Docker-Machine IP.
Setting up the environment with Docker Tools (Windows)
Once a docker compose file is created we can set our environment.
Let's open the docker console and create a new Docker Machine running this command:
docker-machine create --driver virtualbox confluent
We are going to use the VirtualBox driver to create the host virtual machine and we will call it confluent (we can use any name, however)
If we use Linux or Windows Professional onwards, we can skip this option and go straight to the docker-compose up. However, for those who use Windows 10 Home or older versions with Docker Toolbox, this is a step that we must do to have it running the same way.
Let's check that Docker Machine has been created.
docker-machine ls
We should see something like this:

Next, we have to go to the docker machine that we have just created so that the commands can be executed on it (otherwise it will be done on the default)
eval $(docker-machine env confluent)
We get the IP so we will be able to connect from C# and use it through the environment variable KAFKA_ADVERTISED_LISTENERS from the docker compose file.
docker-machine ip confluent
Finally, we run docker-compose in the folder where the file yaml was saved.
docker-compose up -d
We check that Kafka and Zookeeper are up and running.
docker container ps
Setting up the environment on Linux or Docker for Windows
We simply run Docker Compose
docker-compose up -d
If you are using WSL, you can get the IP in this way:
wsl ip -a
With this tiny configuration, we get Kafka ready to the first testings, let's go!
Let's have fun with Kafka
By default, Kafka comes with scripts to create topics, publish/read messages, etc. During this part we will see how to work with them.
Create a new topic
docker container exec <kafka-container-id> kafka-topics \
--create \
--topic foo \
--partitions 1 \
--replication-factor 1 \
--if-not-exists \
--zookeeper zookeeper:2181
We create a new Topic in Kafka with a replication factor of 1 and with only one partition. If we wanted to increase these values we should build up other Kafka instances.
The parameter --if-not-exists indicates that the topic will be created if it doesn't previously exist.
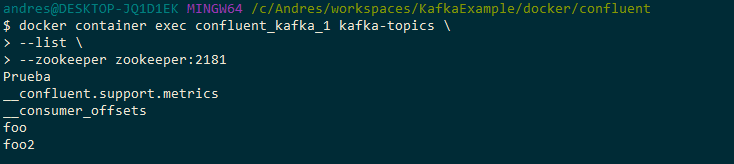
List the topics
docker container exec <kafka-container-id> kafka-topics \
--list \
--zookeeper zookeeper:2181
This command will list only the names of the Topics we have already created.
See a topic’s description
docker container exec <kafka-container-id> kafka-topics \
--describe \
--topic foo \
--zookeeper zookeeper:2181
It shows relevant information about the topic.

Publish a message to the topic
In this case it is better to open your Kafka’s container console, and execute the Producer from there.
docker container exec -it <kafka-container-id> /bin/bash
Now we execute the Publisher.
kafka-console-producer \
--request-required-acks 1 \
--broker-list <docker-machine-ip>:9092 \
--topic foo
Then, for each line we write (separated by a line break), a message will be sent (we use [CTRL+C] to exit the command and Exit to exit the container).
Read from a topic
docker container exec <kafka-container-id> kafka-console-consumer \
--bootstrap-server <docker-machine-ip>:9092 \
--topic foo \
--zookeeper  zookeeper:2181
These are the basics to get started and run the first tests. Each command has multiple parameters worth investigating in order to make the most of it.
For further details, you can check the official docs.
C# knows Kafka
We already have Kafka executing on our PC, now let’s take a look at how to publish and read messages from a Topic.
Producer
We create a console application, and we use the following code to replace the code you will find in Docker-Machine.
We compile and execute, indicating the name of the topic we want to send messages to. The application keeps waiting for our input. Each message should be written in a different line.
dotnet build
.
.
.
dotnet run foo
Consumer
For the Consumer, we create a new console application and we replace the IP value for the IP value of the Docker-Machine we are using.
We compile and run, indicating which Topic we want to listen to.
dotnet build
.
.
.
dotnet run foo
While executing both programs and displaying one console next to the other, we can see that, whenever we publish a message, the listening console displays it.

You can download the source code from here.
Kafka tools
The universe of Kafka tools is immense, and in these lists you can find lots of resources:
- https://github.com/monksy/awesome-kafka
- https://github.com/semantalytics/awesome-kafka
- https://github.com/dharmeshkakadia/awesome-kafka#testing
There are several tools for using Kafka via UI instead of the command line:
There are other choices out there…
Among the ones I tried, Conduktor seems complete enough, despite the free version having some limitations. The good thing is that it includes integration to connect to Confluent and Aiven, in order to use their Kafka SaaS platforms.
Closing up
Kafka is a monster that provides us with a whole new universe of possibilities to extend our architecture in unthinkable ways, but we should not be afraid to get started.
We have seen that with little work (thanks to the people who created Docker images) we can setup everything we need to have Kafka up and running on Docker on our PC, and how easy it is to communicate with it from C#.
In the future releases of this series of articles we will take a look to how can we continue digging further into it.
🧉 + 🥐🥐 = Happy coder 💻


Top comments (0)