MFA helps secure your business and is free with Microsoft 365
What is MFA and why is it important
Usernames and passwords are vulnerable to brute force attacks and can be stolen by third parties. Multifactor Authentication (MFA) is a second form of authentication that verifies a user's identity before granting them access. MFA enhances your organization's security by requiring your users to identify themselves by more than a username and password.
MFA on Microsoft 365
The recommended MFA for Microsoft 365 (Azure AD – also previously referred to as Office 365 or O365) is to enable the security defaults setting and require users to use an MFA authenticator – a smartphone app that can prompt a 6-digit code or enable a click-to-approve button on the phone screen.
Security defaults enable MFA for all your Microsoft 365 users. If you have a requirement to enable MFA for only specific users, you can also use the per-user MFA setting. We will show you both methods below: security defaults and per-user MFA.
Method 1: Turn on security defaults to enable MFA
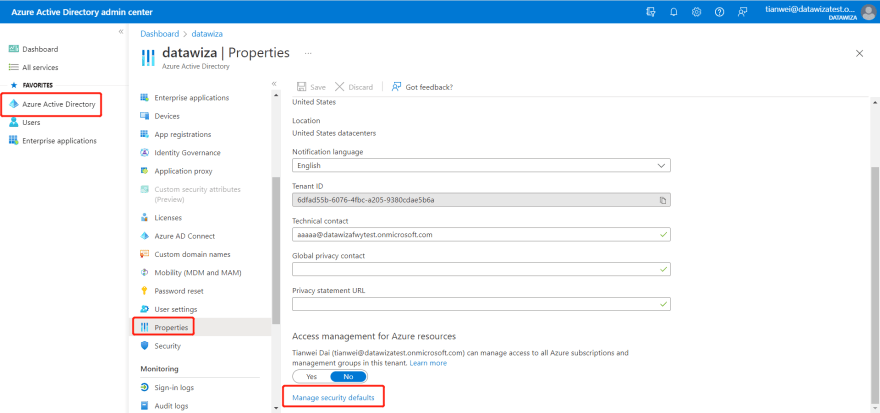
Begin configuration using the Microsoft 365 portal.
- Log into the portal as an administrator and navigate to the Admin panel.
- Select Azure Active Directory.

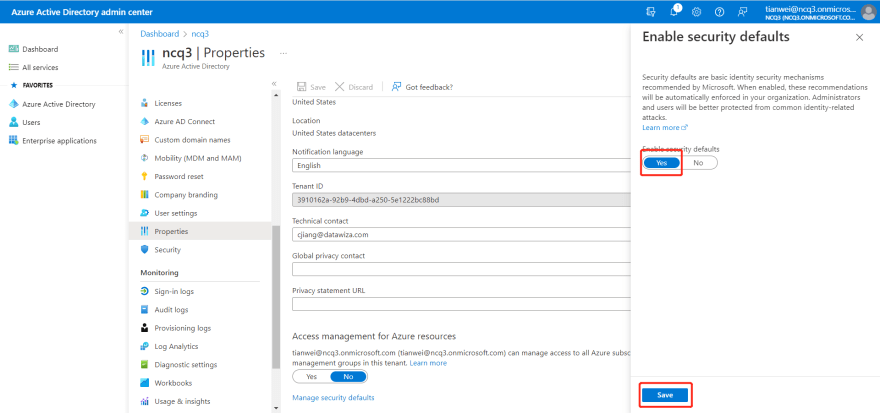
- Navigate to Properties > Manage Security defaults.
- Under Enable Security defaults, select Yes and then click Save.
Method 2: Enable per-user MFA
We do not recommend using this method for configuring MFA unless you have a per-user MFA requirement.
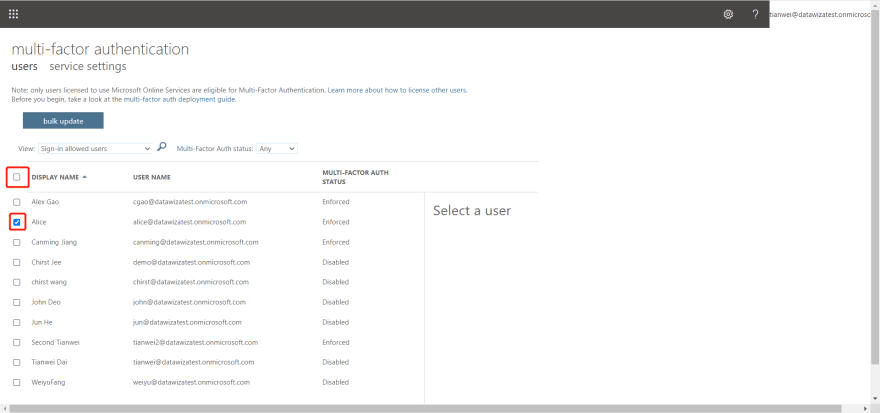
- Log in to the portal as an administrator and navigate to the Admin panel.
- Navigate to the Users->Active Users.
- Click the “Multi-factor Authentication” link.
- Select the users you want to enable MFA for, or you can click the square box on the left of the Display name to select all users.
- Click Enable to enforce MFA for the selected users.
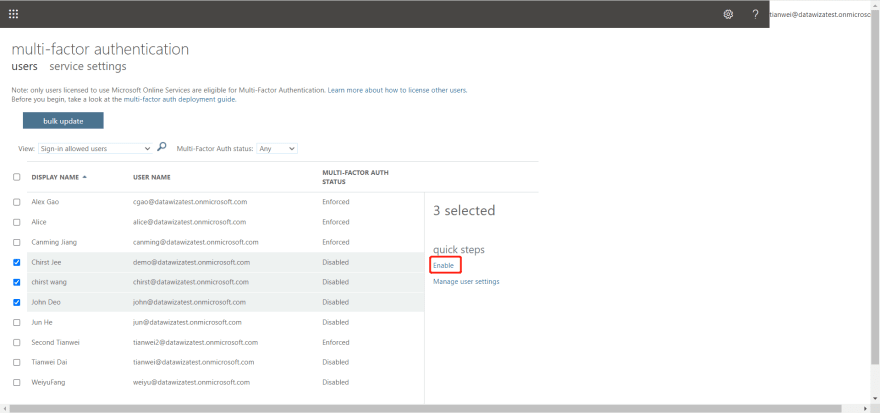
- Confirm you want to enable MFA.

Set up an Authenticator
Once you configure MFA via one of the above methods, the next time a user logs into the account, the system will prompt the user to set up a multifactor authenticator. There are many authenticator options in the market. In this tutorial, we will use the Microsoft-recommended application, Microsoft Authenticator, which can be downloaded from most major application stores, such as the iOS app store or Google Play app store.
The user can follow the instructions below to set up the authenticator and log in.
- Download and install the Microsoft Authenticator app. Run the app and then click Next.
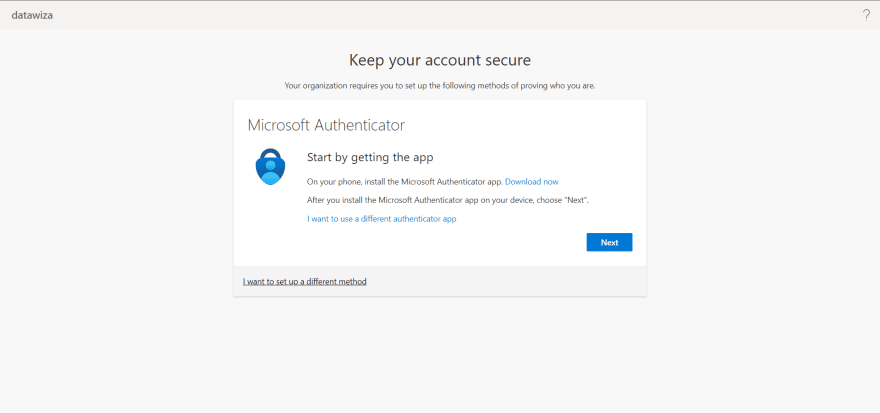
- Set up the account, and then click Next.

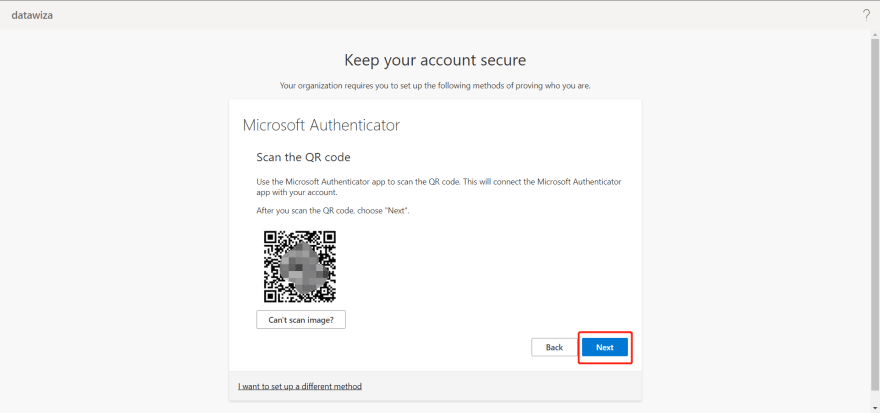
- Use the Microsoft Authenticator app to scan the QR code. Then click Next.
That's it! Your users are now protected by MFA.

Top comments (0)