A Complete Zero-to-Hero guide in setting up a CI/CD Pipeline using Gitlab-CI to deploy with the help of Azure Storage

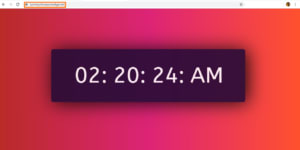
For the purpose of this demo, I have already created a simple Angular 7 application that is hosted on Gitlab, the application is a simple, digital clock that looks something like this.
](https://res.cloudinary.com/practicaldev/image/fetch/s--O3To-PIm--/c_limit%2Cf_auto%2Cfl_progressive%2Cq_auto%2Cw_880/https://cdn-images-1.medium.com/max/2000/0%2AP54UIyNKdpqxE2rD.png)
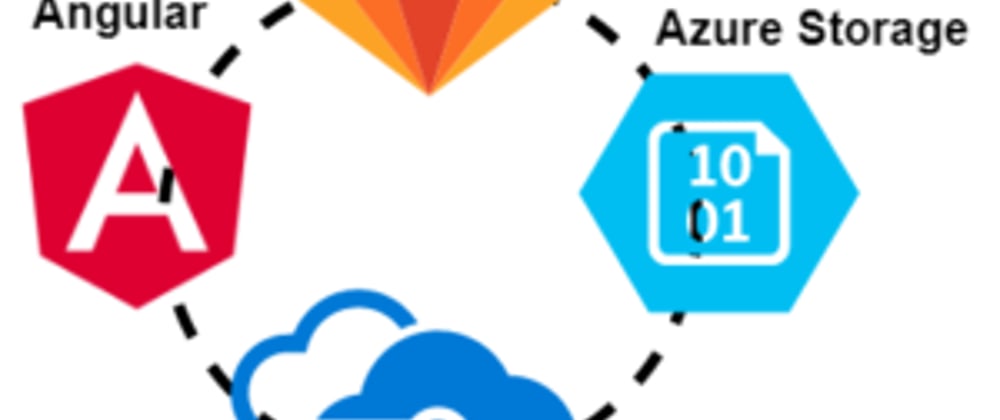
The Overview

The above diagram describes the whole process, right from a developer pushing the code, to the point where the CI/CD Pipeline builds & deploys the code to Azure Storage (Blob) which is linked to Azure CDN Endpoint.
Developer goes ahead and performs the development locally of the application after which he goes ahead and commits and pushes the code to the version control system in our case it’s Gitlab.
We would then have Gitlab perform the CI/CD in the form of the steps mentioned in gitlab-ci.yml file.
From Angular 2 onward’s we use Typescript. the typescript was released by Microsoft and is super-set of JavaScript. For the purpose of this tutorial we are using Angular 7 which uses typescript, the browser doesn’t understand typescript so hence we need to Build the application which converts it into Native JavaScript so that it can be rendered by the browser.
After Building the application, which converts the Angular 7 Application from Typescript to JavaScript we have a dist folder that contains the final build containing static (html,css, js) files which are then uploaded to Azure Storage.
After uploading the files to Azure Storage, for hassle-free access to the Angular Application by the end-user, we would be using a CDN Endpoint which helps us to further optimize the delivery, boost performance with the help of caching as well as adding redirection rules which we would be discussing later.
CDN Endpoint can then be linked to the Custom domain name, by creating CNAME Record in your DNS Zone.
Now since we have understood the overall flow for Deployment, lets get started.
Creating Azure Resources (BLOB + CDN ENDPOINT):
In this case, as we already know we would be deploying the Angular application’s static build content over to the Azure Storage and that would be made accessible using a CDN Endpoint. We need to create a Storage Account along with a Blob, as well as a CDN Endpoint which will be pointing to the respective blob containing the static build files.
Azure Storage Account (WHAT? WHY? HOW?)
An azure storage account contains all of your Azure Storage data objects: blobs, files, queues, tables, and disks for our example we would be using blobs.
Creating a Storage Account
- Log in to the Azure portal, and search storage account and create a Storage account.

- After the Creation of the Storage Account create a Blob/Container in order to store static Angular build files.

- After Blob is created we need to grab the Access Keys for authentication on the Gitlab-CI platform for uploading the content to Azure.
Creating Azure CDN Profile + Endpoint.
For Caching, Increased Performance we would be using Azure CDN. We need to first create a CDN Profile under which we will be creating a CDN Endpoints.
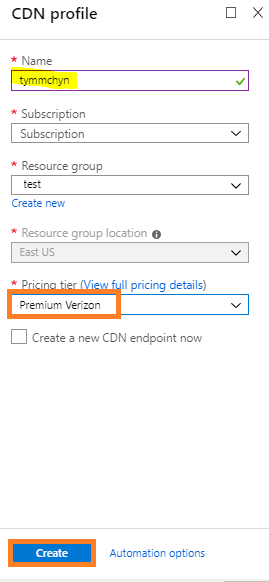
We used Verizon Premium, which allows us to configure redirection rules, and loads of other features that are present, more on this later.
Creating & Configuring AZURE CDN ENDPOINT.
Let’s create a CDN Endpoint for the application to be accessible in this case , we need to click on +Endpoint and then enter the name of CDN Endpoint, and select the Origin Type as Storage as we need to link the CDN Endpoint to the Storage Blob and then select Origin Hostname with the Storage Account hostname URL. Followed by which we need to provide the Origin path which includes the name of Blob Name.
Optimised types in CDN Endpoint.
There are two types of Optimisation type which includes.
General web delivery.
Dynamic site acceleration.
After having used both the types, i prefer to use Dynamic site acceleration as its more optimized, and has better performance and faster caching as compared to General web delivery, but with higher price tag involved.
**Probe Path: **Probe path includes the file placed on the origin server to optimize network routing configurations for the CDN. In our case the origin server is Storage Blob to which the CDN Endpoint is pointing to.

After successfully creating the CDN Endpoint, here’s how it looks like, we need to now make sure that whenever the user enters the CDN Endpoint URL which is linked to the storage blob it should be able to access the website but that’s not how it works by default, as it's not able to locate index.html.It’s never recommended for the user to enter **www.domainname.com/index.html** as that adds an extra overhead from the user's side to append index.html each time he wants to access the website. In order to fix this, we will be using Verizon CDN Portal to configure the redirection rules for index.html as well as http-to-https redirection.
Configuring rules for CDN endpoint.

We need to click on Manage, which will redirect us to Verizon Portal in order to configure the rules.
In this case, we will configure two rules.
1. HTTP-to-HTTPS Redirection Rule:
This will perform a URL-redirect if in case the user request for http it will perform a URL redirect to https.
2. URL Rewrite (index.html):
This rule will perform URL rewrite so that even if the user enters the CDN endpoint it will perform URL rewrite and add index.html automatically so that it removes the overhead for the user to append index.html to the domain name each time.
STEPS TO CONFIGURE THE RULES.

After the CDN portal opens up we need to click on ADN, as we have DSA as a CDN type enabled and then click on Rules Engine after which we now can configure the rules for the same.
1. http-to-https redirection
<rules schema-version=“2” rulesetversion=“2”

rulesetid=“XXXXXXX”

xmlns=“http://www.whitecdn.com/schemas/rules/2.0/rulesSchema.xsd”>

<rule id=“XXXXXXX” platform=“adn” status=“active”

version=“0” custid=“XXXXXXX”>

<description>tymmychn_http_to_https</description>

<!–If–>

<match.request-scheme value=“http”>

<feature.url-redirect code=“301”

pattern=“/XXXXXXX/tymmychn/tymmychn/(.*)”

value=“https://%{host}/$1” />

</match.request-scheme>

</rule>

</rules>
2. url rewrite for index.html
<rules schema-version=“2” rulesetversion=“2”

rulesetid=“XXXX”

xmlns=“http://www.whitecdn.com/schemas/rules/2.0/rulesSchema.xsd”>

<rule id=“XXXX” platform=“adn” status=“active”

version=“0” custid=“XXXX”>

<description>tymmychn_rewrite_index.html</description>

<!–If–>

<match.always>

<feature.url-user-rewrite

pattern=“/XXXX/tymmychn/tymmychn/$”

value=“/XXXX/tymmychn/tymmychn/index.html” />

</match.always>

</rule>

</rules>
After applying the rules here how it should look like.
INDEX.HTML — URL REWRITE

For HTTP-TO-HTTPS Redirection.

After Saving the Rules it will take some time for the changes to the reflected, which can be up to 4 hours and in the worst case even more. After the Pending XML changes to Active XML that’s an indication that the changes have been applied.
BACK TO GITLAB.
Now after setting up the whole infrastructure that was needed at the Azure side, which involved setting up a storage account which will have blobs that could store the Angular static build files (HTML, CSS and JavaScript) as well as to serve the end-user with help of CDN Endpoint for fast delivery.
Now its time to configure the CI/CD pipeline on Gitlab, as we already know that GitLab provides a simple way to configure CI/CD on each repository by mentioned all the steps in .gitlab-ci.yml file.
image: chrisedrego/azng_ubuntu:latest

stages:
  - build_deploy

build_deploy:
  stage: build_deploy
  script:
    - az login -u $AZ_USER_NAME -p $AZ_USER_PASSWORD
    - az account set --subscription $AZ_SUBSCRIPTION_ID
    - npm i -g @angular/cli &&  npm install --save-dev @angular-devkit/build-angular
    # - /usr/bin/ng build --output-hashing none --base-href https://tymmychn.blob.core.windows.net/tymmychn/
    - /usr/bin/ng build --output-hashing none --base-href https://tymmychn.azureedge.net/
    - az storage blob upload-batch -s ./dist/tymmchyn -d $BLOB_NAME --account-key $ACCOUNT_KEY --account-name $ACCOUNT_NAME
    - az cdn endpoint purge -g $RESOURCE_GROUP --name tymmychn --profile-name tymmchyn --content-paths "/*"
https://gitlab.com/chrisedrego/tym_mchyn/-/blob/master/.gitlab-ci.yml
Link to this GitLab-repo contains the codebase along with the gitLab-ci.yml. In this case, let’s quickly examine the GitLab-ci.yml and here what it does.
Line 1: IMAGE, refers to the link to the docker image that I have used for this example which contains the needed tools involving Azure CLI and Node JS, NPM
After which we have declared the stages, followed by which we have defined single-stage named “build_deploy”.
First, we authenticate to the Azure using az login and the username and password which are stored as secret variables in this case. More on Gitlab Secrets on this link.
After authenticating and selecting the right subscription if you multiple subscriptions (9,10)
Gitlab already does the overhead of cloning the repository with the branch on the which we are currently, so taking that into consideration we can now go ahead and perform the following steps:
install Angular CLI
Install Angular-Devkit (Optional)
Install all the dependent packages in the package.json for Angular Application
Use Angular CLI to go ahead and build the Angular Application and then set the base-href to the CDN-Endpoint. The reason behind setting the base-href is that once the application is hosted and when we try to access the application from the CDN endpoint at runtime, we face an issue while trying to access the application as its not able to locate the absolute path of Javascript files.
After the build is created in the specific folder mentioned in angular.json present in your root directory, we can now go ahead and upload the files in the Storage Blob.
After successfully uploading the contents we make sure that after each commit/push we get the latest code by removing the purged content which might previously be present as cache on the CDN Endpoint node.
Now if the pipeline was successfully and the Verizon rules have applied, we can head over to our CDN Endpoint and we should see the final magic.
Well, that looks good.
if you found this article useful, feel free to press >> ❤️ love many times or share it with your friends.


Top comments (1)
Hi!
Thanks for this info, it help me understand better.
But i was wondering if you could help me with this task:
I want to deploy to azure let say a solution with both webjobs, webapp, etc to azure everything is in .Net exept the front end that is in Angular.
And i want to have a pipeline that look lite this:
build, test (unit, integration)-> deploy to DEV -> Deploy to Qa -> Deply to Staging -> swap to production.
I want to have this kind of pipeline so that i cant test my donet app in dev, end if every is working send it to acc and so on and so on.
I have look in google, youtube etc. but it seem dificult to find this info for .net with gitlab.
In azure devops you can choose like build for .net and will get lot of predifine task, like restore the solutionm download nugets, build the solution and zip in in an artifac. also for deply to different stages. But with gitlab i dont fins such things.
Sorry for the lon text.
Thank you in advance. anoob in gitlab