Introduction
Hey Everybody,
In this tutorial, we are going the implement Zustand which is an amazing React State Management Library.
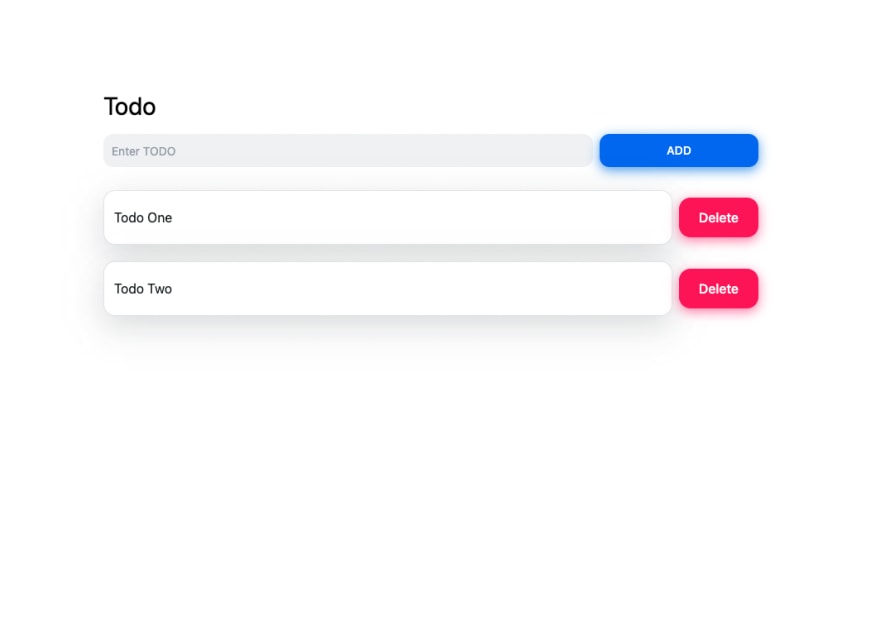
Preview of what we are going to create in this tutorial -
Initial Setup
So, to get started with this tutorial we are going to do some initial setup, which is a Next.js app with TailwindCSS & NextUI.
so let's create our Next.js app.
npx create-next-app your-project-name
then we are going to cd into our project, and then we are going to install tailwindCSS
you can follow this installation guide for installing TailwindCSS in your project.
Installation Guide - https://tailwindcss.com/docs/guides/nextjs
So, once we have our TailwindCSS Setup.
Let's Install NextUI with this command: npm install @nextui-org/react
Ok, now we have everything that we need to follow along with this tutorial.
let's go to the index.js of our app, and create some UI for our app.
Index.js -
import { Button, Input, Card } from "@nextui-org/react";
import {useState} from "react";

export default function Home() {
 const [newtodo, setNewTodo] = useState("");

  return (
    <div className="container text-black mx-auto flex flex-col items-center p-28">
      <div className="w-full">
        <h1 className="text-3xl">Todo</h1>
      </div>
      <div className="mt-2 flex items-center w-full">
        <Input
          value={newtodo}
          onChange={(e) => setNewTodo(e.target.value)}
          fullWidth
          placeholder="Enter TODO"
          clearable
        />
        <Button shadow className="m-2">
          ADD
        </Button>
      </div>
        <div className="mt-5 w-full flex items-center">
          <Card className="w-full">
            <Card.Body>Todo One</Card.Body>
          </Card>
          <Button
            size="lg"
            shadow
            auto
            color="error"
            className="m-2"
          >
            Delete
          </Button>
        </div>

    </div>
  );
}
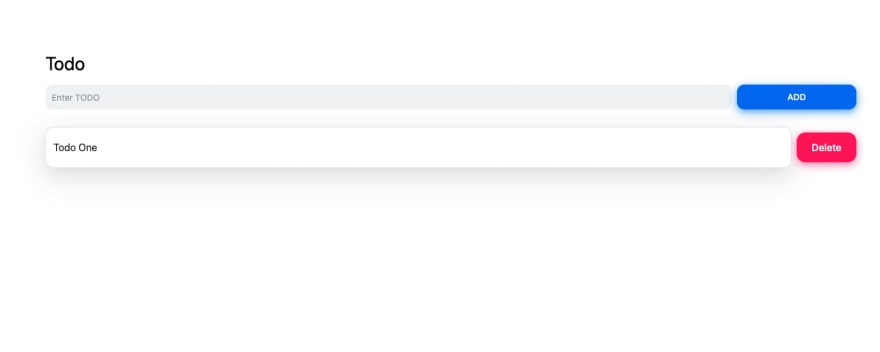
We will have something like this on the screen -
Implementing Zustand
Let's add Zustand to our app now,
to do that we need to create store.js inside our app.
In our store we are going to have three things
todos:[]: this array will help us in keeping track of all the todos and help us in rendering the todos.
addTodo: addTodo will help us in adding a new todo to our todos array, it takes in a todo as an argument, spread the previous state(...state.todos), and add the new todo at the end.
removeTodo: this function will help us in deleting a particular todo with the provided index.
here is the code for our store.js -
import create from "zustand";

const useStore = create((set) => ({
  todos: [],
  todo: "",
  addTodo: (todo) => set((state) => ({ todos: [...state.todos, todo] })),
  removeTodo: (index) =>
    set((state) => ({ todos: state.todos.filter((_, i) => i !== index) })),
}));

export default useStore;
Ok, so now we have our store.
Let's bind everything up and use it in our app.
go back to index.js-
and import useStore from "../store.js"
import useStore from "../store";
ok so now we have our store imported let's get our current todos, and functions for handling all the logic.
  const todos = useStore((state) => state.todos);
  const addTodo = useStore((state) => state.addTodo);
  const removeTodo = useStore((state) => state.removeTodo);
Let's connect everything up and see if everything works or not.
index.js -
import { Button, Input, Card } from "@nextui-org/react";
import { useState } from "react";
import useStore from "../store";
export default function Home() {
  const [newtodo, setNewTodo] = useState("");

  const todos = useStore((state) => state.todos);
  const addTodo = useStore((state) => state.addTodo);
  const removeTodo = useStore((state) => state.removeTodo);

// this function will check if the input is valid or not
  const AddNewTodo = () => {
    if (newtodo.length > 0) {
      addTodo(newtodo);
      setNewTodo("");
    }
  };


  return (
    <div className="container text-black mx-auto flex flex-col items-center p-28">
      <div className="w-full">
        <h1 className="text-3xl">Todo</h1>
      </div>
      <div className="mt-2 flex items-center w-full">
        <Input
          value={newtodo}
          onChange={(e) => setNewTodo(e.target.value)}
          fullWidth
          placeholder="Enter TODO"
          clearable
        ></Input>
        <Button onClick={AddNewTodo} shadow className="m-2">
          ADD
        </Button>
      </div>

// Map all the current Todos
      {todos.map((todo, index) => (
        <div key={index} className="mt-5 w-full flex items-center">
          <Card className="w-full">
            <Card.Body>{todo}</Card.Body>
          </Card>
          <Button
            onClick={() => removeTodo(index)}
            size="lg"
            shadow
            auto
            color="error"
            className="m-2"
          >
            Delete
          </Button>
        </div>
      ))}
    </div>
  );
}
After connecting all the things up, we will be able to create new todo and delete todo.
AWESOME!
now we have Zustand Working on our app.
Bonus
This part of our app is completely optional.
you can go through this if you want to discover a cool animation library that will help you add animation with just 3 lines of code.
Let's begin,
so we want to make our to-do app more amazing by adding some cool animation to it.
to do that we are going to use auto-animate, it is an amazing animation library from formkit.
we are going to import useEffect, useRef from react & auto-animate from @formkit/auto-animate.
after importing these,
create a ref with any name, I am calling it parent.
const parent = useRef(null);
after That in our useEffect hook we are going to add parent as a dependency and pass parent.current to autoAnimate
  useEffect(() => {
    parent.current && autoAnimate(parent.current);
  }, [parent]);
ok, so the last thing we need to do is to add the ref to our parent element.
this is how our whole code will look like -
index.js
import { Button, Input, Card } from "@nextui-org/react";
import { useEffect, useState, useRef } from "react";
import useStore from "../store";
import autoAnimate from "@formkit/auto-animate";
export default function Home() {
  const parent = useRef(null);
  const [newtodo, setNewTodo] = useState("");
  const todos = useStore((state) => state.todos);
  const addTodo = useStore((state) => state.addTodo);
  const removeTodo = useStore((state) => state.removeTodo);

  const AddNewTodo = () => {
    if (newtodo.length > 0) {
      addTodo(newtodo);
      setNewTodo("");
    }
  };

  useEffect(() => {
    parent.current && autoAnimate(parent.current);
  }, [parent]);

  return (
    <div
      className="container text-black mx-auto flex flex-col items-center p-28"
// here we are using our parent ref
      ref={parent}
    >
      <div className="w-full">
        <h1 className="text-3xl">Todo</h1>
      </div>
      <div className="mt-2 flex items-center w-full">
        <Input
          value={newtodo}
          onChange={(e) => setNewTodo(e.target.value)}
          fullWidth
          placeholder="Enter TODO"
          clearable
        ></Input>
        <Button onClick={AddNewTodo} shadow className="m-2">
          ADD
        </Button>
      </div>
      {todos.map((todo, index) => (
        <div key={index} className="mt-5 w-full flex items-center">
          <Card className="w-full">
            <Card.Body>{todo}</Card.Body>
          </Card>
          <Button
            onClick={() => removeTodo(index)}
            size="lg"
            shadow
            auto
            color="error"
            className="m-2"
          >
            Delete
          </Button>
        </div>
      ))}
    </div>
  );
}
Now, If you will try adding and removing todo, you will see some cool animations.
Github Repo - https://github.com/chetanverma16/Zustand-tutorial
Conclusion
That's all I have for you! Hopefully, you learned something new.
If you enjoyed this article, give it a ❤️ so others can find it too.
For more such content, stay in touch on Twitter
Contact Me:


Top comments (0)