
This will be a summarization on a high level of my experience and some related learnings from a hobby project trying to generate images with stable diffusion in the cloud.
Intro: Preface & vision
I had previously played around a bit with generating images using Dall-E 2 and similar solutions using some free credits. My problem was this; I kept forgetting to use my free credits and thus not getting them renewed. And when I finally wanted to generate an image I ran out of credits after a few tries.
The initial idea was simply to set up a scheduled generation of images that would make sure to consume all of my free points in the various offerings available and to then automatically push them to some kind of screen or digital photo frame.
The primary images I wanted to generate would be
As I eventually got started on the project I realised that the free offerings of the various resources have been cancelled. Thus I decided to set up my own image generation using open source solutions with the goal of having it live in the cloud to make it simpler to share and to avoid needing specific local resources.
Chapter 1: Generating images
As stated in the preface; as a lazy (efficient) developer I started my journey of finding a open source implementation of one of the Image generation models, and ended up with Stabilityi-AI's Stable Diffusion setup
After fighting my Windows installation getting all the python packages, conda installations etc. running I was finally able to generate an image.

Well, that did not go great. So I kept trying making more images; altering the prompt and the configurations. All of my attempts turned out similar; but why?
To keep runtime low I tried generating images of 256x256 ratio. I tried altering the prompt, the steps (iterations) as well as CFG scale (multiplier of how much the prompt input should dictate the outcome).
But it just turned into different noise; still no images that looked anything like the prompt.
To ensure that my setup wasn't faulty I took a step back and tried some reference prompts and seeds and managed to generate images that looked like the prompt rather than random colourful noise.
1.1 What went wrong?
My primary problem was simply that I did not understand how diffusion models work well and what might be a good expected prompt (including config) to generate images.
A simplified explanation is that (image) diffusion models are trained on a specific set of images in order to learn how to remove noise from an image in order to get closer to the original image it trained on.
This means that a model can not generate outputs (in a controlled fashion) it's not trained on. This includes the ratio as it's part of the noise removal. Other ratios might still end up looking good; but it might also cause unexpected corruptions
Thus in hindsight I realise that I had to low of a CFG-scale, to few iterations and an unexpected ratio as this model was trained on 528x528 images.
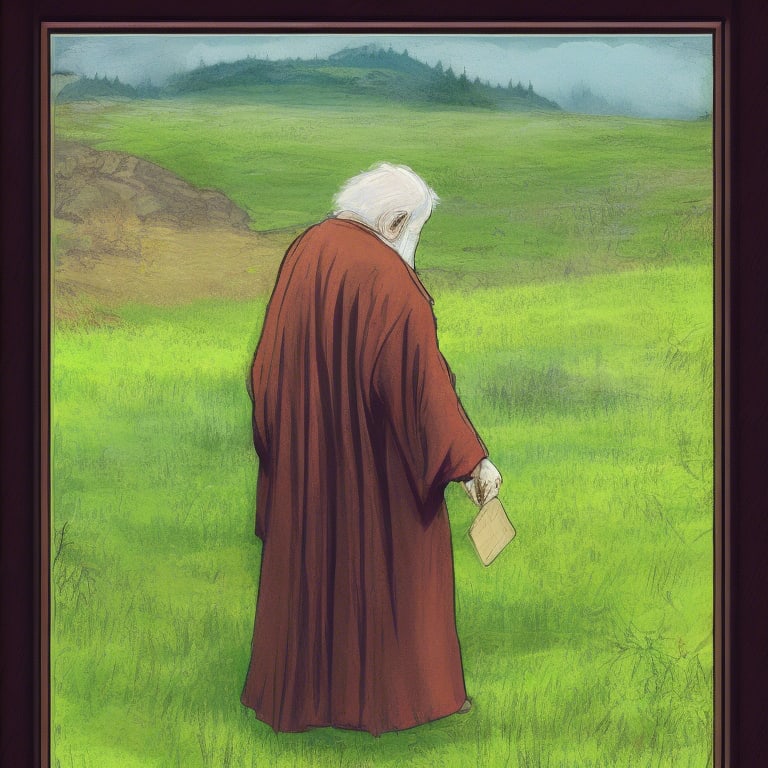
Moving on from this I got back to trying to generate my original prompts; but now with new ratios, iterations and CFG scale. So what was my prompt? Variations of Fox working with a laptop in an office drinking a cup of coffee.With various alterations of phrasing and omitting details. Why this prompt? Well it's simply a reference to my the company I work at Charlie Foxtrot; a software development consultancy with foxes in our branding.
I ended up with images to containing all the contents of the prompt; even if very disjoint and not a combined picture.

I thought this might simply be to hard a prompt for this model. So I changed the prompt again; keeping the fox but altering the rest of the prompt to be a more natural setting for the fox.

Much better. After this I got back to trying various versions of the original prompt with smaller alterations for each prompt.
1.2 The end
Then my laptop blue screened. I left it a short while to cool down and then started it up again; but now for some reason my python and conda setup refused to work.
During my setup I obviously fucked up some step which left it in a state that a fresh start of the system were lacking some kind of path var or similar.
Part of the problem is of course that I did not pay enough attention when installing my dependencies and setting up my paths etc.
To avoid this happening again, to be able to share the setup with friends and colleagues as well as my future plan of getting it set up in a cloud solution I decided to get setup in a Docker image instead. In addition to this I decided to look for a more feature complete solution; preferably with an already prepared docker setup.
1.3: Giving it another shot
As mentioned I wanted a more feature complete solution with an existing docker setup; and I found it InvokeAI.
While this probably relates more to my setup and experience; setting this up was a lot smoother compared to my initial setup, I simply had to build the image according to instrucitons and run it. I suddenly was making images with outcomes that looked like my prompt with a provided GUI. When my laptop inevitable blue screened again from being pushed past its limit I recovered in seconds.
But the images took longer to generate than expected and the gpu was hardly working even when I tried to pass through GPU resources. Did this have something to do with InvokeAI, the model or my setup? After verifying the requirements I simplified the setup by using invokeai's simple installer version; removing potential issues with Docker (running via WSL).
I instantly got better performance and thus could figure out that something was not working as intended. With this knowledge I could debug and resolve the issue with the gpu passthrough and get back to my docker setup.
After this I simply dialed in the prompt configuration to find a good balance between output and runtime by testing various combinations of prompts, cfg and steps.
When this was done I tried all of the recommended models from the invokeai installer and tried a few iterations of each to find the model(s) that I thought generated the best images for my given prompt. For some models I had to play around a bit with new baselines for cfg/steps to get images I thought looked good.
I could now generate images in bulk where some of them actually looked as intended.

1.4 Learnings
Some simple learnings from this:
- Always work with a recoverable / reproducable environment.
- Understand the tools (models) better when using them. Even when playing around you need to play around in a mindful manner.
- When experimenting always sanity check with a known input/output as soon as possible. It might seem more fun to have the first outcome to be what you want; but you probably want to verify your setup first.
- Image generation is just structured randomization. You will need to generate a lot of images and sort through them either manually or with image analysis to provide outcomes you're happy with. Finetuning input for your model can take a lot of iterations.
- Schedule the time for your input/model testing better than I did; generating images is a resource hog and it will make using the device for anything else at the same time a pain. Alternatively get it set up on a secondary machine asap when you know you have working setup.
Chapter 2: To the cloud
As I now had a dockerized soloutin that I liked
After finding models and configurations that performed to my liking on my laptop it was now time to get into the cloud. This is for multiple reasons. Amongst others it would allow for scaling above physical local devices, would not bog down said local devices during runtime and in general be better for sharing and demo purposes.
So what's on the shopping list:
- Container Hosting (potential autoscaling)
- Gpu resources for the container
- A storage volume to make outputs, models and invokeai setup stable between instances.
- Keeping costs down
To simplify the decisions I limited myself to the Azure platform as my company already had an existing setup for it.
2.1 Container hosting
So lets start with getting the container into the cloud; that's the minimum working solution. Getting something autoscaling would simplify maintenance and in general be resource efficient.
Starting with simple azure container apps would allow for azure handled autoscaling and some free resources monthly; which would be nice for a project of this scale. Sadly the maximum memory of azure container apps of 4Gi is way below the required specs for invokeai of 12GB.
I never tried how it would perform on these resources and there is the possibility to request a manual increase of memory limit.
So this is something that could be explored in the future.
Secondly we could explore azures kubernetes setup aks.
Sadly on a free tier there is no autoscaling which made me opt out from this option. However neither the standard tier cluster nor the nodes are that expensive and there are a lot of GPU supported options which might be worth trying out in another iteration in the future.
However I opted for a regular container instance. In theory there should also be cost effective K80 GPU's that could be used; however it's a preview feature which is not intended for production use and needs to be manually approved by Azure prior to usage.
Our request got rejected; hence we are running without a GPU in the cloud.
The pricing for our needs is low; 1 cpu and 12 GB memory which totals to ~$2 per day of uptime; and with mindful shutdown of the service we would of course only pay for actually active resources. And even without a gpu we can produce images in a somewhat acceptable time.
In addition to all this we will of course need a registry. This costs $0.167 / day on the basic tier.
2.2 Cloud storage volume
Setting up a volume mount for the container seemed pretty simple. All I needed was to set up a file share and mount it to my container instance.
Depending on your setup you should only need ~12GB for your models as well as extra storage for caching between steps of the image generation + generated output storage. I could not see storage going above ~25GB with some mindful cleaning of unused data. At this point pretty much any storage option would be cheap; I went for a transaction optimized setup at $0.06 per used GiB and month for the storage + $0.015 per 10000 read/writes. At this price point we should not need to worry at all.
The first few burst tries of starting one docker container; generating one image and then killing everything this worked fine.
I then tried sharing the volume between two different container instances and generated multiple images on both instances.
Sharing a volume worked fine and I thought that was it; I generated a few images each for a few hours straight.
Happy with the performance and results I closed them down for the day.
Next day I sanity checked my cost analysis and realized that for some reason I had an unexpectedly huge storage cost. Turns out that this also induces a network fee for the file transfers; while not immensly large this costed about 90% of the storage cost and even 90% of the entire project at this scale of use.
Thus I decided to cut it from the project to keep costs down.
The only implication from this is that I need to reinitiate the invokeai setup for every container on startup; re-install any models I want to use and ensure to download any outputs I want to keep before shutting it down. For this type of hobby project that's perfectly fine.
When the week was up it was apparent what had happened; azure gave me the finger.
2.3 Learnings
So what did I learn this time
- Start any request for potential resource needs way ahead of time; there might be a lot of forth and back and you might eventually get rejected.
- Read pricing details more closely so you understand potential extra costs in your calculations.
- When trying out things do it in iterations and inspect the outcomes after use vigilantly. Had I paid more attention the first few days the spike would have never occured. This time the cost was just high relative to an extremely low baseline; but in any project costs can run amok if you don't pay attention.
Outro: The outcome and next steps
After all of this I opted to let the iteration 0 frame to be a simple solution, we bought a photo frame with a proprietary application for sharing images.
There are a lot of places to take this project in a second iteration; building a custom photo frame with functionality for automatically pushing new images generated to it, training / extending a model to use the companys mascot and logos rather than generic foxes, a different cloud hosted solution with the same or different provider, using any of the many other features invokeai supports like multistep workflows, or simply replacing invokeai with a different solution. Or maybe this is the final iteration of the project?


Top comments (0)