
This tutorial will teach you the basics of terminal customization. I hope you can tag along so you can start customizing your terminal too. On a side note though: this post assumes you’re either using macOS or Linux. Additionally, I assume you have Git and Vim installed, and that you’re using a package manager such as Homebrew.
The Z Shell
In order to start making changes to the terminal, it's necessary to download and install a UNIX shell. More specifically, the UNIX shell we're using is a refined bundle of tools that allows us to make use of the terminal in a more specific way. Think of it as an improved version of the command line. In this case, we’re using Zsh, also known as The Z Shell, an open-source UNIX shell that has been used by thousands of users and also happens to be open-source. Refer to this piece of documentation on GitHub written by Robby Russel for a well-written in-depth guide on how to install Zsh.
![[1]installingZSH](https://res.cloudinary.com/practicaldev/image/fetch/s--C2SMCu6v--/c_limit%2Cf_auto%2Cfl_progressive%2Cq_auto%2Cw_880/https://thepracticaldev.s3.amazonaws.com/i/h39xy5h8bupczxqd4nvk.png)
It's always a good idea to execute the -- version command once the installation is complete. This helps us make sure the installation went through successfully. It should look like this:
![[2]zsh-version@2x](https://res.cloudinary.com/practicaldev/image/fetch/s--_RMHWTaY--/c_limit%2Cf_auto%2Cfl_progressive%2Cq_auto%2Cw_880/https://thepracticaldev.s3.amazonaws.com/i/hees2s7p2pcahxl4hw9i.png)
Once you execute -- version, the output message should be similar to this:
![[3]zsh-version@2x](https://res.cloudinary.com/practicaldev/image/fetch/s--O1GZ3CJj--/c_limit%2Cf_auto%2Cfl_progressive%2Cq_auto%2Cw_880/https://thepracticaldev.s3.amazonaws.com/i/c8f8tw9dvrknk5jt1ukd.png)
Oh My Zsh
To make things even better, we’re also installing a framework manager that will help us, well, manage the configurations we judge necessary in the future. While Zsh is what allows us to start tweaking the terminal, Oh My Zsh is where the magic happens. It comes with more than 100 plugins and themes available which is more than enough customization for users like me. Because I have friends that love creating their own plugins and themes, it is also worth noting that Oh My Zsh is open-source. So, rest assured: if you happen not to find what you’re looking for in their catalog, you can certainly build it yourself!
I recommend installing it using cURL:
![[4]wget@2x](https://res.cloudinary.com/practicaldev/image/fetch/s--zDeNmyZI--/c_limit%2Cf_auto%2Cfl_progressive%2Cq_auto%2Cw_880/https://thepracticaldev.s3.amazonaws.com/i/657j69mjvd3arhetb20b.png) sh -c "$(curl -fsSL https://raw.githubusercontent.com/robbyrussell/oh-my-zsh/master/tools/install.sh)"
sh -c "$(curl -fsSL https://raw.githubusercontent.com/robbyrussell/oh-my-zsh/master/tools/install.sh)"
However, you can also run Wget as opposed to cURL:
![[4]curl@2x](https://res.cloudinary.com/practicaldev/image/fetch/s--AHZC-2va--/c_limit%2Cf_auto%2Cfl_progressive%2Cq_auto%2Cw_880/https://thepracticaldev.s3.amazonaws.com/i/tzt7mq78o5q7995gduan.png) sh -c "$(wget -O- https://raw.githubusercontent.com/robbyrussell/oh-my-zsh/master/tools/install.sh)"
sh -c "$(wget -O- https://raw.githubusercontent.com/robbyrussell/oh-my-zsh/master/tools/install.sh)"
During either of those two installation processes, you might get prompted with something like this:
![[5]defaultshell@2x@2x](https://res.cloudinary.com/practicaldev/image/fetch/s--c00oNpVF--/c_limit%2Cf_auto%2Cfl_progressive%2Cq_auto%2Cw_880/https://thepracticaldev.s3.amazonaws.com/i/qj7dfwbrwldoenqr4iul.png)
To which you simply press y and hit enter.
At this point, any changes that you’d like to take effect on the terminal window you're using should be made on the ~/.zshrc file and not to ~/.bash-profile.
![[6]ohMyZsh@2x](https://res.cloudinary.com/practicaldev/image/fetch/s--Wzs20VjA--/c_limit%2Cf_auto%2Cfl_progressive%2Cq_auto%2Cw_880/https://thepracticaldev.s3.amazonaws.com/i/0vi07w2heo5lkr5ejvjk.png)
Useful Plugins with Zplugin
Because this is an introductory post, we’ll keep things simple. As such, we need to install Zplugin which brings useful tools such as command suggestions, auto-completion, and syntax-highlighting.
Execute the following via cURL:
![[7]zPlugin@2x](https://res.cloudinary.com/practicaldev/image/fetch/s--9skqnJ5q--/c_limit%2Cf_auto%2Cfl_progressive%2Cq_auto%2Cw_880/https://thepracticaldev.s3.amazonaws.com/i/s0sj4zh1gp6z326j4end.png) sh -c "$(curl -fsSL https://raw.githubusercontent.com/zdharma/zplugin/master/doc/install.sh)"
sh -c "$(curl -fsSL https://raw.githubusercontent.com/zdharma/zplugin/master/doc/install.sh)"
Once the installation is complete, the output message should be similar to this:
![[9]zplugininstall@2x](https://res.cloudinary.com/practicaldev/image/fetch/s--cs2fw4zT--/c_limit%2Cf_auto%2Cfl_progressive%2Cq_auto%2Cw_880/https://thepracticaldev.s3.amazonaws.com/i/uutbodtf7e130c8z85fq.png)
Now, for this next step, we will be using Vim. If you don't have much experience with Vim, it's highly recommended that you practice a bit before continuing. The reason being, it’s not hard to mess something up while using it if you don’t know what you’re doing.
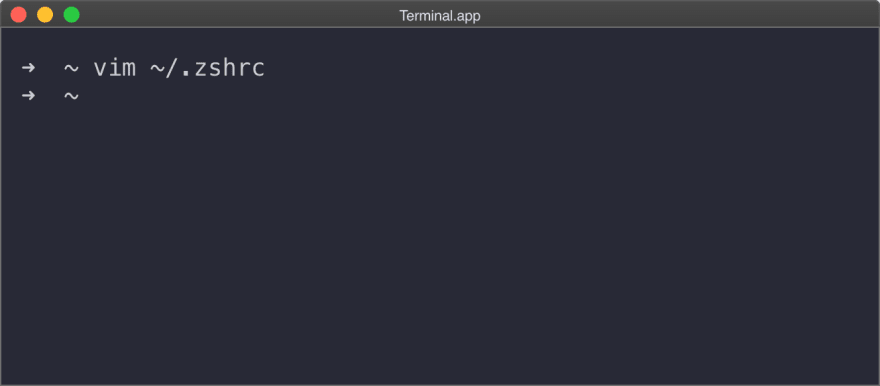
Open ~/.zshrc using Vim:
At the end of the file, find the line that reads “###End of Zplugin installer’s chunk” and add the following:

Since we’re using Vim, once those three lines are added, simply press ESC, and :wq.
Done! You now have command suggestions, auto-completion, and syntax-highlighting.
Installing Your First Theme
I just so happen to be using the so-called “Dracula" theme made available by Zeno Rocha. Check it out using this link.
Before you start the installation process though, you might need to go through an extra step. That is if you’re using macOS. To agree with Xcode's license agreements, execute the following:
![[11]xCodeLicense](https://res.cloudinary.com/practicaldev/image/fetch/s--eQs9NeLm--/c_limit%2Cf_auto%2Cfl_progressive%2Cq_auto%2Cw_880/https://thepracticaldev.s3.amazonaws.com/i/rcvdspafhm8szqy9jv4i.png) sudo xcodebuild -license
sudo xcodebuild -license
Once you have agreed to Xcode's license agreements, it’s time to clone the Dracula theme into Oh My Zsh’s folder:
![[12]gitHubClone@2x](https://res.cloudinary.com/practicaldev/image/fetch/s--Su3F7ae9--/c_limit%2Cf_auto%2Cfl_progressive%2Cq_auto%2Cw_880/https://thepracticaldev.s3.amazonaws.com/i/jvmtjqv1vru62bswh4ti.png)
Now, let’s edit ~/.zshrc once again using Vim, and set it Dracula:
![[13]setVim@2x](https://res.cloudinary.com/practicaldev/image/fetch/s--wVy5RJwv--/c_limit%2Cf_auto%2Cfl_progressive%2Cq_auto%2Cw_880/https://thepracticaldev.s3.amazonaws.com/i/q8vhse6fgv0n5ldgbh5o.png)
Final Thoughts
Once everything is fully installed, I recommend restarting your machine so that we can make sure the CPU is refreshed and that the changes we made throughout this tutorial can take effect. As a software developer myself, I sure spend a considerable amount of time using the terminal. Tailoring it to my needs only makes sense - and you should, too!


Top comments (0)