
GPG, or the GNU Privacy Guard, is a complete and free implementation of the OpenPGP standard, and allows you to encrypt or sign your communications.1 While gpg is a great tool for encryption, this blog post will focus on the signing aspect, specifically, when using it to sign git commits for a GitHub repository.
Why?
Why should I GPG sign my commits? Simple, so that you can prove that they came from you! Just as in the world of academia, your reputation is everything, you should do everything in your power to protect it! While I am not saying anyone would ever try to steal your software engineering identity, GPG signing your commits is an easy way to guarantee that you can prove which commits you have or have not made.
I have configured my laptop to auto-sign all commits with my GPG key. Doing this allows all commits I create to have the 'Verified' stamp when viewing them in GitHub.
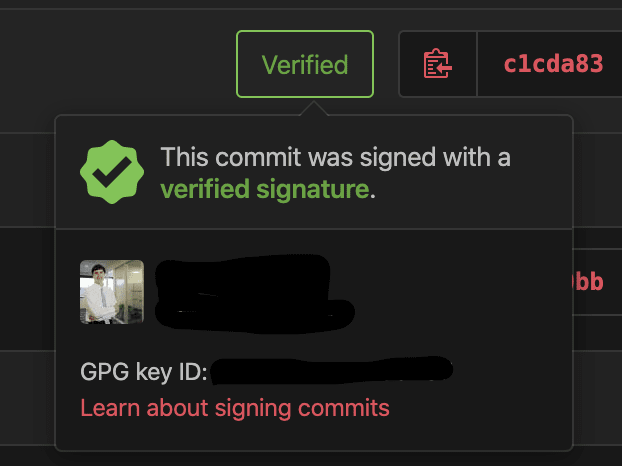
Whenever you view a commit I have created, it will appear like this:

Clicked on the Verified gives additional information to prove that I am the one who as signed this commit, because I have uploaded my GPG key to my GitHub profile:
Just because a commit is signed with a GPG key though, does not make it verified. When I was initially setting this all up, the GPG key I used was secured with a password that my toolchain could not support. As a result, I decided to delete that GPG key and start fresh. Here is what my test commit with that key looks like:

As you can see, I am in full control of this signing mechanism, and it is an excellent way to self-verify your work.
How?
This guide is written for MacOS.
The how-to articles are plentiful on the internet, and so here's another. Beyond just providing the steps though, this guide hopes to explain what each command is for (if it's not clear already).
Installations
First, we need to install some tools. This guide assumes you have Homebrew already installed. Homebrew is a MacOS package manager, and is incredibly useful for toolchain installation management.
Using Homebrew, install the gnupg command line tool for working with gpg keys, and pinentry for Mac. Pinentry is a collection of GUI based programs for working with GPG keys2, and pinentry for Mac will allow us to save the GPG key password to our keychain for easier access.
brew install gnupg pinentry-mac
Configure Pinentry
We then must do some work to ensure pinentry is used immediately for interacting with our GPG keys.
echo "pinentry-program /usr/local/bin/pinentry-mac" > ~/.gnupg/gpg-agent.conf
killall gpg-agent
We tell our gpg agent to default to pinentry with the first command, and secondly, we kill all running gpg-agents to make sure our configuration takes effect immediately.
Generate a GPG Key
GitHub has phenomenal instructions for this, these instructions are inspired from this guide3. If something in this guide does not work for you, I recommend that you open GitHub's guide and follow it, this will focus on the happy path of GPG key generation.
If you have just installed gnupg, you should have a version greater than 2.1.17, so you can run this command to start the key generation process:
gpg --full-generate-key
Then, when asked for the type of key, press Enter to accept the default of RSA for both the private and public keys.
Enter your desired key size, a key of at least 4096 bits is recommended.
Enter the length of time you wish the key to be valid for, Pressing Enter will accept the default of never expiring. For this use case, that is perfectly acceptable, since if the GPG key ever gets compromised you can delete it from GitHub.
Verify your selections, and then enter your user ID information. A tip from GitHub - If you would like to keep your email private, use your GitHub-provided no-reply email address.
Type a secure passphrase - I recommend using a password generator to make a suitably long password, however, you should keep your password below 100 characters since this toolchain has had issues with longer passwords in the past. You should save this password in a password manager, I personally use BitWarden!
Congratulations! You have created a GPG key!
Now, it needs to be added to git and GitHub.
Adding your GPG key to Git
List your secret gpg keys, which is the portion of the key required to sign your commits and tags:
gpg --list-secret-keys --keyid-format LONG
In the list of keys, select the secret key id (sec) that you would like to use. In this example, the GPG key ID is 7FF2A19983627EC2
$ gpg --list-secret-keys --keyid-format LONG
/Users/username/.gnupg/secring.gpg
------------------------------------
sec   4096R/7FF2A19983627EC2 2020-01-02 [expires: 2022-01-01]
uid                          Username
ssb   4096R/24F148EA2DB78C3B 2020-01-02
We will configure git to use our key to sign all commits.
You must use your GPG secret key ID in the following commands.
First, tell git which GPG key to use, then, tell git to automatically GPG sign every commit:
git config --global user.signingkey 7FF2A19983627EC2
git config --global commit.gpgsign true
Now, create a test git repository with a new GPG signed commit! You will need to enter the GPG password the first time you use it, and Pinentry will allow you to save this password to your keychain so that you will not need to re-authenticate in the future.
After committing, you can test the new signature, by running this command to ask git to verify the signature:
git log --show-signature -1
Adding your GPG key to GitHub
The last phase is to add your GPG key to GitHub, without doing this step, all commits will show as 'Unverified'. This fact also allows us to revoke a GPG key in the future, as if it gets compromised we can delete it from GitHub.
Using your same GPG Key ID from above, we need to export the key:
gpg --armor --export 7FF2A19983627EC2 | pbcopy
Then, in your GitHub Settings, select SSH and GPG keys, click 'New GPG key' and paste your key!
Again, GitHub has a fantastic illustrated guide for this if you get stuck.
Push your test commit from the previous phase, and when you view the commits, it will show up as 'Verified'!
🎉🎉🎉
That's it! You have now configured your computer to auto GPG sign your commits and therefore provide a mechanism to guard and verify your identity as a software engineer!
References
- GnuPG - https://gnupg.org/
- Pinetry - https://gnupg.org/related_software/pinentry/index.html
- Generating a new GPG key - https://help.github.com/en/github/authenticating-to-github/generating-a-new-gpg-key

Latest comments (0)