
Decentralized applications (DApps) have the potential to transform the way we interact with technology and conduct transactions. However, building and deploying smart contracts on a blockchain can be time-consuming and challenging for developers.
The Bunzz User Triggered Deployment SDK aims to simplify this process by providing developers with new functionality to implement contract deployment and cloning features more easily, improving the user experience for decentralized applications (DApps).
This article will discuss the contract cloning problem, the user Triggered Deployment SDK benefits, and how to use it.
The Problem with Contract Cloning
Sometimes, DApps require users to deploy or clone the same contract multiple times. For example, no-code web3 tools like DAO platforms, protocols like Uniswap, and NFT marketplaces allow users to create their own NFT projects. However, implementing this cloning functionality can be time-consuming and error-prone for developers.
The Benefits of the User-Triggered Deployment SDK
Bunzz’s User Triggered Deployment SDK solves this problem, allowing developers to quickly and easily integrate the cloning functionality into their DApps. Here are some of the benefits of using the SDK:
Simplifies the development process
- Reduces the risk of errors
- Speeds up time to market
- Implementing the SDK
Installation
To use the SDK, you first need to install it from your CLI using the following command:
npm install @bunzz/deploy-sdk ethers@5.7.0
Note that @bunzz/deploy-sdk does not currently support ethers version 6.
Implementation Process
The complete implementation process includes the following steps:
Find an appropriate smart contract module from the explorer.
If you can’t find a suitable module, upload your own smart contract module from the repository page (requires signing up).
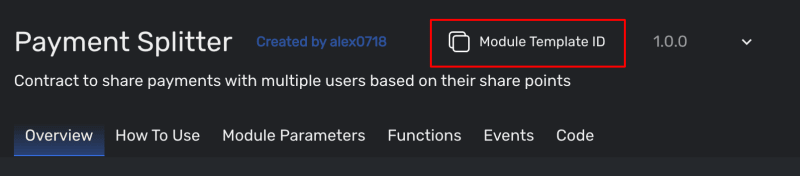
Copy the module template ID from the module template page.
- Implement the deploy function using the SDK as shown below:
import { deploy } from '@bunzz/deploy-sdk';
import { providers } from 'ethers';

const TEMPLATE_ID = '<TEMPLATE_ID>';

const cloneContract = async () => {

  // get a Signer object in the ethers' style.
  const signer = getSigner();

  // Arguments for the constructor as an array.
  // The types must follow the ethers style.
  const arg = ['dummy', 123456];

  // The return value is the same as the ethers one.
  const tx = await deploy(TEMPLATE_ID, signer, args);

  // You can get receipt as well.
  const receipt = await tx.wait();
}
Using the example of an auto DAO creation platform, the difference in the process would be significant without the User Triggered Deployment SDK and with the SDK. With the SDK, developers can create a custom solution from scratch. With the SDK, they can easily integrate the cloning functionality with minimal coding.
Conclusion
Bunzz’s User Triggered Deployment SDK simplifies deploying and cloning smart contracts, reducing the risk of errors and speeding up time to market.
Following the installation and implementation process outlined above, developers can easily integrate the SDK into their DApps and improve the user experience.
Bunzz is a platform that helps to increase the number of blockchain developers who want to contribute to the Web3 scene. By providing tools like the User Triggered Deployment SDK, we aim to make it easier for developers to create DApps that meet users' needs.
If you have any questions or feedback, don't hesitate to contact us on Discord. Get started building your DApps with Bunzz now!

Top comments (0)