
Several enterprise companies ask engineers to integrate their application authentication with LDAP (Lightweight Directory Access Protocol) or Active Directory (AD), Microsoft’s proprietary solution for storing user or employee information. The focus of this article is to explain how to integrate Buildly with an LDAP server.
LDAP
LDAP, the Lightweight Directory Access Protocol, is a mature, flexible, and well supported standards-based mechanism for interacting with directory servers. It’s often used for authentication and storing information about users, groups, and applications, but an LDAP directory server is a fairly general-purpose data store and can be used in a wide variety of applications.[1]
LDAP can define permissions, set by the admin to permit just certain individuals to access the LDAP database, and schema, to describe the format and properties of data in the server.
Active Directory
Active Directory is used to store user information. It helps to work with interconnected, complex and different network resources.
A directory service, such as Active Directory Domain Services (AD DS), provides the methods for storing directory data and making this data available to network users and administrators. For example, AD DS stores information about user accounts, such as names, passwords, phone numbers, and so on, and enables other authorized users on the same network to access this information.[2]
Configure Buildly LDAP connection
Before start
In our example, we’re using OpenLDAP as the LDAP server, so we also need an instance of it up and running. There are a couple of tutorials on the internet of how to start a LDAP server, so we’re not going to explain how to do it here but share some links that should help you. You can also use Azure Active Directory.
OpenLDAP
- How To Install OpenLDAP Server for Centralized Authentication
- How to Install OpenLDAP on Ubuntu Server 18.04
Active Directory
- Install a new Active Directory forest using Azure CLI
- Create and configure an Azure Active Directory Domain Services instance
Configure Buildly
First of all, we need to have a Buildly Core instance up and running locally, so we can safely expose our services and use an LDAP server to retrieve users’ data for authentication. To know how to quickly have a local instance of Buildly Core, go through the Quickstart documentation.
Now, we need to configure Buildly Core to connect to our LDAP server, so we have to have the URI, username, password and base domain name for the user search in hands. Buildly Core uses specific environment variables to configure its LDAP connection. These are the environment variables with our LDAP server values:

We can specify each parameter using -e, –env, and/or –env-file flags to set simple (non-array) environment variables when running docker containers but if you are running Buildly Core with docker compose, you can update the docker-compose.yml file with the new environment variables.
Let’s run Buildly Core with the new configuration and test the authentication. But first of all, we are going to list all users from our current Buildly Core instance using superuser powers.
As we can see in the response below, currently, there’s no other user besides the superuser.

We have already added a user called Rick Sanchez to our LDAP server with username rick and password admin. We will send the following request to Buildly Core to authenticate with it:

Buildly Core responded with an access token for our user:

Since this user didn’t exist in the Buildly database before, it should be created now. Let’s check that.
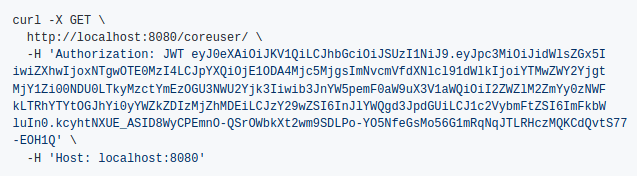
Example of request:

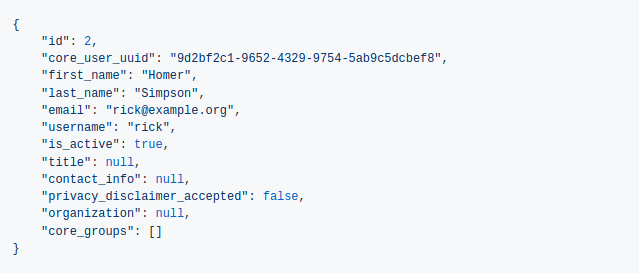
Buildly returns all information about my user:

Now, I will change the first and last name of the user in our LDAP server, then authenticate with it again and check if its name was updated in the Buildly Core database.
This is the data of the user in the LDAP server.

Let’s authenticate to Buildly Core again:

Now, let’s retrieve the user data:

Everything worked and the user data was updated in the Buildly Core database based on the information we have in our LDAP server. Buildly authenticates users against LDAP server, creates and updates users based on the data retrieved from the server.
Conclusion
We connected Buildly Core to an OpenLDAP server in this tutorial but you can connect to Active Directory as well. To connect to an Active Directory Domain Service (AD DS) you would need to update the user search filter in the config, to the AD field that you would define as the username in your AD user data.
Example:
LDAP_USERNAME_FIELD_SEARCH: “sAMAccountName”
Reference
- LDAP – https://ldap.com/
- Active Directory Domain Service – https://docs.microsoft.com/en-us/windows-server/identity/ad-ds/get-started/virtual-dc/active-directory-domain-services-overview


Top comments (0)