Introduction
This is the most polished, complete project I have built to date. Bundl is a social-networking application built on the Rails framework. It is based on the popular groups app, Meetup.
Users can join and login, as well as create groups and events, post discussions, rsvp, and join groups. The goal is to allow users to find groups of people with similar interests. Groups have a name, description, location, members, events with RSVPs, and discussions.
Planning
Before I wrote a single line of code, I got out my handy notebook. I then drew diagrams of my model and attributes. Thinking about how I wanted my UX was a tremendous help during this process. I thought of it like reverse engineering. I had to build the UX the way I saw a user interacting with it in my head. With a basic understanding of my project structure, I began coding.
Building the App
Rather than taking my usual approach and starting with the User model, I decided to build my apps core component first, Groups. This is where most interactions are made in my application. Groups have a name, description, location and an owner or user. Users can view, join and leave groups, as well as access a bunch of nested components I will cover later.
# bundl/db/20201004221257_create_groups.rb
class CreateGroups < ActiveRecord::Migration[6.0]
  def change
    create_table :groups do |t|
      t.string :name
      t.text :description
      t.string :location
      t.integer :user_id
    end
  end
end
Next, I decided that groups need a topic. Topics can belong to multiple groups.
# bundl/db/20201004221451_create_topics.rb
class CreateTopics < ActiveRecord::Migration[6.0]
  def change
    create_table :topics do |t|
      t.string :title
    end
  end
end
Users should also be able to join groups. I thought that the best way to do this was with a join model called Membership. Memberships have a group_id and user_id. Using this method allowed me to create the functionality for users to join and leave groups with '@membership.destroy'.
Members should be able to view events for their groups. This is where I added the Event model, which has a group, title, description, location, start-time, and end-time.
# bundl/db/20201004221815_create_memberships.rb
class CreateMemberships < ActiveRecord::Migration[6.0]
  def change
    create_table :memberships do |t|
      t.integer :group_id
      t.integer :user_id
    end
  end
end
User Model
I created my User model using Devise. Most of the features of my application require a user account. My User model accepts a name, email and password. I then used Devise to setup users routes and users_controller for users actions.
# bundl/config/routes.rb
Rails.application.routes.draw do
     devise_for :users, path: '', path_names: { sign_in:    "login", sign_out: "logout", sign_up: "join" }
end
I decided to start building my users join and login forms, so that I could begin testing other features of my app as I build them. Devise and Simple Form make error messages much easier later. I added my view 'views/registrations/new.html.erb' and wrote the following code:
# bundl/app/views/registrations/new.html.erb
<%= simple_form_for(resource, as: resource_name, url: registration_path(resource_name)) do |f| %>
     <%# <%= f.error_notification %>

     <%= f.input :name,
             required: true,
             label: "Full Name",
             input_html: { autocomplete: "name" }%>

     <%= f.input :email,
             required: true,
             autofocus: true,
             input_html: { autocomplete: "email" }%>

     <%= f.input :password,
             required: true,
             hint: ("#{@minimum_password_length} characters minimum" if @minimum_password_length),
             input_html: { autocomplete: "new-password" } %>

     <%= f.input :password_confirmation,
             required: true,
             label: "Confirm Password",
             input_html: { autocomplete: "new-password" } %>

     <%= f.button :submit, "Sign up" %>
<% end %>
The users login form is similar, but only has fields for email and password.
Groups
At this point I had my Groups model created, so I built the feature to create new groups. I added a new action to the groups controller and built the new view.
I then added validations for name, description, topic and location to ensure that the user fills out all required fields.
I created the RSVP and Discussion models, and put together the groups show page with name, description, buttons, and a members list. I wrote conditions, such as 'if @group.user == current_user,' to display advanced options to the group admin only. Group members also have more options than non-members.


The groups feature a variety of associations and nested routes. This allowed me to build unique discussions, members and events pages for each group.
resources :groups do
    resources :memberships, only: [:index], path: "/members"
    resources :discussions, only: [:index, :create, :destroy]
    resources :events, only: [:index, :show, :new]
end
Tags
This is a feature I added on a whim. I wanted another way for users to browse groups, so I thought it would be a great idea for users to create their own tags. I implemented this feature by creating a GroupTag join model that belongs to a tag and group. When a user enters a tag title, the application will create that tag or find a tag if one already exists with the given title.
I decided to get creative with this new model, and allow users to enter multiple tags, separated by commas, into a text area in the groups new form.
You may have seen it in the screenshot above. This works via two instance methods I created called tag_list and tag_list=(value).
def tag_list
    self.tags.map { |t| t.name }.join(", ")
end

def tag_list=(value)
    tag_names = value.split(/,\s+/)

    self.tags = tag_names.map { |name| Tag.where('name = ?', name).first or Tag.create(:name => name) }
end
The first method displays all group tags separated by commas and the second method takes the input from the text area, splits it at commas, and finds or creates tags with the provided values.
Searches
What good are the tags if they cannot be used? This is where the Search model comes in. The purpose of this model is to search for groups by tags, however more search fields can be added if wanted.
Here is the form:
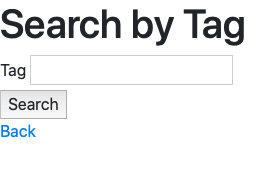
Every time that form is submitted, a new Search instance is created. This also means that each search result is displayed on a unique show page with the Search instance ID. This is a little more advanced than the Groups index search field that filters the results.
OAuth
The final step, as far as the backend, was setting up OAuth, specifically OAuth-Facebook, which allows users to login to your application using their Facebook account.
First I added Omniauth columns to my users table.
# bundl/db/migrate/20201105220126_create_searches.rb
class AddOmniauthToUsers < ActiveRecord::Migration[6.0]
   def change
     add_column :users, :provider, :string
     add_column :users, :uid, :string
   end
end
I then bundle installed the Omniauth-Facebook and DotEnv gems. Devise actually works with Omniauth, so I was able to add this line of code to my Devise initializer.
config.omniauth :facebook, ENV['FACEBOOK_APP_ID'], ENV['FACEBOOK_APP_SECRET'], {}
If you look at the code above, you will notice the constants, "FACEBOOK_APP_ID" and "FACEBOOK_APP_SECRET." These constants are stored in DotEnv, and hold my unique ID and secret. This prevents the information from being exposed.
Omniauth uses these codes to direct users to my Facebook app, and back to my application. It pulls the Facebook user's email and name to build their user account in the Bundl application. This is happening in the background when the user is redirected, and the information is stored to the database.
Roadblocks
There were a few headaches throughout the process of building my Rails application. The hardest part was sitting down and getting to work. Having lots of moving parts caused me to become overwhelmed. I was jumping from one feature to another and feeling unsure about where to start. This feeling slowly faded away as I got further into development.
My biggest area of struggle was forms. At times, my form field data would not pass over. I spent hours trying to understand why new groups were coming back as invalid due to not having a topic. It ended up being as simple as adding a topic_id column to my groups table and fixing the associations in my models. I had it setup as Group 'has_one :topic', when the correct association is 'belongs_to :topic'.
Final Thoughts
Building this project was a huge learning experience. I utilized everything I learned throughout the module, including associations, validations, authentications, nested fields, nested routes, displaying validations and using helper methods. I have developed a solid understanding of Rails. Here are a few key take aways from my experience:
- Test your application and try to break it
- Use byebug and use it often
- Break down your project into small parts
- Keep a tab with documentation handy


Top comments (0)