This tutorial will highlight a useful Nuget package for enabling file uploads in your Blazor project. In particular, you will learn how to create a beautiful user experience with drag and drop file uploads that respond to ondragenter and ondragleave events.
Getting Started
To get started, launch Visual Studio and create a new server-side Blazor project. We will be using the BlazorInputFile Nuget package to handle all the JSInterop calls for us. Install the package via the Package Manager Console.
Install-Package BlazorInputFile
To begin using BlazorInputFile, you must includes a reference for the package’s JavaScript file to your project. To do this, locate and open your project’s _Host.cshtml within the Pages folder. Then, add the following line just before the closing </body> tag.
<script src="_content/BlazorInputFile/inputfile.js"></script>
In this tutorial, you will build a drag-drop experience as a reusable Blazor component. This will give you flexibility in case you wish you use the component in multiple pages of your project. Add a new Razor component to your project’s Shared directory by right-clicking the Shared folder, and selecting Add > New Item. Select Razor Component and call it DragDrop.
Designing the Drag and Drop Interface
Layout
At the top of your new DragDrop.razor file, add a using directive for BlazorInputFile and inject an instances of Blazor’s JavaScript runtime.
@using BlazorInputFile
@inject IJSRuntime jsRuntime
Your drag-drop component will simply extend the InputFile component of BlazorInputFile with some custom CSS styling. It could be as simple as the following.
<div class="dropzone">
    <InputFile OnChange="HandleFileInputChange" />
    Upload file
</div>
From here, you would define the styling for the .dropzone class and define the actions to be taken by the OnChange event handler.
We will make our example a little more interesting because we want the user to be presented with some visual feedback when a file is hovering over the drop zone. Our example will add a few more features. It will support adding multiple files, and it will check to ensure only certain file types are accepted and that each file is smaller than a given maximum file size. A validation message will be shown if either of these checks fail. Finally, our example will provide some visual feedback by listing the filenames of each uploaded file and allowing the user to remove specific files.

When you add the following to DragDrop.razor , you will see a number of error messages. Don’t worry, we will handle each one by declaring the referenced variables and defining each event handler.
<div class="row">
    <div class="col-12 p-0">
        <div class="dropzone @dropClass rounded">
            <InputFile id="fileInput" multiple title=""
                       OnChange="HandleFileInputChange"
                       accept="image/png,image/gif,image/jpeg"
                       @ondragenter="HandleDragEnter"
                       @ondragleave="HandleDragLeave" />
            Upload images
        </div>
        @if ((fileTypeError || fileSizeError))
        {
            <ul class="validation-errors mb-0">
                @if (fileTypeError)
                {
                    <li class="validation-message">Only image files are accepted.</li>
                }
                @if (fileSizeError)
                {
                    <li class="validation-message">The max file size is @MaxFileSizeMB MB.</li>
                }
            </ul>
        }
        @if (selectedFiles != null && selectedFiles.Count > 0)
        {
            <div class="col-12">
                <ul>
                    @foreach (var file in selectedFiles)
                    {
                        <li>
                            @file.Name
                            <button class="btn btn-link text-danger p-0 pl-1" type="button"
                                    @onclick="@(e => RemoveFile(file))">
                                <small class="align-text-bottom">Remove</small>
                            </button>
                        </li>
                    }
                </ul>
            </div>
        }
    </div>
</div>
Variable Declaration
Begin by declaring the variables you will be using in this Blazor component. Add the following declarations to the @code{ } block of DragDrop.razor.
const int MaxFileSizeMB = 5;
const int MaxFileSize = MaxFileSizeMB * 1024 * 1024; // 5MB
private string dropClass = "";
private bool fileSizeError = false;
private bool fileTypeError = false;
private List<IFileListEntry> selectedFiles = new List<IFileListEntry>();
As you can see, there is a variable that will be used to enforce a maximum file size of 5 MB, The dropClass variable will be used to programmatically add a class to the dropzone container when the user is dragging a file over the dropzone but has not yet released the mouse button. In addition, there are boolean flags that will be triggered in the event of an error. Finally, you have reserved a block of memory, selectedFiles, that will contain the list of files to be uploaded to the server.
Event Handlers
Now that your variables are declared, it is time to declare the methods that will be fired when the OnChange, ondragenter, and ondragleave events are raised. There is also a fourth handler that will be triggered when the user, wishing to remove a file from the input element, clicks the remove button.
The HandleDragEnter() and HandleDragLeave() handlers are simple. They will simply set and clear the value of the dropClass string, respectively. The value of dropClass is used to programmatically assign assign a styling class to the div element on Line 6, which wraps the InputFile component.
private void HandleDragEnter()
{
    dropClass = "dropzone-drag";
}

private void HandleDragLeave()
{
    dropClass = "";
}
The HandleFileInputChange() handler method will be a little more complex. Since our InputFile field accepts multiple files, this handler should perform validation on the list of files, checking that the size of each one is below the maximum file size threshold and that the filetype of each one is on our list of accepted filetypes. Each valid file should be added to the selectedFiles collection.
private async Task HandleFileInputChange(IFileListEntry[] files)
{
    dropClass = "";
    fileSizeError = false;
    fileTypeError = false;
    List<string> acceptedFileTypes = new List<string>() { "image/png", "image/jpeg", "image/gif" };
    if (files != null)
    {
        foreach (var file in files)
        {
            bool error = false;
            if (file.Size > MaxFileSize)
            {
                error = true;
                fileSizeError = true;
            }

            if (!acceptedFileTypes.Contains(file.Type))
            {
                error = true;
                fileTypeError = true;
            }

            //keep the good files
            if (!error)
            {
                selectedFiles.Add(file);
            }
        }
    }
}
Finally, the RemoveFile() handler method simply removes the selected file from the list of files stored in the selectedFiles collection.
private void RemoveFile(IFileListEntry file)
{
    selectedFiles.Remove(file);
}
Styling
Now that you have handled all the file input, drag, and button events, it is time to add styling to the drag-drop zone. Open site.css from within the wwwroot/css directory and add the following lines to the stylesheet.
.dropzone {
    border: 3px dashed steelblue;
    padding: 3rem;
    display: flex;
    align-items: center;
    justify-content: center;
    background-color: #eee;
    box-shadow: inset 0 0 8px rgba(0,0,0,0.2);
    color: #444;
    font-size: 1.5rem;
    cursor: pointer;
    position: relative;
}

    .dropzone:hover {
        background-color: #f3f3f3;
        color: #333;
    }

    .dropzone input[type=file] {
        position: absolute;
        width: 100%;
        height: 100%;
        opacity: 0;
        cursor: pointer;
    }

.dropzone-drag {
    background-color: palegreen;
}
Bringing it all together
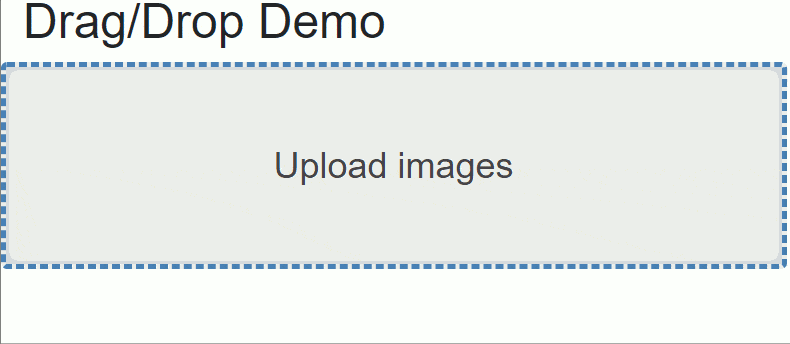
You can, now, use your drag-drop component on any page of your project. For example, add it to your projects Index.razor page to test it.
@page "/"

<h2>Drag/Drop Demo</h2>
<DragDrop />
Your complete code for the DragDrop.razor Blazor component may look like the following.
@using BlazorInputFile

<div class="row">
    <div class="col-12 p-0">
        <div class="dropzone @dropClass rounded">
            <InputFile id="fileInput" multiple title=""
                       OnChange="HandleFileInputChange"
                       accept="image/png,image/gif,image/jpeg"
                       @ondragenter="HandleDragEnter"
                       @ondragleave="HandleDragLeave" />
            Upload images
        </div>
        @if ((fileTypeError || fileSizeError))
        {
            <ul class="validation-errors mb-0">
                @if (fileTypeError)
                {
                    <li class="validation-message">Only image files are accepted.</li>
                }
                @if (fileSizeError)
                {
                    <li class="validation-message">The max file size is @MaxFileSizeMB MB.</li>
                }
            </ul>
        }
        @if (selectedFiles != null && selectedFiles.Count > 0)
        {
            <div class="col-12">
                <ul>
                    @foreach (var file in selectedFiles)
                    {
                        <li>
                            @file.Name
                            <button class="btn btn-link text-danger p-0 pl-1" type="button"
                                    @onclick="@(e => RemoveFile(file))">
                                <small class="align-text-bottom">Remove</small>
                            </button>
                        </li>
                    }
                </ul>
            </div>
        }
    </div>
</div>

@code {
    const int MaxFileSizeMB = 5;
    const int MaxFileSize = MaxFileSizeMB * 1024 * 1024; // 5MB
    private string dropClass = "";
    private bool fileSizeError = false;
    private bool fileTypeError = false;
    private List<IFileListEntry> selectedFiles = new List<IFileListEntry>();

    private void HandleDragEnter()
    {
        dropClass = "dropzone-drag";
    }

    private void HandleDragLeave()
    {
        dropClass = "";
    }

    private async Task HandleFileInputChange(IFileListEntry[] files)
    {
        dropClass = "";
        fileSizeError = false;
        fileTypeError = false;
        List<string> acceptedFileTypes = new List<string>() { "image/png", "image/jpeg", "image/gif" };
        if (files != null)
        {
            foreach (var file in files)
            {
                bool error = false;
                if (file.Size > MaxFileSize)
                {
                    error = true;
                    fileSizeError = true;
                }

                if (!acceptedFileTypes.Contains(file.Type))
                {
                    error = true;
                    fileTypeError = true;
                }

                //keep the good files
                if (!error)
                {
                    selectedFiles.Add(file);
                }
            }
        }
    }

    private void RemoveFile(IFileListEntry file)
    {
        selectedFiles.Remove(file);
    }
}

Top comments (0)