A common mistake among developers is to give less importance (often, none at all) to styling when compared to other parts of their codebase.
Since the early years of CSS, there is a very popular practice of accumulating everything in a single stylesheet, carelessly, quickly creating a huge maintenance nightmare.
It’s a very simple philosophy:
- If you need to style something, just put it at the end of the styles.css
- When you have problems trying to make a property work, there’s no need to debug your code, this is foolish, it’s only CSS… A simple !important will do the job. As a precaution, you can use it for everything, so it will work for sure
- If it still doesn’t work, an ultra-specific selector is a sure thing, something like
body>header#main_header.main-header>img.logo+div.links>a.link - Do you have a lot of repeated code? This is normal, it’s just old school code reuse
- Patterns, conventions, best practices, methodologies? For what? It’s JUST CSS, remember?
Fortunately, in recent years, this way of thinking has become more and more obsolete.
A lot of things have changed in the web: in the browsers, in their three main languages, in the explosive growth of the number of available libraries and frameworks, in the emergence of many incredible tools to facilitate our everyday work and, last but not least, in the front-end community and its growing thirst for self-improvement.
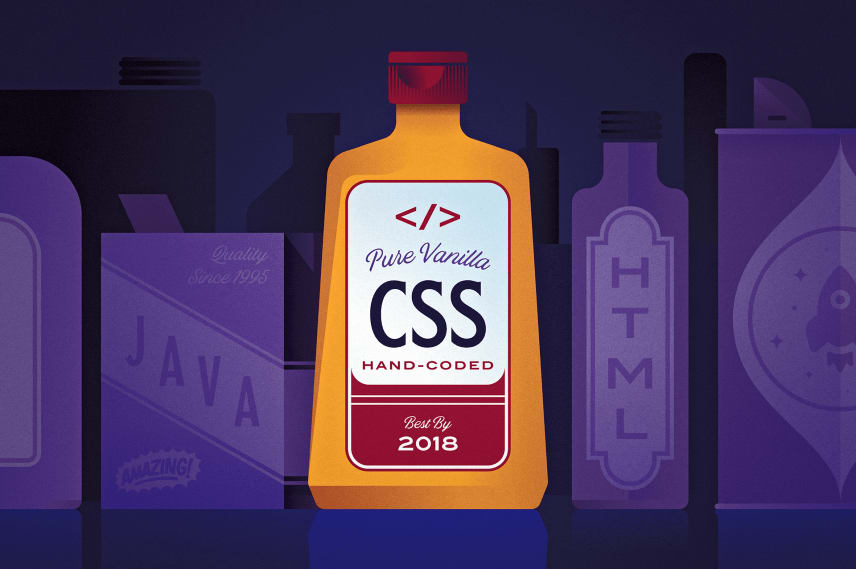
The evolution of CSS is continuous. Features like CSS Grid Layout, Flexbox, custom properties, writing-mode and others are quickly appearing and being supported. Even so, maintaining the appearance of a complex web application with only Vanilla CSS is a thankless job, regardless of whether you are following the best practices or not.
The fact is that any project, minus a few exceptions, can be favored by pre and post-processing tools or CSS-in-JS libraries. In this article, we will see, both, how they work and their advantages.

Preprocessors
CSS preprocessor is a tool that transforms code in a given language into pure CSS. The most popular ones are Sass, Stylus and LESS. Among them, there are differences in the feature set and the language syntax.
The purpose of this article is not to make a detailed comparison between the available options (since there are many great posts on the internet with this goal), but to introduce preprocessors in a general way. For the examples, I chose Stylus, a tool written in JavaScript, which runs on Node.js.
Take a look at this piece of code:
$base-color = #2DD;
$base-color--dark = darken($base-color, 30%);

.menu {
    background-color: $base-color--dark;

    &::before {
        color: $base-color;
    }
}
At the beginning of the code shown above, I declared two variables whose values are colors. The first one has a literal value, the second one uses a native Stylus function, darken, to make the color stored in the $base-color variable 30% darker.
Then, I declare a class named menu. In the body of this rule, I use both variables that have been declared previously. Finally, there is an occurrence of selector nesting, where I set the color of the before pseudo-element for the menu class.
Note: Using the dollar sign as a prefix for variable names is a question of personal preference and not a Stylus demand. I acquired this habit over the years working with Sass and I still use it these days as a best practice in Stylus. This way, the variables become more visible, not being confused with CSS keywords.
The example above has features which are not supported by the browser, e.g. selector nesting and variables (OK, now CSS has custom properties, as I explain in this article, but their usage and syntax are different and somewhat peculiar). A compilation process is necessary in order for the browser to correctly interpret Sass, Stylus or LESS code. After compiled, the output is just plain CSS:
.menu {
  background-color: #189b9b;
}
.menu::before {
  color: #2dd;
}
As you can see, the final result expands nested selectors as separate rules and replaces each variable reference with its respective value. Just like that.
Common features in preprocessors
The supported features vary between preprocessors. Among the main ones, Sass and Stylus are the most versatile and complete. Once again, I’ll use Stylus to explain each concept.
Variables
A variable can store things like:
Colors:
$base-color = blue;$cta-color = #D32;$link-color = rgb(15, 200, 25);
Numeric values + unit:
$container-padding = 2rem;$rotation-increment = 15deg;$default-transition-duration = 20ms;
Values list, like…:
- Numbers:
$sequence = 1, 2, 3; - Colors:
$colors = blue, #F00, hsla(120,100%,30%,0.5); - And more…:
$font-stack: “Helvetica Neue”, Helvetica, Arial, sans-serif;
Nesting
It’s possible to nest selectors in order to avoid code repetition and to group correlated rules in a clearer way:
.main-navbar {
    ul {
        list-style-type: none;
    }

        a {
            color: #D22;

            &::after {
                margin-left: 1rem;
            }

            &:hover{
                opacity: 0.8;
            }
        }
}
Advice: It’s important to point out that this feature needs to be considered carefully, since it is prone to problems if overused, such as: stylesheets highly coupled with the HTML hierarchical structure, selectors with high specificity and a CSS output unnecessarily big.
Single and multiple inheritance
Like OO languages, preprocessors allow code reuse through inheritance.
A class X can extend another class Y, inheriting all of its properties, and having properties of its own:
.btn {
    border-radius: 0.3rem;
    border: 0.1rem solid #222;

    &:hover {
        opacity: 0.9;
    }
}

.btn--blue {
    @extend .btn;
    background-color: #22D;
}
Besides single inheritance, exemplified above, it’s possible to inherit styles from multiple classes at the same time:
.btn {
    border-radius: 0.3rem;
    border: 0.1rem solid #222;

    &:hover {
        opacity: 0.9;
    }
}

.big-btn {
    font-size: 1.8rem;
    padding: 1rem 2rem;
}

.big-btn--blue {
    @extend .btn, .big-btn;
    background-color: #22D;
}
Placeholders (abstract classes)
And to continue with our comparison with OO languages, let’s introduce the concept of placeholder, originally popularized by Sass, which can be compared to an abstract class in OOP. A placeholder is a special type of class which can ONLY be extended. Which means you can’t reference it directly from your HTML, once it won’t be present in your final CSS output. The code in a placeholder will only be rendered in case a class extends it.
The way we extend placeholders is the same way we use common CSS classes:
$btn {
    border-radius: 0.3rem;
    border: 0.1rem solid #222;

    &:hover {
        opacity: 0.9;
    }
}

.btn--blue {
    @extend $btn;
    background-color: #22D;
}
In Stylus, placeholders are prefixed with a dollar sign. In the above code, the .btn--blue class will inherit the entire body of the $btn placeholder, but it, in its turn, won’t be present in the compiled CSS.
Conditionals and loops
Like any structured language, it’s also possible to use conditionals and loops:
$colors = 'blue', 'black', 'yellow', 'aqua';
$dark-colors = 'blue', 'black';

for $color in $colors {
    .btn--{$color} {
        background-color: unquote($color);

        if $color in $dark-colors {
            color: white;
        } else {
            color: #222;
        }
    }
}
Here’s the compiled CSS:
.btn--blue {
  background-color: blue;
  color: #fff;
}
.btn--black {
  background-color: black;
  color: #fff;
}
.btn--yellow {
  background-color: yellow;
  color: #222;
}
.btn--aqua {
  background-color: aqua;
  color: #222;
}
Functions
Functions are a feature included in the main preprocessors as well. A function behaves exactly the way you’re used to from other languages, receiving from 0 to n arguments and returning a value:
repeat($str, $qty) {
    if ($qty < 1) {
        return '';
    }

    $ret = '';

    for $i in 1..$qty {
        $ret += $str;
    }

    $ret;
}

h1:before{
    content: repeat(ha, 5);
}
CSS output:
h1:before {
  content: 'hahahahaha';
}
Mixins
Mixins are very similar to functions, but with the following differences:
- They don’t have a return value
- Due to not having a return, they can’t be used as a value for a variable or property
- A mixin can have CSS properties in its body, which will be rendered in the place where the mixin was called.
square($side) {
    width: $side;
    height: $side;
}

.card{
    square(20rem);
    background-color: #3C3;
}
CSS output:
.card {
  width: 20rem;
  height: 20rem;
  background-color: #3c3;
}
Imports
You probably already know the CSS @import at-rule, which allows a stylesheet X to include an external stylesheet Y. This is made by the browser, during the interpretation of the stylesheet, triggering an additional HTTP request.
Preprocessors save the browser from having to make these additional requests for each included CSS. When you import a Sass, Stylus or LESS file, the included stylesheet and the one that includes it become one single CSS bundle (after compiled) to be loaded in your application.
To make it clearer, here is a simple example:
// color-scheme.styl
$base-color = #555;
$cta-color = #D22;
// another-thing.styl
.whatever {
    padding: 2rem;
    background-color: $cta-color;
}
// example.styl
@import 'color-scheme';
@import 'another-thing';

.footer {
    background-color: $base-color;
    color: white;
}
The main file, example.styl, imports two other files. In the first one, we can see two variables being defined, which will become globally accessible from this moment on. The second file has a CSS rule defined, which uses one of the variables we defined previously. After compiled, here’s what the CSS output will look like:
.whatever {
  padding: 2rem;
  background-color: #d22;
}
.footer {
  background-color: #555;
  color: #fff;
}
Naturally, in the real world, the final bundle would be minified and GZipped before being served to the user.
Native functions
Among the many possible uses, native functions help us when dealing with:
- Colors (ex: darken, saturation, alpha, lightness)
- Lists (ex: push, pop, index, shift, keys)
- Different types of values and units (ex: typeof, unit)
- Math operations (ex: round, sin, floor, abs)
- Strings (ex: split, substr, slice)
Native functions can be used both to compose your mixins/custom functions logic and directly in the body of a rule.
Post-processors (or just “processors”?)
In theory, a post-processor is a tool whose input is a CSS file and whose output is a transformed CSS file. Note that, differently from preprocessors, a post-processor doesn’t involve another language, it’s just plain CSS.
So, what kind of transformation are we talking about? Well, many kinds. Here are some good examples of post-processing plugins:
- Autoprefixer: Automatically includes vendor-prefixes according to the browsers you want to support.
- PostCSS Assets: Handles asset paths, cache-busting, image dimensions and base64 image inlining.
- cssnano: Minifies your CSS.
- Font Magician: Automatically generates @font-faces.
- postcss-color-palette: Allows you to use native CSS color names like blue, purple, aqua, yellow and others as aliases for colors from your own palette, replacing each reference with the color you specify.
- stylint: Analyzes your code, suggests fixes and improvements and (if you want to), applies some of them.
- postcss-sprites: Extracts images from your stylesheets, generates a sprite containing all of them and replaces the original references to make use of the created sprite.
All of the above examples are PostCSS plugins. PostCSS is a tool which is regarded by many as a top-of-mind name when it comes to post-processors.
However, there is some discussion in the development community about the meaning of the term “post-processor”. Some argue that the “post” prefix would only make sense if the processing took place in the browser (like -prefix-free, for example) and not before, in development time.
Other disagree with the premise of “valid CSS in, valid CSS out” since many post-processing plugins use inexistent properties or invalid CSS syntax to make their magic happen. Some plugins even mimic the typical preprocessor behavior, supporting mixins, inheritance, loops, conditionals and other features not natively supported by CSS.
Here are some examples of post-processing plugins that use CSS non-standard syntax and properties:
- PreCSS: Allows the use of Sass-like markup, with conditionals, loops, imports, extends, mixins, selector nesting and other features.
- Short: Extends the native CSS shorthands and provides shorthands of its own to enable more succinct rules.
- Write SVG: Lets you write SVGs directly in CSS.
- LostGrid: A grid system which is based on the calc CSS function. Depends on the use of non-standard properties (e.g.: lost-column, lost-row, lost-utility and lost-center).
After the massive adoption of PostCSS by developers and hundreds of plugins created for a wide variety of purposes, the project maintainers themselves realized that the term “post-processor” no longer makes sense and officially stopped using it.
Independently of the semantic debates about name of the concept, the potential of a tool like PostCSS is unquestionable and, due to its great flexibility, it can be used both with a preprocessor (like Sass, Stylus or LESS), and as a replacement for it (through plugins like PreCSS, for example).
CSS-in-JS
The React explosion has popularized a number of concepts among the front-end developers, like functional programming, reactive programming, Flux architecture (and its most famous incarnation, Redux) and others.
One of the most recent trends born in the React world is CSS-in-JS , the idea of writing styling code in JavaScript, rendering the resulting CSS in runtime. The most popular library in this category is, certainly, styled-components, but there are other relevant options, like JSS, Radium, Emotion and Aphrodite, just to list a few.
Christopher “vjeux” Chedeau, a front-end engineer at Facebook, is often credited as the precursor of CSS-in-JS. He got the idea while working in the React team, in 2014, as you can see in this presentation.
When Vjeux created CSS-in-JS, its original goal was to solve 7 CSS problems:
- Global namespace: Every CSS class is a global identifier and, as it is in JavaScript, this is prone to some undesirable conflicts.
- Dependencies: If component A depends on a stylesheet B which could not be loaded, probably you’ll see a component with a broken appearance. This is normally enough to alert the maintainer that something is wrong. However, if this same stylesheet was already loaded in another place of the application, the component A won’t have any styling problem and its developer will never suspect there is a bug.
- Dead code elimination: It’s hard to track and remove classes which are not used anymore.
- Minification: The standard CSS minification process is limited because you can’t rename classes without updating the existing references in the HTML.
- Sharing constants: Often, it’s necessary to share values between JavaScript and CSS. We may have CSS custom properties nowadays, but in 2014 there weren’t elegant ways of solving this problem.
- Non-deterministic resolution: A HTML element can have a given CSS property set to different values in multiple rules. If the selectors for these rules have the same specificity, the last one to be interpreted “wins the battle”, as stated by the cascade behavior. If one of these rules is defined in an asynchronously loaded stylesheet, it’s impossible to predict which of them will be read last.
- Isolation: Let’s say you’re using a component created and maintained by another team, but you want to create a variation of this component with a few visual changes, like the background color of a button, for example. Ideally, you should negotiate the creation of this variation with the responsible team. More likely, however, is that the engineer who needs this change will make it himself, analyzing the internal structure of the component and styling it through selectors. This is a problem, since any changes in the HTML may break customizations made by other teams (which probably depend on a specific structure to work properly).
A practical example
I’ll use styled-components to exemplify the concept:
import React, { Component } from 'react';
import styled from 'styled-components';

const Title = styled.h1`
    color: white;
    font-size: 2rem;
`;

const Content = styled.div`
    background: blue;
    padding: 2rem;
`;

class Example extends Component {
    render() {
        return (
            <Content>
                <Title>Hi everyone!</Title>
            </Content>
        );
    }
}

export default Example;
For those who have some knowledge about React, the above example speaks for itself. The constants Title and Content are normal React components, but with a custom style.
The styled.div notation is an ES2015 native feature and it’s known as Tagged Template Literal. In this context, it allows us to dynamically handle the style of a component based on its properties, like in the example below:
const SignInButton = styled.button`
  font-size: ${
    props => props.standout ? '2rem' : '1.4rem'
  };
`;
CSS-in-JS: an innovative and controversial idea
While it is true that libraries such as styled-components are widely recognized and used by the community, there is a considerable mistrust, or even rejection, of the CSS-in-JS concept on the part of a large number of developers, many questioning its original goals. There are many reasons for this, but the most obvious one is the discomfort brought by the idea of defining style in a JavaScript file.
The fact is that some of the problems that CSS-in-JS aims to solve already have other solutions nowadays. CSS Modules are a good example, allowing you to modularize stylesheets in an elegant way, preventing conflicts between global identifiers.
Furthermore, they can also be combined with a preprocessor. The consistent use of a naming convention, such as BEM, also prevents these problems. CSS custom properties, which already have a decent browser support, let you share values between CSS and JavaScript. And so on…
Conclusion
There are many modern alternatives to plain CSS. There is no perfect and universal solution among them, each one having its own pros and cons. It’s up to the developer to choose the best fit for each project.
What matters is not to be bound by the limitations of Vanilla CSS in projects of relevant size or with a reasonable growth perspective, suffering to maintain your stylesheets for not knowing better available options.
Plug: LogRocket, a DVR for web apps

LogRocket is a frontend logging tool that lets you replay problems as if they happened in your own browser. Instead of guessing why errors happen, or asking users for screenshots and log dumps, LogRocket lets you replay the session to quickly understand what went wrong. It works perfectly with any app, regardless of framework, and has plugins to log additional context from Redux, Vuex, and @ngrx/store.
In addition to logging Redux actions and state, LogRocket records console logs, JavaScript errors, stacktraces, network requests/responses with headers + bodies, browser metadata, and custom logs. It also instruments the DOM to record the HTML and CSS on the page, recreating pixel-perfect videos of even the most complex single page apps.
The post It's 2018: You shouldn't be writing vanilla CSS appeared first on LogRocket Blog.

Top comments (0)