
Zero Server is an application bundler made to simplify web development. It takes away the hassle of package management and routing by automatically doing it for you. As stated on its website,
It’s as simple as writing your code in a mix of Node.js, React, HTML, MDX, Vue, and static files and putting them all in a folder. Zero will serve them all. Zero abstracts the usual project configuration for routing, bundling, and transpiling to make it easier to get started.
Zero Server offers several features that make it a great choice for developing your next web application:
Auto configuration
Your project folder doesn’t require config files. You just place your code and it’s automatically compiled, bundled, and served.
File system-based routing
If your code resides in ./api/login.js, it's exposed at http://<SERVER>/api/login.
Auto dependency resolution
If a file does require('underscore'), it is automatically installed and resolved. You can always create your own package.json file to install a specific version of a package.
Multiple languages
Zero is designed to support code written in many languages, all under a single project. Imagine this:
- Exposing your Tensorflow model as a Python API
- Using React pages to consume it
- Writing the user login code in Node.js
- Your landing pages in a mix of HTML or Markdown/MDX
You can have all this under a single project folder as a single web application.
Improved error handling
Each endpoint runs in its own process. So if /api/login crashes for some reason, it doesn't affect the /chatroom page or the /api/chat API. Crashed endpoints are restarted automatically when the next user visits them.

In this tutorial, we will learn how to set up an application with Zero Server and demonstrate the process by building a small React e-commerce application. Let’s dive in.
Prerequisites
To follow this tutorial, you’ll need a basic understanding of React and Node.js. Also, ensure that you have at least Node v8+ installed on your machine before you begin. HTML/CSS knowledge is also required, but not mandatory.
To build the required application, here are a few tools we’ll use:
Exploring Zero Server
To start working with Zero, you need to first install it globally on your development machine. To do so, type the following in your terminal:
npm install -g zero
Once this is done, you can go ahead and start building your applications using its capabilities. Let’s do a quick demo to see what makes Zero unique. Create a test folder called zero, and define the following folder structure:
zero/
         api/
Inside the api folder, create a time.js file and add the following code to it:
// api/time.js
    const moment = require("moment")

    module.exports = (req, res) => {
      var time = moment().format('LT');   // 11:51 AM
      res.send({time: time })
    }
In our file, we:
- Import moment.js
- Export a function that accepts Request and Response objects (like Express)
And that’s it! Your API is ready. Now, when you run your server, Zero does two things:
- Automatically installs and makes moment.js available for you to use in your file
- Exposes your newly created API to the URL /api/time
To run your file, navigate to the created folder via your terminal and type the command **zero**. Once that’s done, you should see this in your terminal:

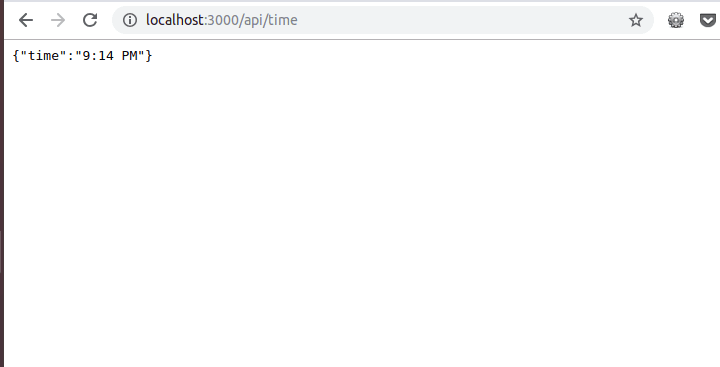
Now when you visit http://localhost:3000 in your browser, you will see this:
As you can see, without installing any library or configuring routes, you have implemented a basic API. Zero reduces your workload by doing all this for you behind the scenes. This way, you get to focus on what truly matters to your project: your code.
Now that we have an API running, let’s see how to consume it using React on the front end. At the root of your directory, create an index.jsx, and add the following lines of code to it:
// ./index.jsx

    import React from 'react'

    export default class extends React.Component {
      static async getInitialProps(){
        var json = await fetch("/api/time").then((resp) => resp.json())
        return {time: json.time}
      }

      render() {
        return <p>Current time is: {this.props.time}</p>
      }
    }
In our file, we initialize a standard React component, with one additional Hook for initial data population.
getInitialProps is an async static method called by zero when the page loads. This method can return a plain object, which populates props.
Now, go to this URL: http://localhost:3000. You should see the current server time rendered by React while fetching the API endpoint you created earlier:

That’s it! You have created a basic application without any installation or extra configuration. This is very powerful, and it’s the base Zero Server stands on.
N.B. , you can always create your own package.json file to install a specific version of a package.
Bootstrapping an e-commerce application with Zero Server
Now that we have an understanding of how Zero works, let’s go ahead and bootstrap a small e-commerce application.
Update your folder structure to look like this:
zero/
         api/
         components/
           Product.jsx
           ProductList.jsx
           Total.jsx
         index.jsx
In our components directory, we define three files:
- A Product component to hold a single product’s data
- A ProductList component to serve, fetch, and display products
- A Total component to store our current cart data
Finally, our **index.js** will house all our components. As mentioned above, Zero currently supports the following languages:
- Node.js (JavaScript and TypeScript)
- React (JavaScript and TypeScript)
- HTML
- Markdown/MDX
- Vue
To distinguish between Node.js and React, Zero uses the file extension. You’re required to name your React components with the jsx extension and your Node APIs with the js extension to enable Zero to process your files properly.
Creating our components
First, let’s define our Product component. Open up the file and add the following lines of code:
// ./components/Product.jsx
    import React from 'react'
    import 'bootstrap/dist/css/bootstrap.css';

    export default class Product extends React.Component {
      constructor(props) {
        super(props);
        this.state = {
          qty: 0
        };
        this.add = this.add.bind(this);
        this.subtract = this.subtract.bind(this);
        this.showInfo = this.showInfo.bind(this);
      }

      add() {
        this.setState({
          qty: this.state.qty + 1
        });
        this.props.handleTotal(this.props.price);
      }

      subtract() {
        this.setState({
          qty: this.state.qty - 1
        });
        this.props.handleTotal(-this.props.price);
      }

      showInfo() {
        this.props.handleShow(this.props.info);
      }

      render() {
        return (
          <div>
            <div className="row form-group">
              <div className="col-sm-10">
                <h4>{this.props.name}: ${this.props.price}</h4>
              </div>
              <div className="col-sm-2 text-right">qty: {this.state.qty}</div>
            </div>
            <div className="row btn-toolbar">
              <div className="col-6">
                <button className="btn btn-outline-primary">
                  show info
                </button>
              </div>
              <div className="col-6 text-right">
                <button className="btn btn-outline-primary" onClick={this.add}>
                  +1
                </button>
                <button className="btn btn-outline-primary" onClick={this.subtract} disabled={this.state.qty < 1}>
                  -1
                </button>
              </div>
            </div>
            <hr />
          </div>
        );
      }
    }
Here, we display a single product and define functions to add and remove items from our state, which is where the current cart data is stored.
Before we create our ProductList component, let’s create our Total component. This will house the current cart state. Open up your Total.jsx, and add the following lines of code to it:
// ./components/Total.jsx

    import React from 'react'
    import 'bootstrap/dist/css/bootstrap.css';

    export default class Total extends React.Component {
      constructor(props) {
        super(props);
      }
      render() {
        let total = this.props.total.toFixed(2);
        let tax = (this.props.total * 0.15).toFixed(2);
        let totalIncTax = (+total + +tax).toFixed(2);
        let mystyle = {
          borderTop: "1px solid #ddd",
          marginTop: "10px"
        };
        return (
          <div style={{"marginTop": "30px", "backgroundColor":"#F6F6F6","padding": "10px"}}>
            <h3 className="row" style={{ fontWeight: 400 }}>
              <span className="col-6">total price:</span>
              <span className="col-6 text-right">${total}</span>
            </h3>
            <h3 className="row" style={{ fontWeight: 400 }}>
              <span className="col-6">tax (15%):</span>
              <span className="col-6 text-right">${tax}</span>
            </h3>
            <h3 className="row" style={mystyle}>
              <span className="col-6">tota inc tax:</span>
              <span className="col-6 text-right">${totalIncTax}</span>
            </h3>

          </div>
        );
      }
    }
In our Total.jsx file, we calculate the total alongside the taxable amount for the products in our cart.
To allow our ProductList.jsx file to display a list of products, let’s add the following code:
// ./components/ProductList.jsx
    import React from 'react'
    import Total from './Total'
    import Product from './Product'

    export default class Products extends React.Component {
      constructor(props) {
        super(props);

        this.state = {
          total: 0,
          productList: [
                        {
                          "name": "Berries",
                          "price": 23.54,
                          "description": "Sweet popsicles to help with the heat"
                        },
                        {
                          "name": "Orange",
                          "price": 10.33,
                          "description": "Mouth watering burger."
                        },
                        {
                          "name": "Lemons",
                          "price": 12.13,
                          "description": "Sumptuous egg sandwich"
                        }
          ],
        };

        this.calculateTotal = this.calculateTotal.bind(this);
      }

      showProduct(info){
        alert(`Details: ${info}`)
      }

      calculateTotal(price) {
        this.setState({
          total: this.state.total + price
        });
      }

      render() {
        if (!this.state.productList) return <p>loading products! </p>

        var component = this;
        var products = this.state.productList.map(function(product) {
          return (
            <Product
              name={product.name}
              price={product.price}
              info={product.description}
              handleShow={component.showProduct}
              handleTotal={component.calculateTotal}
            />
          );
        });

        return (
          <div>
            {products}
            <Total total={this.state.total} />
          </div>
        );
      }
    }
This component does three things:
- Sets our initial product data
- Defines functions to handle parts of our app, like calculating the total price of items in the cart
- Passes data down to other components as props
There’s one last step left to see our products on-screen. All we need to do is import our ProductList.jsx into our index component. Update your index.jsx to look like this:
// ./index.jsx
    import React from 'react'
    import ProductList from './components/ProductList'

    export default class extends React.Component {

      render() {
        return <ProductList />
      }
    }
Now, start your server by typing zero in your terminal. Once you visit http://localhost:3000, you will see this screen:

And that’s it! We have created a working React application without installing or configuring routes, or any other hassle! All thanks to Zero Server.
Conclusion
In this tutorial, we’ve built a simple React application where items can be added and removed from a cart. We’ve been able to write our application without any extra configuration or package management using Zero Server.
Zero is a powerful tool that has the potential to speed up your web development. Be sure to check out the docs. Happy coding!
Plug: LogRocket, a DVR for web apps

LogRocket is a frontend logging tool that lets you replay problems as if they happened in your own browser. Instead of guessing why errors happen, or asking users for screenshots and log dumps, LogRocket lets you replay the session to quickly understand what went wrong. It works perfectly with any app, regardless of framework, and has plugins to log additional context from Redux, Vuex, and @ngrx/store.
In addition to logging Redux actions and state, LogRocket records console logs, JavaScript errors, stacktraces, network requests/responses with headers + bodies, browser metadata, and custom logs. It also instruments the DOM to record the HTML and CSS on the page, recreating pixel-perfect videos of even the most complex single-page apps.
The post An intro to Zero Server, a new tool to simplify web development appeared first on LogRocket Blog.


Top comments (0)