Building a Chat application from scratch using ReactJs
What is ReactJS?
React is a JavaScript library for building user interfaces. It is maintained by Facebook and a community of individual developers and companies. — Wikipedia
In simple terms, HTML + JS + CSS = React
Why ReactJS?
- I had recently moved to a role where I entirely do the backend with Python. Though I prefer it, I don’t want my JS skills to go in vain.
- Most of my friends are front-end developers, so its a bit of peer pressure to know their language(both in terms of React and what they talk).
- I wanted to build my own portfolio website using Gatsby which is built using React.
- Bonus point: The frontend developer I’m working with can’t just say, “that can’t be done in react” and walk away like that.
Pre-requisites
You need to have an understanding of front-end technologies like HTML, CSS, and JS. You don’t have to master all of them. If you know how to put them together and create a webpage, you’re good to go.
ReactJs — A Basic Understanding
React = Component + props + state
Three basic terminologies you would come across as a beginner is component, state, and props. Apart from these, I hear fancy names like “Lazy React”, “React hooks” etc., which are in my list but not in this blog.
Where to Start?
I am a documentation freak. I spend an insane amount of time with the documentation and look for other resources/tutorials only if it doesn’t work.
React’s documentation tutorialwalks you through a tic tac toe game and teaches you how to organize your components and play around with its states and props. Though I completed the tutorial I had no clue how to apply it to my project.
What worked finally for me was thinking in react. It teaches you by splitting a web page components and how to intervene states and props across them.
What’s great about this tutorial is that it’s very close to reality. A front-end developer will always have a design to work with. So starting React with an empty slate like in Tic Tac Toe was not much of a help.
What are we building?
I had this common front-end chat module built using plain HTML, CSS, and JS. It had been my template to build and play around with chatbots. Most of my chatbot hobby projects have this front-end.
My end goal was to achieve a chat frontend that would send and receive messages to a backend API. You can directly jump and play around with the code in my GitHub repository.
Thinking In Components
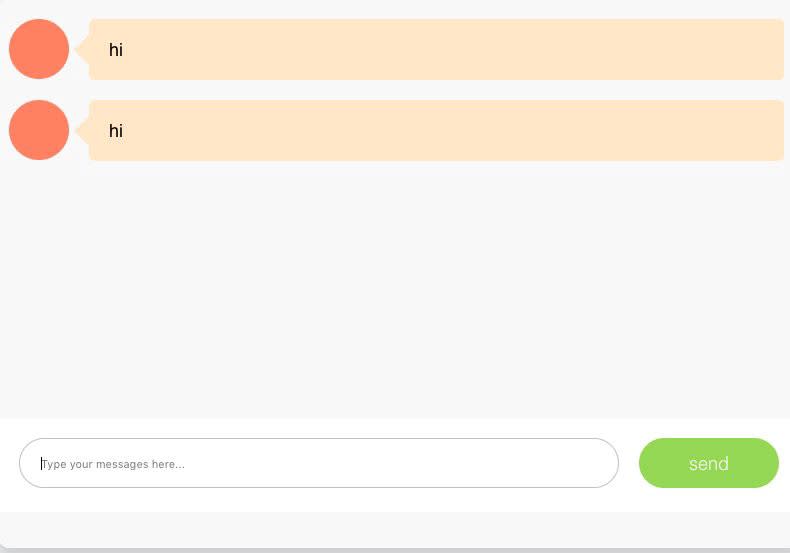
The first step to start with is to define individual UI components. What do you mean you may ask?
In the above picture, we can see around 4–5 UI elements. These are wrapped into individual entities called components.
Send button

class SendButton extends Component{
    render(){
      return (
         <div className="send\_message"
              <div className="text">send</div>
         </div>);
    }
}
TextBox

class MessageTextBoxContainer extends Component{
  render(){
    return(
      <div className="message\_input\_wrapper">
        <input id="msg\_input"
               className="message\_input"
               placeholder="Type your messages here..."/>
      </div>
    );
  }
}
Avatar

The avatar is where the profile picture of the person goes. For now, we are going to stick with different backgrounds.
class Avatar extends Component {
  render(){
    return(
      <div className="avatar"/>
    );
  }
}
The Message
The MessageBox component has an Avatar component in it. For each message, we will just loop through and create N of these components.

class MessageBox extends Component{
  render(){
    return(
      <li className={`message ${this.props.appearance} appeared`}>
        <Avatar></Avatar>
        <div className="text\_wrapper">
            <div className="text">{this.props.message}</div>
        </div>
      </li>
    );
  }
}
The Whole App
Similarly, we bring together the whole UI by binding these components together. It has a MessageContainer where are the messages are listed, The TextBox and SendButton. For now, ignore the this.state or this.handleClick
class ChatApp extends Component {
render() {
    return (
      <div className="chat\_window">
        < **MessagesContainer** messages={this.state.messages}/>
        <div className="bottom\_wrapper clearfix">
          < **MessageTextBoxContainer/** >
          < **SendButton** handleClick={this.handleClick}/>
        </div>
      </div>
    );
  }
}
Event Capturing
Before moving on bumping our heads with states and props of the component let’s see what events we need to handle.
- Send_message on pressing the send button.
- Send_message on pressing enter.
In this block, we will explore how to capture the event press_enter and send_button_click event
Let’s go back to our SendButton component and attach a method to handle clicks. Similarly, we can add an onKeyPress event to the textbox and capture the events.
class SendButton extends Component{
**handleClick(){
        console.log("I am captured");
    }**

render(){
      return (
         <div className="send\_message"
**onClick={this.props.handleClick}>**
              <div className="text">send</div>
         </div>);
    }
}
Event Handling
Now that we have captured the button click and keypress events. Let’s see how to handle those events. This is the part where I struggled the most.
On clicking send or on pressing enter, the current message in TextBox should be added as a MessageComponent to MessageContainer component.
Now let’s go through each of these components and see what are data that we need to populate the required information. This data is defined by the state and props of the component.
Deriving States and Props
Let’s take each component and see what data does it need to do its job well.
- SendButton — Needs access to current_message user is typing in order to send it to the chatbot.
- MessageTextBox — Needs to maintain and update current_message as and when the user types it (State) and sends it to the chatbot on pressing enter
- MessageContainer — Needs to maintain a list of all the messages from both the bot and the user to populate it.
In order to populate the current message in MessageContainer we need to know the current message that the user had typed in the MessageTextBox.
The MessageContainer also needs to keep track of all the messages that have been typed/received so far. hence, it would have messages an array as its property.
class TextBox extends Component{

constructor(props){
    this.state.current\_message = ""
}

**onChange(e) {
    this.setState({
      current\_message: e.target.value;
    });
    if(e.key === "Enter"){
      // We need to add a new message to MessageContainer component
    }**

**}**
render(){
    return(
      <div className="message\_input\_wrapper">
        <input ...
             value={this.props.current\_message}
             onChange={this.props.onChange}/>
      </div>
    );
  }
}
Now you can see that initially, the current_message is an empty string and onChange, as we type the text into our TextBox component. But the changes you make in the TextBox component is not visible to MessageContainer
In React, sharing state is accomplished by moving it up to the closest common ancestor of the components that need it. This is called “lifting the state up”.
Lifting State Up
Now comes the question of which component should we move the control to? Let’s draw a simple tree of the components and see where what fits.

On drawing this out, it is pretty obvious that all the child components need access to current_message and list of messages already seen by the bot. Thankfully, we have only one parent ChatApp which will delegate all the state and event handling requirements of to the respective child components
Out ChatApp component is going to get a bit messy right now. First, let’s define all the functions we need and later attach them to events as we need them.
**addMessageBox** (enter=true){
  let messages = this.state.messages;
  let current\_message = this.state.current\_message;
  if(current\_message && enter){
    messages = [...messages, {"message":current\_message}];
}

**handleClick** (){
  this.addMessageBox();
}

**\_handleKeyPress** (e) {
  let enter\_pressed = false;
  if(e.key === "Enter"){
    enter\_pressed = true;
   }
   this.addMessageBox(enter\_pressed)
}

render() {
  return (
    <div className="chat\_window">
      <MessagesContainer messages={this.state.messages}/>
      <div className="bottom\_wrapper clearfix"> .
       <**MessageTextBoxContainer
           \_handleKeyPress={this.\_handleKeyPress}**
           onChange={this.onChange}
           message={this.state.current\_message}> .
       </MessageTextBoxContainer>

      <SendButton **handleClick={this.handleClick}/>**
</div>
    </div>
);}
Like you see in the snippet we define the event_handlers and the state & props at the parent component level and delegate it to the child components.
From someone who hated frontend and Javascript to someone who built a ChatApp using it, trust me now I actually like JS only because of React. Moving forward if you see me building any frontend it will be with React.

Top comments (0)