With the boom of SaaS, people want to spend more time solving business problems rather than spend their time dealing with technical problems like managing a database.
DBaaS (Database as a service) entered the SaaS ecosystem to solve just that. While you are busy solving business problems, services like HarperDB will take care of managing, scaling, replicating, and optimizing your databases.
HarperDB is a cloud service that exposes your data via an API endpoint, making it language agnostic. It supports all major languages like Python, Java, NodeJS, etc.,
HarperDB — SQL vs NoSQL
If you have worked with MySQL or Mongo, you will get the pros and cons of both. While relational systems provide concrete transactional and ACID properties, NoSQL DB works wonders for reading dominant use cases or streaming data.
HarperDB wants to bring the best of both worlds to the database community by providing a system that.
- Scales like a NoSQL system
- Is ACID Compliant
- Cost and Computing efficient
Python App with HarperDB
Now that we have understood what HarperDB brings to the table let’s build an application using Python while parallelly exploring the features provided by HarperDB.
Note :: The rest of the blog assumes that you have a fair understanding of Python and Flask. For an in-depth tutorial on API, schema, and application design, check outmy flask starter tutorial and come back here.
If you are a “show me the code” kind of person, check out the Github repository, or if you want to follow along, here is the summary of steps we will perform.
- Setup HarperDB instance
- Create a Schema and Database
- Create a Python Project
- Accessing HarperDB via python-SDK
- Creating and exposing the REST APIs
Setup HarperDB Instance
Create your HarperDB account
The signup process is super smooth. All you have to do is go to the HarperDB signup page and fill in your details.

Create a new DB instance
Once you are inside the account, you can create the DB instance. Harper’s free tier provides 1 GB of free storage and 0.5 GB of RAM.
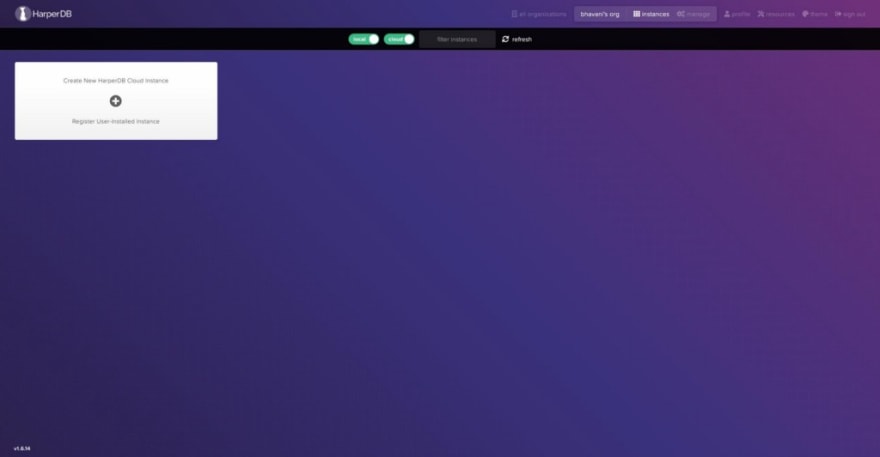
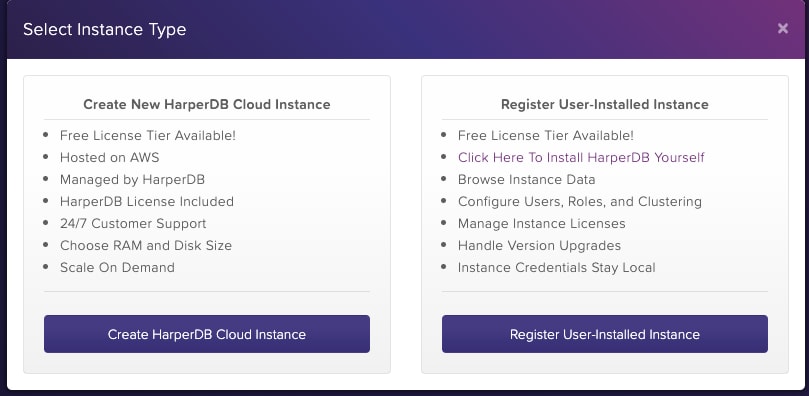
Click on create a DB instance. You will have two options.
- Create an HarperDB cloud instance that is created, managed, and scaled by HarperDB itself.
- Install HarperDB in your own server and add it to the UI.
For this blog, I am going to stick with the cloud instance. Give your DB instance a name, select the tier, username, password, and click on create. Make a note of the username and password. It will come in handy when we connect to this DB from our python app.

The instance will take a few minutes to spin up. Once it is ready, we can create tables as per the needs of our application.
The Application
We all want to read books. I truly believe that the habit of reading books is essential for upgrading your thoughts. Now, if that motivated you enough, you would jump the bandwagon and start reading 100 books, but that’s not essential. Reading books is all about quality than quantity.
Let’s build a Book Journal app where we
- Track the book we are reading, Add a Book Name, Start Date, End Date, URL, Author and Why are you reading this book
- Add our notes, thoughts, and highlights.
- Export notes for summary/blogs
Create schema and tables
Let’s start building the application by creating the necessary schema and tables. Click on the created DB instance, create a schema and table.
Besides the table name, HarperDB also asks to enter or assign the field for a hash_attribute. This attribute is similar to a Primary Key in a relational database, used as the unique identifier(inserted_hashes) for each record. A good name for hash attribute would be just id or something more meaningful to the table book_id

The created table will have basic fields like the hash_attribute, created, and updated time. HarperDB will automatically add additional fields when we insert data later.

Creating Python Application
For the python app, we are going to use a flask app with harperdb-python-SDK. Start by cloning the sample repo and checking out the tutorial branch.
git clone [git@github.com](mailto:git@github.com):bhavaniravi/python-harperdb-app-tutorial.git
git checkout tutorial
The packages required for this app are in requirements.txt Let’s install them using the pippython package manager.
pip install -r requirements.txt
Accessing DB using Harper Python SDK
HarperDB provides Python, Java, Node, Rust SDKs. These SDKs make the CRUD apps as easy as calling a function. Once we have this logic in place, it is just a matter of exposing them via our APIs.
Get the DB_URL from the HarperDB cloud username and password we noted earlier and add them to the file. To create a .env file, rename the file from the repo, and update the following fields.
DB_URL=""
DB_USER=""
DB_PASSWORD=""
Let’s Connect to the HarperDB instance using the above credentials. In a typical MVC pattern, all the DB related logic goes into the models file. Open models.py add the following code.
import harperdb
import os

from dotenv import load_dotenv
load_dotenv() # loads the .env file

schema = f"book_repo"

db = harperdb.HarperDB(
    url=os.environ["DB_URL"],
    username=os.environ["DB_USER"],
    password=os.environ["DB_PASSWORD"])
Run the model file using python app/model.py. We have connected to HarperDB successfully if there are no errors. We will use the above dbobject to create, delete and update DB records.
HarperDB Python SDK — A sneak peek
The HarperDB Python SDK includes Python3 implementations of HarperDB API functions and wrappers for an object-oriented interface. Here is the GitHub repo. We will be using the following in our book application.

Using the SDK methods, we can write our own models.py file, which creates, updates, deletes the books from the table
class BookModel:
    table = "books"
    def create(self, book_list):
        return db.insert(schema, self.table, book_list)

    def update(self, book_list):
        return db.update(schema, self.table, book_list)

    def delete(self, id):
        return db.delete(schema, self.table, [id])

    def get(self, id):
        return db.search_by_hash(schema, self.table, [id], get_attributes=['*'])

    def get_all(self):
        return db.sql(f"select * from {schema}.{self.table}")
I have added a BookService class in service.pya module that ingests business logic. TheBookService acts the controller of our MVC comes in handy to use adding notes to a specific book. It packages the request JSON and uses the update method internally.
from models import BookModel

class BookService:
    def __init__ (self):
        self.model = BookModel()

    def create(self, params):
        return self.model.create(params)

    def update(self, item_id, params):
        if isinstance(params, dict):
            params = [params]

        for param in params:
            param["id"] = item_id

        return self.model.update(params)

    def delete(self, item_id):
        return self.model.delete(item_id)

    def get_all(self):
        response = self.model.get_all()
        return response

    def get(self, book_id):
        response = self.model.get(book_id)
        return response

    def add_notes(self, item_id, notes):
        if isinstance(notes, dict):
            notes = [notes]
        return self.update(item_id, {"notes":notes})
Exposing and consuming APIs
Let’s create a flask app, and that uses BookService and expose our book CRUD API. If you are new to Flask, do switch to the flask beginner tutorial. Here is a little flask primer for you to get going forward.
# hello.py
from flask import Flask # import flask
app = Flask( __name__ ) # create an app instance

@app.route("/") # at the end point /
def hello(): # call method hello
    return "Hello World!" # which returns "hello world"

if __name__ == " __main__": # on running python app.py
    app.run(debug=True, port=5000) # run the flask app
Add the above code to app/hello.py and run python app/hello.py it will start a flask app. Open localhost:5000 in your browser, and you will see your hello world flask app.
The cloned version of our book app’sapp/app.py the file looks like this.
from flask import Flask, request, jsonify
from dotenv import load_dotenv
load_dotenv(verbose=True)

# import BookService Here

app = Flask( __name__ )

_# Add the Flask routes here_

if __name__ == " __main__":
    app.run(debug=True, host='0.0.0.0', port=8888)
For us to integrate the API endpoints with the BookService we need to import it.
# import BookService Here
**from service import BookService**
Next, let’s add the independent flask routes to create, update, delete and add notes to the books app.
Create Book
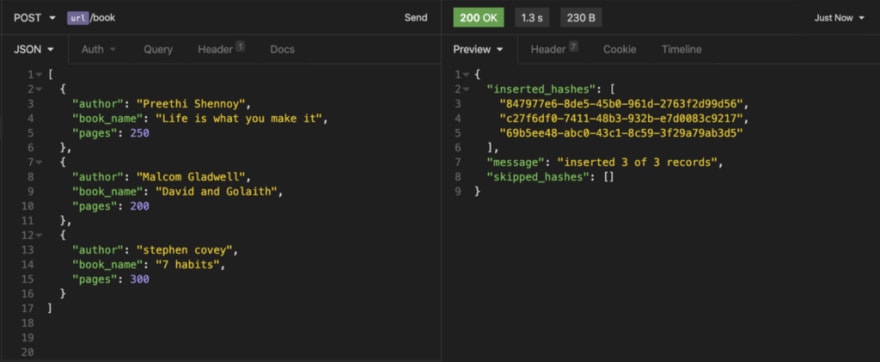
For the create API, we will route /booksrequests via the HTTP POST method. It calls the BookService we created earlier to call our DB via HarperDB SDK, which creates and returns unique IDs. The response from HarperDB is converted into a JSON string using the Flaskjsonify method and returned as an HTTP response.
# app.py

@app.route("/book", methods=["POST"])
def create_book():
    return jsonify(BookService().create(request.get_json()))
Start the application by running python app/app.py
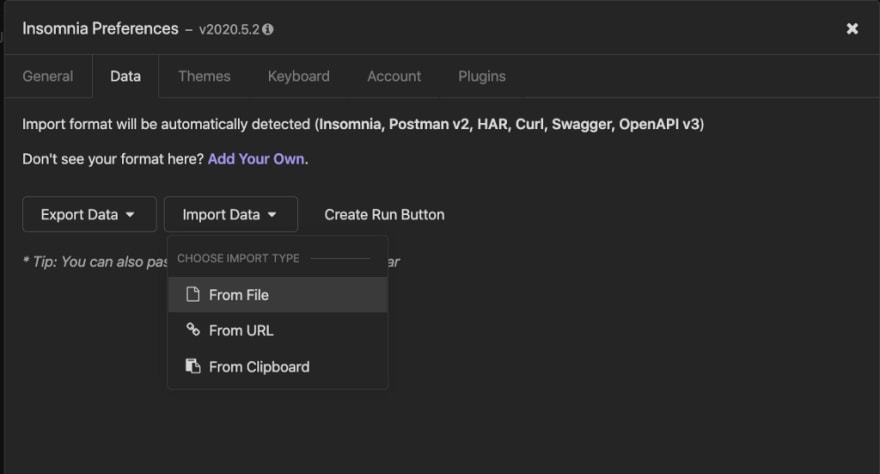
To test our API, I have used the insomnia applicationand configured the APIs. You can also configure using the insomnia-api-consumer.json file from the repo. Download and install insomnia. To import the API consumer, click on the drop-down at the left corner and click on Import/Export
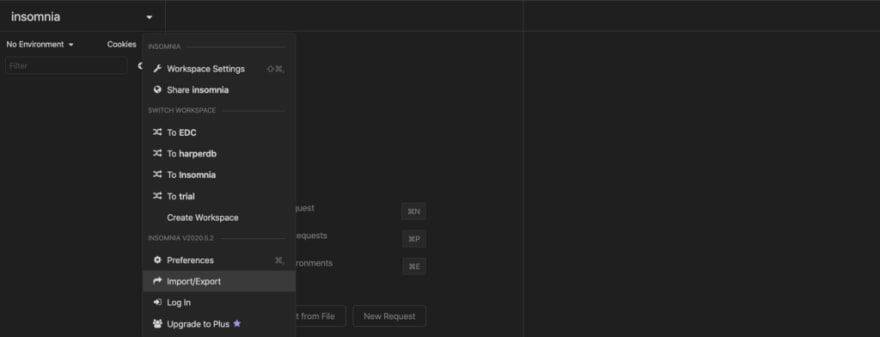
Click on import data -> From file and choose the insomnia-api-consumer.json from the file picker.
You will have all the book APIs configured once the insomnia file is uploaded. Select the create_bookfrom left nav bar and click on the send button. You will see the API response on the right.
Note down one of the book IDs. We will use it when testing the other APIs.
Similarly, we can create the rest of the APIs and test them using the insomnia app.
Update Book
For the update API, we will route /booksrequests via the HTTP PUT method along with a . The acts as a template to receive book IDs generated by create API.
Note: The rest of the APIs calls the respectiveBookService method.
# app.py

@app.route("/book/<book_id>", methods=["PUT"])
def update_book(book_id):
    return jsonify(BookService().update(book_id, request.get_json()))
When testing the update API on insomnia, select update_bookand ensure that you replace the existing ID with the one you noted down from create API.

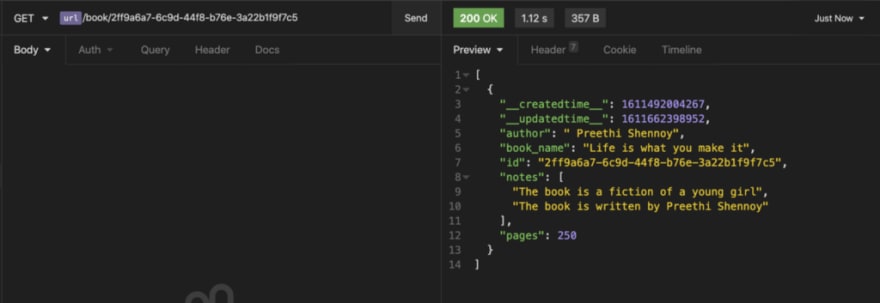
Get book details
To get a book detail, we will route /books/requests via the HTTP GET method.
# app.py

@app.route("/book/<book_id>", methods=["GET"])
def get_book(book_id):
    return jsonify(BookService().get(book_id))
Add notes
To add notes to the API, we pass the book ID to /note POST API. Internally the service method calls the book update and adds the note to the respective book.
# app.py

@app.route("/book/<book_id>/note", methods=["POST"])
def add_notes(book_id):
    return jsonify(BookService().add_notes(book_id, request.get_json()))

Though notes are stored as a param of books, we give it a logical separation using a different API. As an exercise, try adding notes via the update API we created before.
Once you have used these APIs to add, update and remove books, you can check these records in the HarperDB studio interface.

_Voila!!! W_e have successfully built the backend of our Book Journal app. With a Database as a service like HarperDB, you can achieve a lot by writing as little code as possible. Got an idea? Focus on working on the solution, leave the rest to the experts.
Further Reading
- Security in HarperDB — https://harperdb.io/developers/documentation/security/
- SQL vs. NoSQL — https://harperdb.io/developers/documentation/sql-overview/sql-features-matrix/

Oldest comments (0)