DEV Community

Cover image for Running a Linux VM... on Android?!!! 🎉
Besworks
Besworks

Posted on • Edited on

2 1 1

Running a Linux VM... on Android?!!! 🎉

It finally happened! The dream has come true. It is now possible to run full linux terminal apps directly on your Android 15 device without root or hacky workarounds. At least for Pixel owners anyway (for now). Just make sure you have the latest system update and then go look in Developer Options for the new Linux development environment setting. This will enable a new Terminal app.

Step 1 - Enable

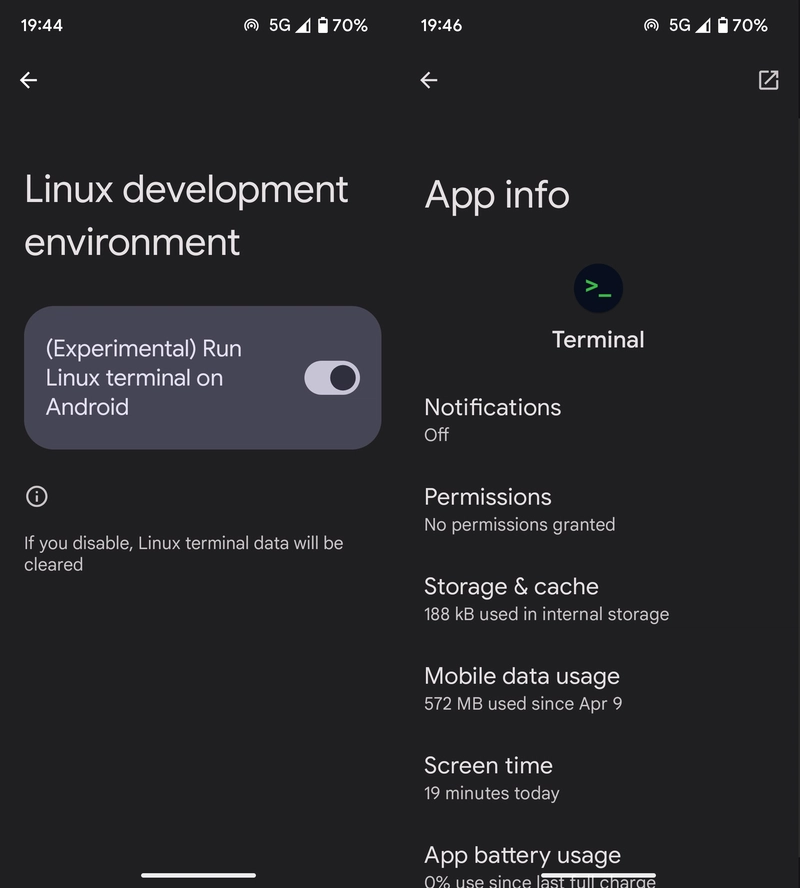
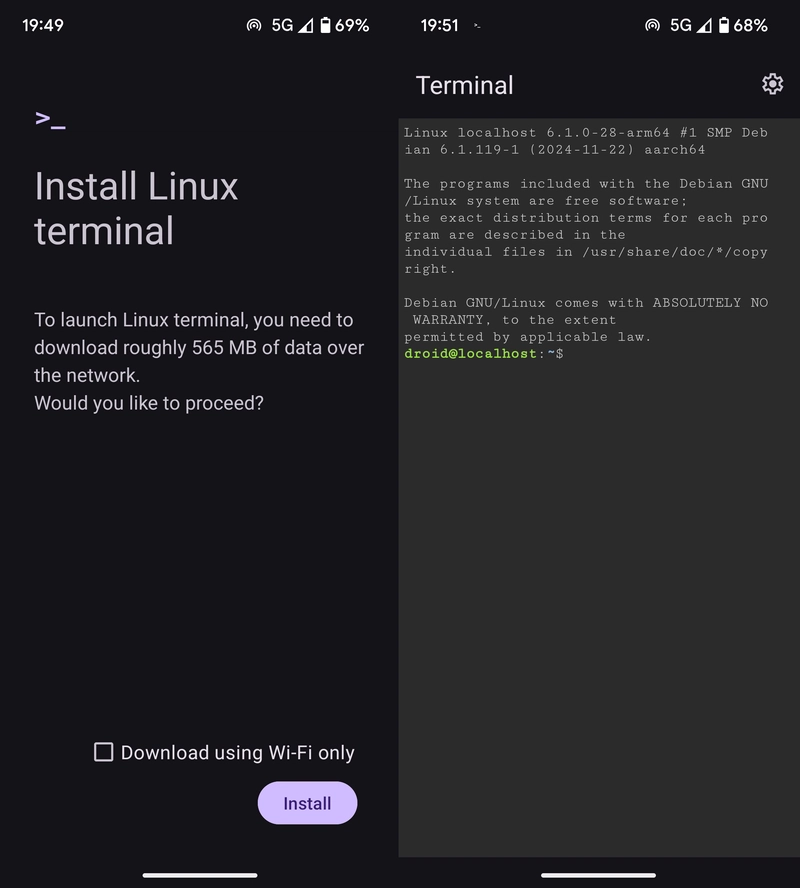
Once activated you will need to install a 565MB virtual machine. And that's it! Now you have a full Linux Development Environment on your phone. How awesome is that?! Now we can run Node apps or any other services you want directly-on-device.

Step 2 - Install

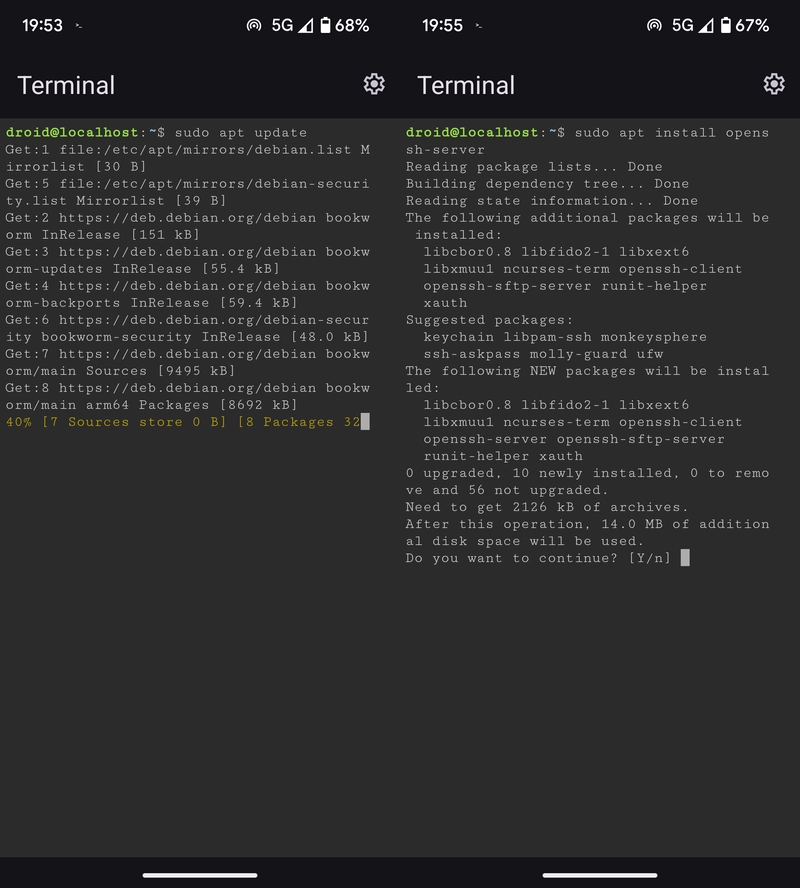
To start, you'll probably want to setup sshd to be able to sftp files into the VM. First we'll need to install the package. No problem! This VM is Debian based, so :

$ sudo apt update
$ sudo apt install openssh-server
Enter fullscreen mode Exit fullscreen mode

Step 3 - Update

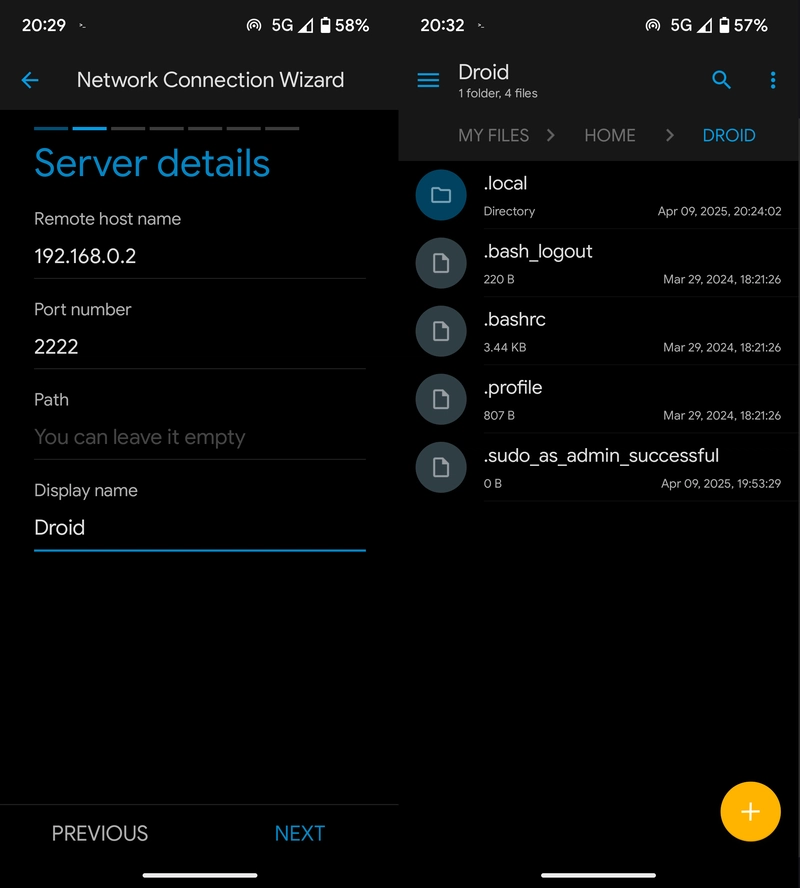
Then you will need to change the port that sshd runs on because priviledged ports below 1024 are blocked.

$ sudo nano /etc/ssh/sshd_config
Enter fullscreen mode Exit fullscreen mode

I set my port to 2222 so it'll be easy to remember. Then you'll need to set a password, and reload sshd.

$ sudo passwd droid
...
$ sudo systemctl reload sshd
Enter fullscreen mode Exit fullscreen mode

Accept the request to open the port and then find out what your IP is.

$ ip addr
Enter fullscreen mode Exit fullscreen mode

Step 4 - Setup

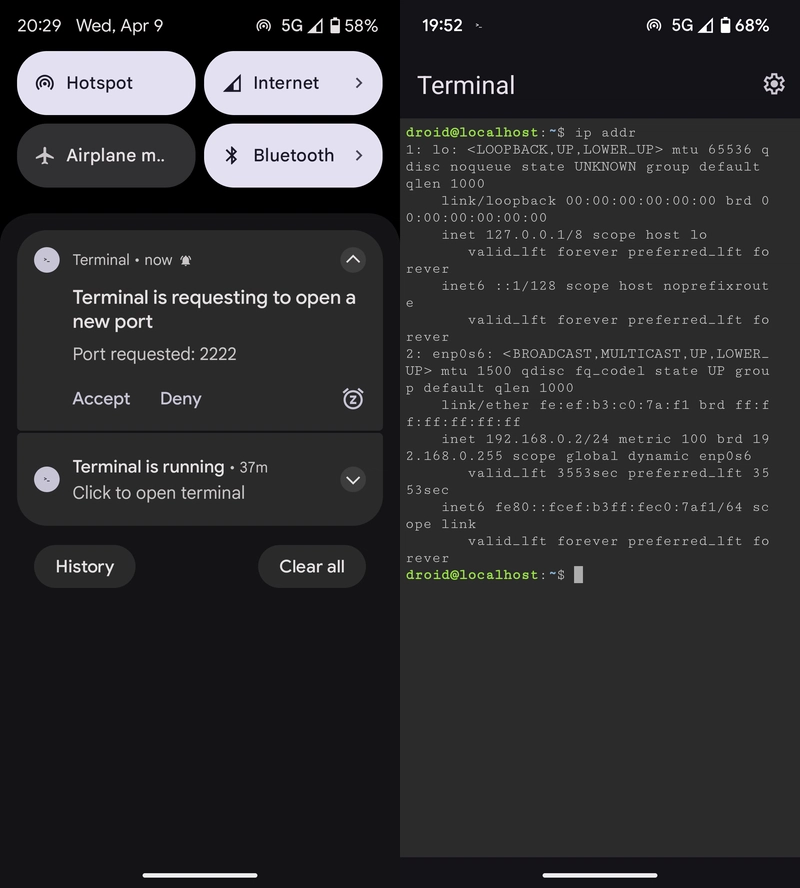
Then, using an app like Solid Explorer, you can add a network storage location and access the files inside your VM.

Step 5 - Test

And then go ahead and install whatever you want from there. I'm going to start with Node.

$ curl -o- https://raw.githubusercontent.com/nvm-sh/nvm/v0.40.2/install.sh | bash
$ source ~/.bashrc
$ nvm install node
$ nvm install-latest-npm
Enter fullscreen mode Exit fullscreen mode

Bonus Step - Installing NodeJS

I am very excited about the possibilities this opens up. I build and run Node apps for personal use all the time. Being able to run these directly on my phone is gonna be sweeeeet! 🎇

Image of PulumiUP 2025

From Cloud to Platforms: What Top Engineers Are Doing Differently

Hear insights from industry leaders about the current state and future of cloud and IaC, platform engineering, and security.

Save Your Spot

Top comments (2)

Collapse
 
besworks profile image
Besworks • Edited

Here are some notes after my first couple days messing around with this:

  • Using app.listen('7777'); in an Express based Node app did not trigger the port request notification. I had to specifically bind to the loopback interface app.listen('7777', '127.0.0.1'); which did work and I was able to access my server from the Android host as https://127.0.0.1:7777.

  • FUTO keyboard is basically unusable in this terminal. Tab completion doesn't sync with the input so whatever you typed gets appended to the completed text. Even when your command line looks fine, pressing Enter will add the extra characters and mess it up. And this is with all auto-correction features turned off. That could be VERY dangerous. I would not trust it for more than a few basic commands to get up and running. GBoard seems to work well enough though it still has a few quirks, and physical keyboards will work assuming you can get one to connect... My old Moto BT KB will no longer pair (but used to, and works fine with my laptop) and my 2.4Ghz USB dongle has issues being detected and staying connected (especially when anywhere near a wireless charger).

  • JuiceSSH supports tunneling. I was able to pass the ssh port through to my laptop and do ssh -p 2222 droid@localhost to access it. Now I can copy/paste and access sftp without fiddling around on the phone screen. That app has paid for itself many times over.

  • The VM doesn't seem to handle high resource usage well. I've been watching the stats through top on my phone screen while connected via ssh and have seen it steadily run low on RAM before crashing during some heavier operations. Even doing a full system update is enough to bog it down. Compiling software is hit or miss. Clearing out background activities on the phone helps. The problem seems to be that the 4GB allotted to the VM is not dedicated but rather represents the total pool of available RAM which can be used up by other processes.

  • I had the idea to bootstrap this Debian VM into an Arch install. I have successfully chrooted using ArchLinuxARM and updated all packages but never tried to overwrite the Debian host. I expected the whole thing to collapse in on itself and I had other things I wanted to test first. I will get around to trying this at some point and write an article if it works. For now, here's the process to get the chroot running:
# extract chroot fs
cd ~/
wget -c http://os.archlinuxarm.org/os/ArchLinuxARM-aarch64-latest.tar.gz
su -
mkdir -p /arch
cd /arch
tar -xpf /home/droid/ArchLinuxARM-aarch64-latest.tar.gz
# setup mounts
mount --rbind /dev /arch/dev
mount --make-rslave /arch/dev
mount --bind /proc /arch/proc
mount --bind /sys /arch/sys
mount --bind /tmp /arch/tmp
mount --bind /mnt /arch/mnt
mount --bind /root /arch/root
mount --bind /home /arch/home
mount --bind /arch /arch
# setup network
echo 1 > /proc/sys/net/ipv4/ip_forward
if [ -L "/arch/etc/resolv.conf" ]; then
    rm /arch/etc/resolv.conf
    cp /etc/resolv.conf /arch/etc/resolv.conf
fi
# start chroot
chroot /arch /bin/bash
Enter fullscreen mode Exit fullscreen mode

Once inside the chroot:

pacman-key --init
pacman-key --populate archlinuxarm
pacman -Syyu archlinux-keyring
Enter fullscreen mode Exit fullscreen mode

Good luck... this eats RAM and the VM might crash which corrupts pacman's database and forces you to restore from the archive and try again. I did eventually get it to complete a full upgrade.

Arch on Android!

When you're done, you can exit the chroot and clean up the mounts:

exit
umount /arch/proc
umount /arch/sys
umount /arch/tmp
umount /arch/mnt
umount /arch/root
umount /arch/home
umount /arch
umount -R /arch/dev
Enter fullscreen mode Exit fullscreen mode

If you leave the mounts active you can enter and exit the chroot as many times as you want.


  • I found the source for the Terminal App and discovered that it is possible to install the vm from /sdcard/linux/images.tar.gz. But your Android install needs to be built with the debuggable option for this to work. I considered attempting to spoof the download URL of the stock VM. That might work, but would be awkward to reproduce. However, it would be much cleaner than attempting to expand Arch out of chroot. I found the script that prepares the Debian img to run inside AVF and will use this as a guide to build an Arch img.

  • The Android Virtualization Framework can be controlled over adb:
$ adb shell -t /apex/com.android.virt/bin/vm
Enter fullscreen mode Exit fullscreen mode

AVF over ADB

I was not able to connect to the Terminal app's Debian VM using the vm console command. But, building a custom Arch VM was pretty straightforward based on this example.

dd if=/dev/zero of=arch.img bs=1 seek=2G count=0
sudo losetup -f arch.img
sudo losetup -a
sudo mkfs.ext4 -F /dev/loopX
mkdir arch
sudo mount arch.img arch
wget -c http://os.archlinuxarm.org/os/ArchLinuxARM-aarch64-latest.tar.gz
cd arch
sudo tar -xpf ../ArchLinuxARM-aarch64-latest.tar.gz
cd ../
cp arch/boot/initramfs-linux.img ./initrd.img
cp arch/boot/Image ./vmlinuz
loopdevid="$(blkid /dev/loopX)"
cat > vm_config.json <<EOF
{
    "name": "arch",
    "disks": [
        {
            "partitions": [
                {
                    "label": "ROOT",
                    "path": "/data/local/tmp/vm/arch.img",
                    "writable": true,
                    "guid": "$loopdevid"
                }
            ],
            "writable": true
        }
    ],
    "sharedPath": [
        {
            "sharedPath": "/storage/emulated"
        },
        {
            "sharedPath": "/data/user/0/com.android.virtualization.terminal/files"
        }
    ],
    "kernel": "/data/local/tmp/vm/vmlinuz",
    "initrd": "/data/local/tmp/vm/initrd.img",
    "params": "root=/dev/vda1",
    "protected": false,
    "cpu_topology": "match_host",
    "platform_version": "~1.0",
    "memory_mib": 4096,
    "debuggable": true,
    "console_out": true,
    "console_input_device": "ttyS0",
    "network": true,
    "auto_memory_balloon": true,
    "gpu": {
        "backend": "2d"
    }
}
EOF
adb shell "mkdir -p /data/local/tmp/vm"
adb push vm_config.json /data/local/tmp/vm/vm_config.json
adb push vmlinuz /data/local/tmp/vm/vmlinuz
adb push initrd.img /data/local/tmp/vm/initrd.img
adb push arch.img /data/local/tmp/vm/arch.img
adb shell "/apex/com.android.virt/bin/vm run /data/local/tmp/vm_config.json"
Enter fullscreen mode Exit fullscreen mode

This runs fine and boots into a shell that can be accessed through adb, but I have not been able to gain network access. I think without adb root the VM does not get assigned the tap network device to enable this. So without root it seems that only the Terminal app or a custom app that uses AVF can create this connection. But... /data/user/0/com.android.virtualization.terminal/files gets mapped to /mnt/internal which can be accessed as root (with su -) inside the Debian VM. This is where the config file and boot/root images are stored. The root user inside the vm has write access to this dir, so it should be possible to push a new disk img here and modify the config which then ought to load through the Terminal app. It seems necessary to include guest_forwarder, ttyd and other services from the Debian img to ensure proper network access. More on this later when I have more time to experiment.

Collapse
 
madhurima_rawat profile image
Madhurima Rawat

Looking forward to trying this! Sounds fun 😄🎉