
The Problem
Elixir is a new player in the market, and the tooling is not as comprehensive as the others like C# and Java. When I started learning Elixir, I had some questions like:
- Where to host it?
- How to build and test it in a CI style?
- How to deploy it on Azure?
The immediate answer was to have a VM on Azure, but that's not an affordable solution. Fortunately, nowadays the main problem is solved by using docker for development and deployment. In this post, I will share a simple solution to using AzureDevOps for the CI part of the development and in a follow-up article, I will cover the CD part. If you want to check out the code, here is the repo: https://github.com/benyblack/elixir-phoenix-ci.
One of the most popular approaches to website creation in Elixir is by using Phoenix. To set it up using this gist. The credentials for the Postgres server exist in dev.exs in the config folder. If your credentials are different, you can change them in the script Have a look at the final result in the following:
Navigate to http://localhost:4000, and you will see something like this:
Now that we have a working code, then we can think about the build and test part. To begin, let's try to do it locally with Docker.
First, we need a docker file:
Build and run it by these commands:
docker build -t benyblack/helloworldci .
docker run --rm -p 4000:4000 benyblack/helloworldci
Navigate to http://localhost:4000, and you should get see a working web site, albeit one with lots of connection errors in the console. It's time to use docker-compose magic. The config file for docker-compose is rather simple:
Furthermore, we need to change the database hostname in test.exs. Change the hostname to database. Then run this command to build and run our tests:
docker-compose up --abort-on-container-exit
There we have it! You should see the result at the end of the console messages:

Continuous Integration
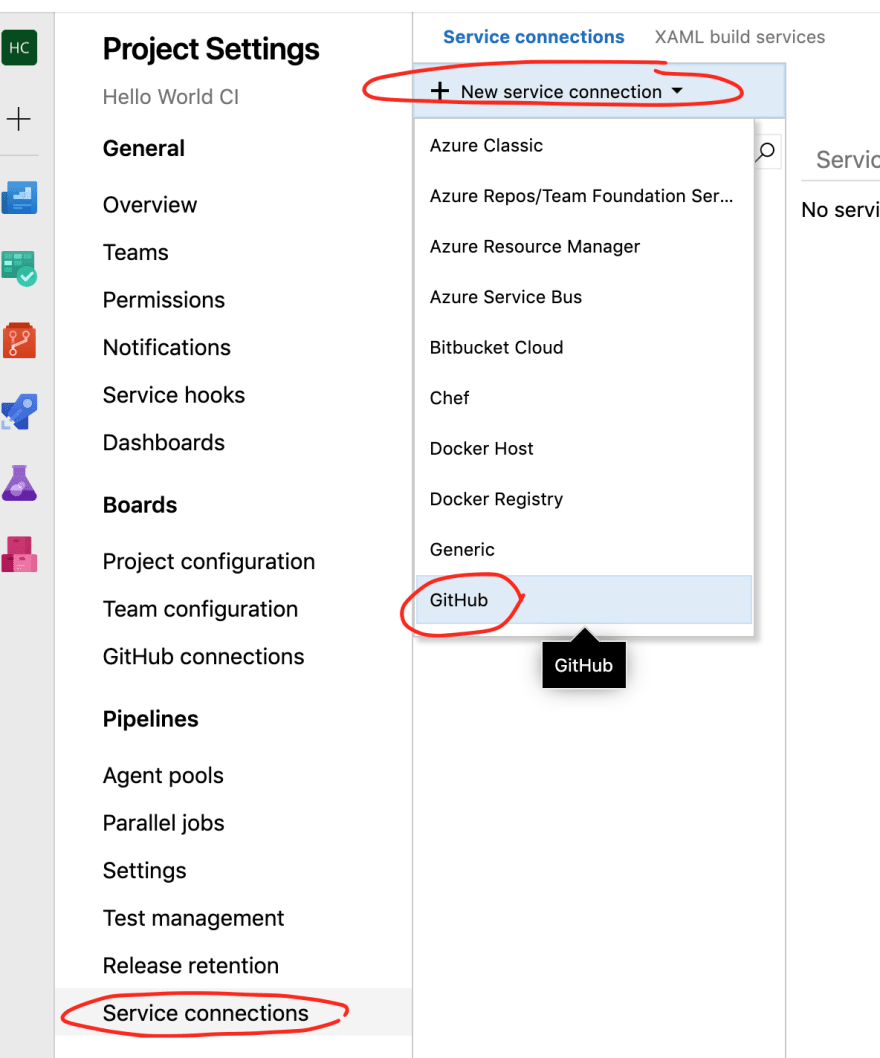
That's it! It's now ready to be used in AzureDevOps. We need to connect our GitHub and DockerHub account to the project in the AzureDevOps project settings section. Go to the Project Settings at the bottom left side of the page and then select Service connections and hit "+ New service connection". From the list select Github. It is necessary to give access to our code on Github.

Do the same for DockerHub to connect your public repositories to the project, except select Docker Registery this time. We'll use it later for using docker-compose.


The next step is to create a Pipeline. Go to Pipelines from the main menu. Select Github from the list.

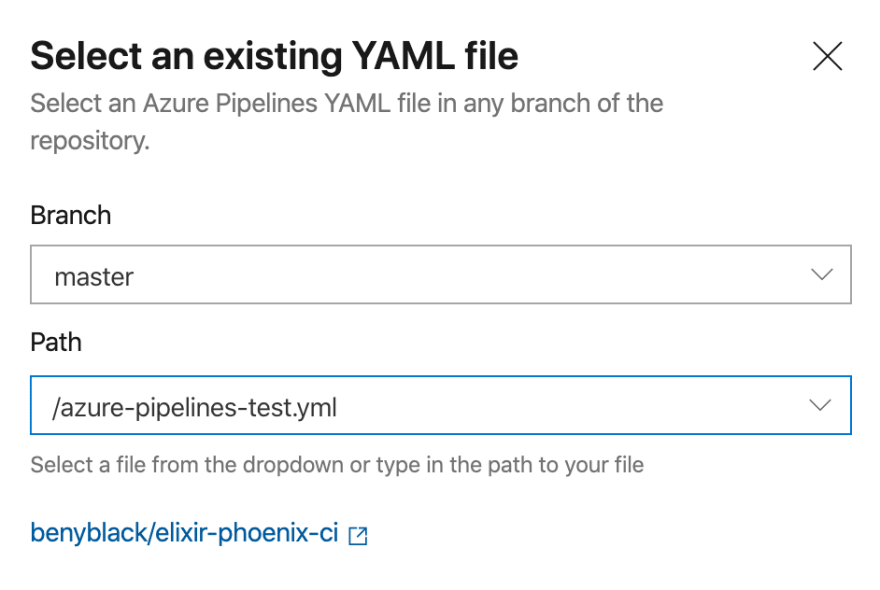
Hit Next and select Existing Azure pipelines YAML file.

A popup should appear from the right. Select the config file we have created.
Then, you can adjust the config by hitting the setting link or editing it manually. If your DockerHub connection name is not the same as mine, you'll have to change it.


Finally, hit the Run button at the top left of the page.
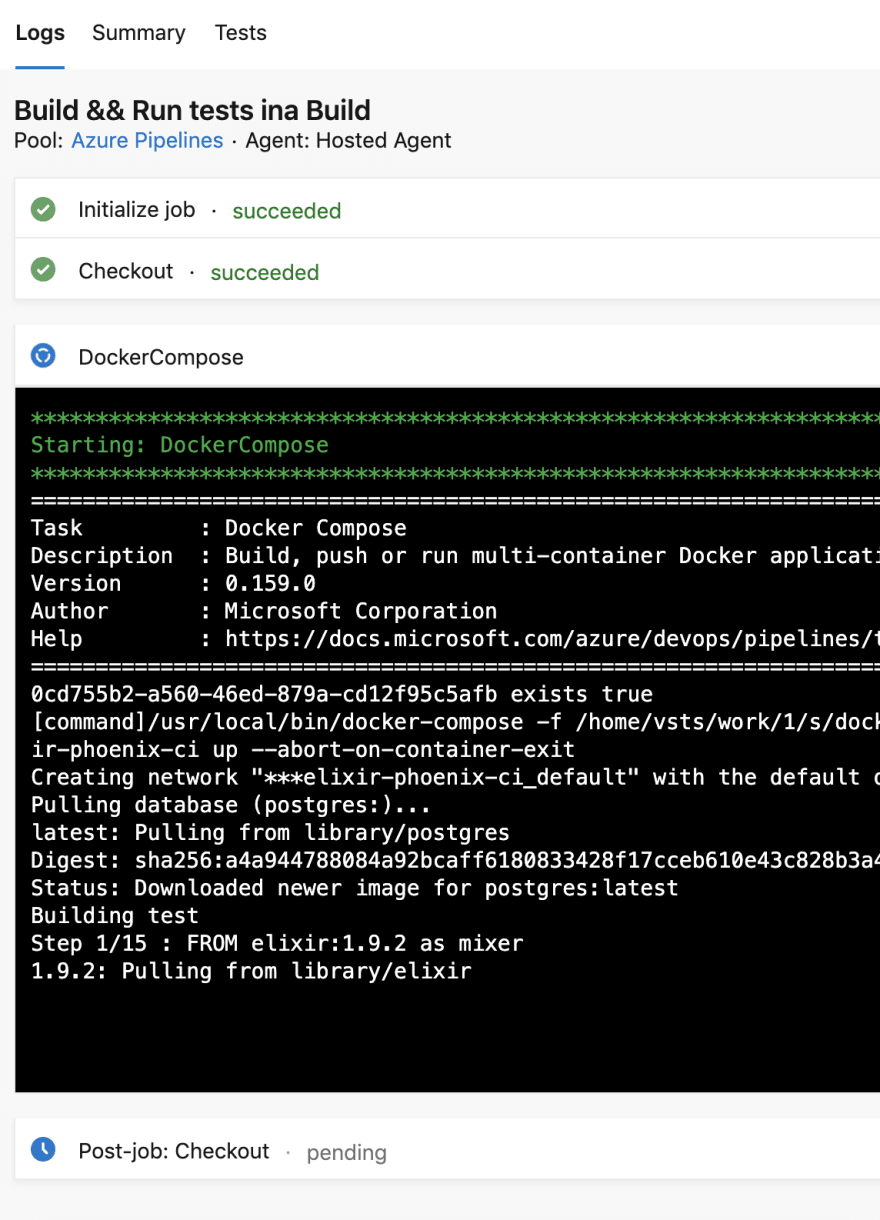
You should see something like this:
At long last, we have to have some green lights. However, there is one more step; publishing the test result. The problem is that AzureDevOps can't parse the test result from the mix test. The solution is to apply a Formatter for the test result. In this case, I chose to use JUnitFormatter. It exports the result to an XML file. Using the library is pretty straightforward. I appended this section in my test.exs in the config folder:
# Configure publishing test result
config :junit_formatter,
report_file: “report_file_test.xml”,
report_dir: “./”,
print_report_file: true,
prepend_project_name?: true
Moreover, we need to add a test publishing step to our pipeline. Go to the build menu and select Edit to edit the pipelines. From the right panel, select Publish Test Result and set the testResultsFiles to '**/hello_world_ci-report_file_test.xml'. Click Add. It should look like this:

Save it and run it again. You should see something like this:

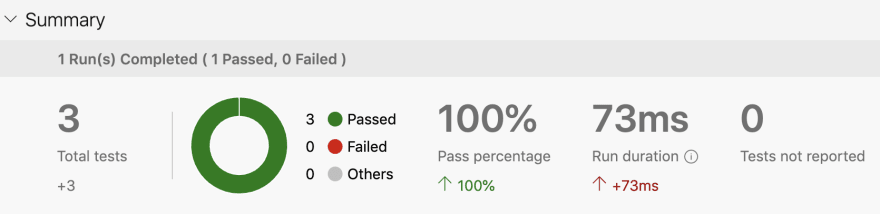
Go to the Tests tab. Your Tests tab should be the same as mine:
Voilà! That's it! Pretty simple. In an upcoming post, I am going to do the CD part.

Top comments (1)
Really nice work! I typically use Gigalixir for my own projects but looks like it could be a much nicer alternative and lets me finally use some of my wasted MSDN Azure credits :D Looking forward to part 2!