
A few months ago, I wrote an article on how to send data to a Google spreadsheet in 2 seconds. It got tons of views and likes. Almost a thousand people have used it to send data with over 300K API requests in the last 30 days 😱 🚀
Recently, Bearer has decided to open-source a large part of its codebase into a GitHub repository codenamed Pizzly. That part of the codebase was the foundation of what made "Push to GSheet" (as we called it) so easy to build and use.
Today, I'd like to show you how you can build your very own Google Sheets integration.
Here's a quick demo 👇
You can see the full source code by opening the CodePen, but I'd like to focus on some key parts below to help you build your very own API integration.
Setup your Pizzly 🐻
Pizzly is a self-hosted API integration toolkit. It provides everything a developer needs to make it easy to consume an OAuth-based API (aka an API that uses OAuth as the authentication method).
Most APIs now use the OAuth framework to authorize an application that wants to access some user's data. One of the main reasons, I believe, is that OAuth provides the best user experience while being very secure. But let's be honest: it's much more difficult for a developer to implement and use.
When no user's data are involved, API keys are preferred as they are much easier to implement and use. For example, Stripe or Google Maps use an API Key. But Facebook, Twitter, or Google Sheets use OAuth.
Pizzly aims to provide the best developer experience when using an OAuth-based API. One of its power-features is that it totally handles the OAuth-dance (including the refresh token), meaning a developer can focus on requesting endpoints without spending hours on dealing with authentication.
Let's see how to use it.
Installing Pizzly
Pizzly is a self-hosted solution. This means you can install it on your machine or any platform-as-a-service. We are goning to use Heroku for this example as it's a free and well-known solution. But you should be able to use it on AWS, Google Cloud, etc.
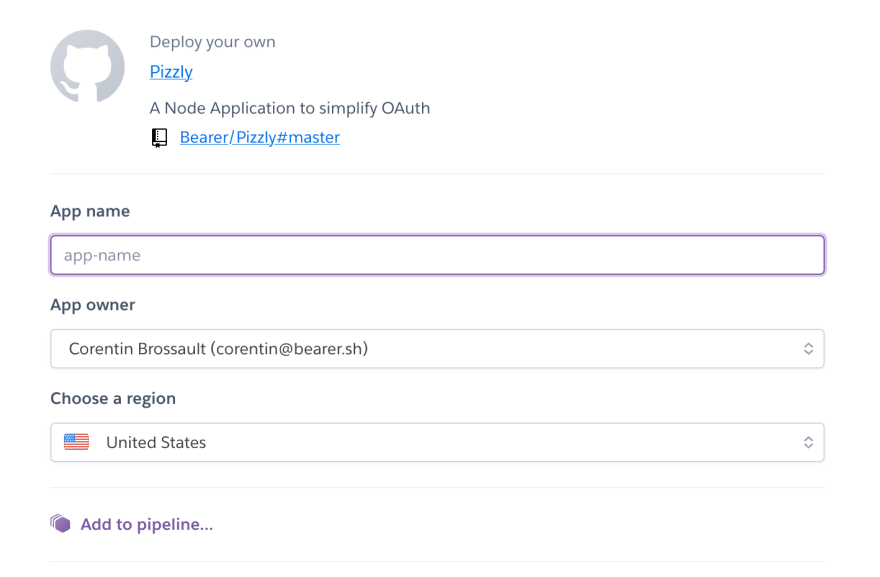
First, deploy Pizzly to Heroku by clicking on the button below:
You might need to sign in or create an account on Heroku. Go ahead, it's free. When prompted, provide a name for your app then scroll down and click on "Deploy app". It will take around 2 or 3 minutes to deploy.
Once it's deployed, open the app and you should see something like this:
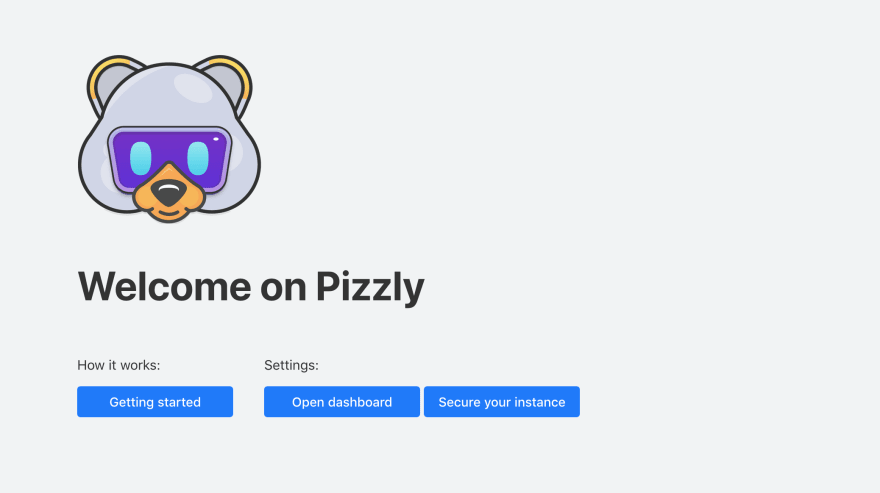
It means that your Pizzly instance is up and running 🎉 As a short overview, Pizzly provides multiple tools to help you with your integrations, including:
- a dashboard - where you are right now;
- an API - to programmatically do what you can do with the dashboard;
- an
/auth/service - to handle the OAuth-dance; - a proxy - to make authenticated requests to an API;
- a JS library - to connect a user and request an API from your application.
This is just to give you an overview. You can learn more about each on the Pizzly wiki, but for now let's get back to connecting with Google Sheets.
Configuring the Google Sheets integration
Now, let's configure your Google Sheets integration with Pizzly. From your Pizzly instance, click on "Open the dashboard", then head to the Google Sheets API and click on "Create your first configuration".
Here's a GIF with the different steps to follow:

You should now see something similar to this:

This is where you will save the credentials of your Google Sheets application.
If you already have them, fill in the form with your Client ID, Client Secret and the following scope: https://www.googleapis.com/auth/drive.file. Make sure that you've registered on the Google Cloud console the callback URL provided by Pizzly. Then skip the next section.
You can use any scopes with Pizzly. I'm providing this one to make sure the snippets below will work with your instance. But if you want to use another scope, feel free!
If you don't have a Google Sheets application yet, stay with me. In the next section, we will see how to create one.
Creating a Google Sheets application 🔑
We'll work through the steps needed to retrieve your credentials. The process is as follows:
-
Sign in to the Google Cloud Console;

- Create or Select an Organization and Project;
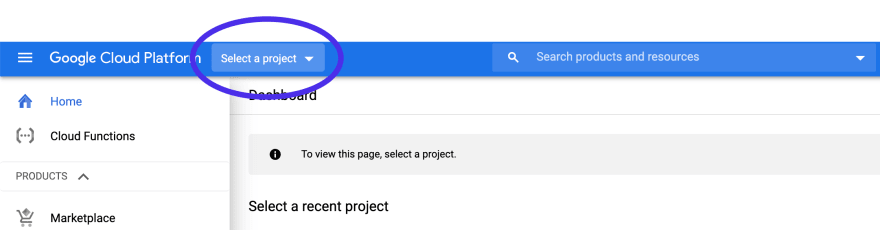
- Enable the Google Sheets API;
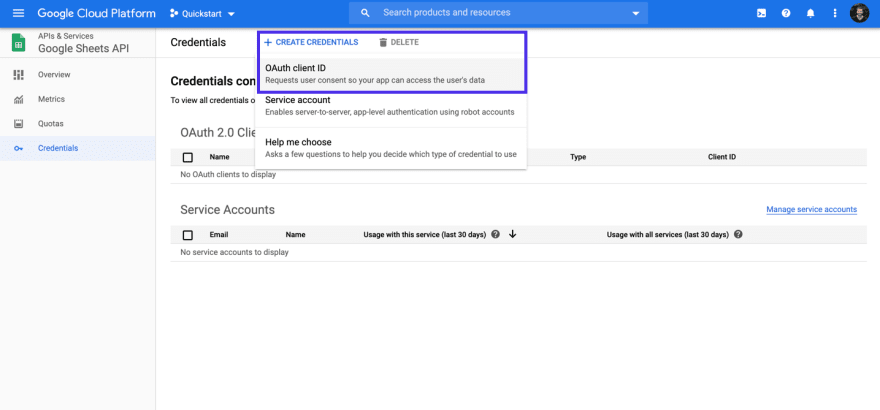
- Once enabled, select Credentials in the API manager, then Create credentials > OAuth client ID:
- The application type is Web application. Make sure to add in the Authorized redirect URIs the callback URL provided by Pizzly on your dashboard. If you've deployed Pizzly on Heroku, it should look something like this:
https://[project-name].herokuapp.com/auth/callback.
- Back to Pizzly, save your Client ID and Client Secret. In the scope field enter
https://www.googleapis.com/auth/drive.file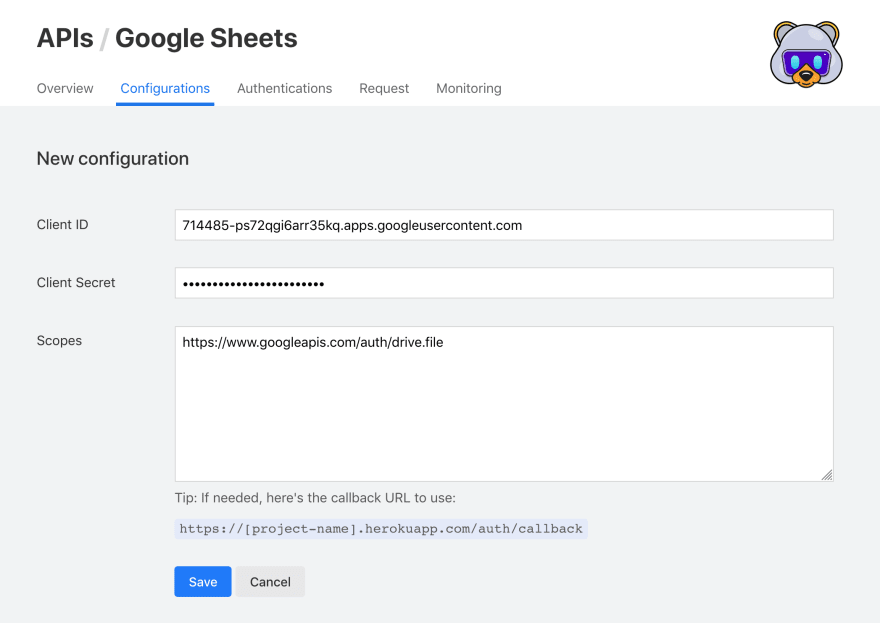
Click save and that's it! You've successfully configured an integration with Google Sheets.
Test your integration
To be sure that your integration is well-configured, I recommend that you try to connect yourself using Pizzly connect.
From your Pizzly's dashboard, open the Google Sheets API and click on the Connect to Google Sheets. This should open the following page:

Now, click again on "Connect to Google Sheets". This will open a popup with Google's OAuth consent screen. Grant access to your application.
On success, the dashboard will prompt a Connected! message. It means your application is well-configured 👍 Good job!
If something went wrong, it might be because of the redirection callback URL. Make sure that you've well registered your own callback URL within the Google Cloud console.
To do so, go back to the Google Sheets dashboard in the Google Cloud console. Confirm you are on the right project and right organization. Edit your OAuth client ID and confirm that the Authorized redirect URIs is well-registered
If you're still in trouble, drop a comment below and I'll guide you further.
Back to the code 👩💻👨💻
In the previous part of this article, you've managed to install Pizzly and configured a Google Sheets integration. Well done!
In this part, we will see how to connect users and make requests to the Google Sheets API. Let's go!
Connecting users to Google Sheets 🔐
Pizzly comes with a JavaScript library (pizzly-js) that includes high-level methods to interact with your instance. Here we are going to use the .connect() method that provides an easy way to connect a user.
<script src="https://cdn.jsdelivr.net/npm/pizzly-js@v0.2.3/dist/index.umd.min.js"></script>
<script>
// Initializing Pizzly JS with a demo instance
const demoKey = "pope8Qy8qfYyppnHRMgLMpQ8MuEUKDGeyhfGCj";
const demoInstance = "https://pushtogsheet.herokuapp.com/";
const pizzly = new Pizzly(demoKey, demoInstance)

// Connecting a user
pizzly
  .connect('google-sheets')
  .then((data) => console.log("Successfully connected!", data))
  .catch((error) => console.error("It failed!", error))
</script>
This snippet does two things:
- First, it initializes the Pizzly JS client using a demo instance. The
demoKeyis an optional key that you can configure on your own instance (learn how). AnddemoInstanceis just the URL of my own demo instance 😉 - Then, and it's the most interesting part, the
.connect()method is triggered with the API name as argument. As it's using promises, I can usethen/catchto handle success or error.
If you run this snippet on a browser, it will open a popup that instantly prompts the authorization consent screen from Google.

It feels a bit magical the first time that you run it (well, it felt magical for me at least 😅). A few lines of code and you can connect your users to Google Sheets. That's the power of Pizzly: focusing on the developer experience.
What's even better is that Pizzly handles the OAuth refresh sequence. If you're familiar with OAuth, you probably know how epic it is to handle token refreshes. That's something that Pizzly totally hides away (more on that).
And what's even, even better, is that Pizzly comes with dozens of pre-configured APIs (e.g. Facebook, Twitter, Salesforce, Pipedrive, etc.). This means you can create an integration with Google Sheets in a few minutes and using the same code to integrate with many others!
If you are curious about how it works behind the scene... When running
pizzly.connect('google-sheets'), it opens a popup in the browser that first redirects to the Pizzly instance.Upon receiving that request, the instance fetches the API configuration in its database and redirects as fast as it can to the consent screen
After the user has given access, the API will redirect her/him back to the instance on what's called the
callback URL. This is why you've to register a Pizzly URL when you configure your application.That callback URL informs Pizzly JS if the connection succeeded (or not), then close the popup.
Making authenticated requests to the Google Sheets API 👾
After connecting a user to the API, you can query all the API endpoints using Pizzly JS again. Here's the snippet from above slightly enhanced and made interactive:
If you click on Create a new spreadsheet in the previous CodePen, Pizzly JS will both connect yourself, then send a request to the Google Sheets API to create a new spreadsheet.
We already know how to connect someone, so let's focus on the request part. Here's an abstract from the previous CodePen that is responsible for the request:
pizzly
  .integration("google-sheets")
  .auth(userAuthId)
  .post("/spreadsheets")
  .then((response) => response.json())
  .then((data) => {
    // Do what you want with the data
  });
There are three interesting parts in this snippet:
- First, it uses the
.integration()method to specify which integration we are working with (google-sheetsin this case). - Then, it tells Pizzly to use an
authId. This is where the authentication happens. TheauthIdis generated by Pizzly when you use.connect(). I'm not going to cover in detail theauthIdhere, but it's a powerful concept introduced by Pizzly. I really recommend this read to learn more about it. - Finally, it runs
.post("/spreadsheets")to create a POST request to the/spreadsheetsendpoint. This is how Google Sheets API works - You can learn more in the Google Sheets API documentation.
Pizzly JS accepts all HTTP methods, including
.get(),.put(), etc.
Making authenticated from the backend 🤖
Pizzly is not tied to working from a browser. Once you've connected a user and retrieved it's authId, you can perform requests to the API from your servers.
Here's the same request that creates a spreadsheet, but using cURL
curl -X POST https://pushtogsheet.herokuapp.com/proxy/google-sheets/spreadsheets?pizzly_pkey=pope8Qy8qfYyppnHRMgLMpQ8MuEUKDGeyhfGCj \
 -H "Pizzly-Auth-Id: REPLACE-WITH-YOUR-AUTH-ID"
and the same one in Node.js:
const axios = require("axios");

const authId = "REPLACE-WITH-YOUR-AUTH-ID";
const demoKey = "pope8Qy8qfYyppnHRMgLMpQ8MuEUKDGeyhfGCj";
const demoInstance = "https://pushtogsheet.herokuapp.com";

axios
  .post(demoInstance + "/proxy/google-sheets/spreadsheets" + "?pizzly_pkey=" + demoKey, null, {
    headers: { "Pizzly-Auth-Id": authId },
  })
  .then(({ data }) => {
    console.log(data);
    // Do what you want with the data
  })
  .catch(console.error);
Make sure to replace REPLACE-WITH-YOUR-AUTH-ID with a valid authId. If you're wondering how to get one, use this snippet:
pizzly
  .connect('google-sheets')
  .then(({authId}) => console.log(authId))
  .catch((error) => console.error("It failed!", error))
Conclusion
If you've read this far, first thank you! It's probably a topic that you're familiar with or want to learn more about. Feel free to add comments if anything wasn't clear enough. You can also look at Pizzly's project on GitHub, and especially its wiki.
Second, I quickly mentioned that Pizzly is open-source software (MIT License). Meaning that you can freely grab the code and contribute to it anytime. OAuth is a vast topic where all developers are forced to reinvent the wheel. Let's try to make it the perfect place to handle OAuth?
Last but not least, now that you have a Pizzly instance set up, remember to secure it. By default, it's unsecure to help you get started, but you shouldn't let it as is.

Top comments (2)
Hey mancan you please tell me how to ember the code like you
Hey! You mean on DEV? If yes, I’ve used markdown ;)